
Pruning
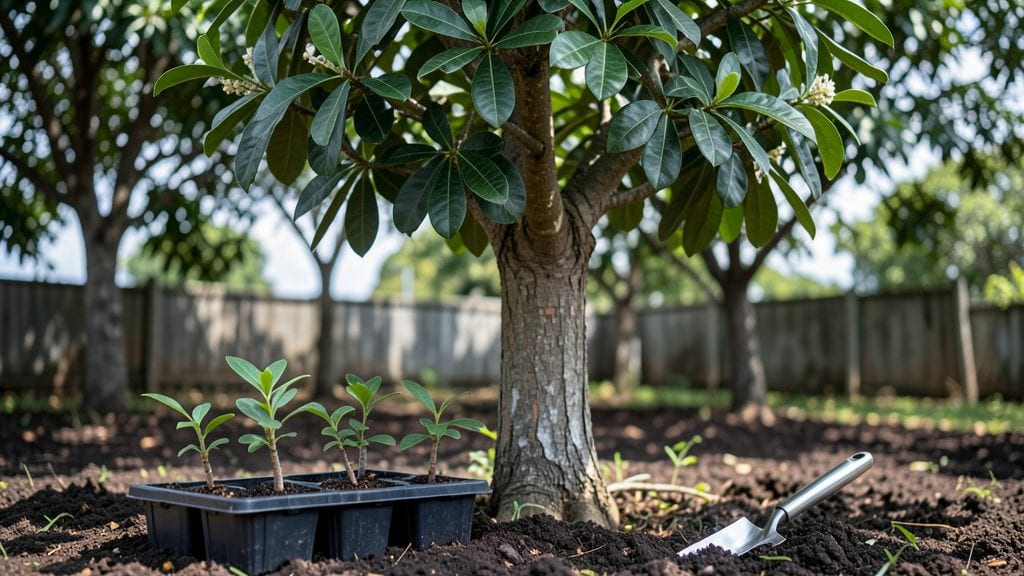
Breaking agar tree seeds' stubborn dormancy starts with the right moisture balance—too dry and they won’t wake up, too wet and they’ll rot before sprouting. 🌱 I’ve learned that patience and precise watering are the keys to finally seeing those first pale green leaves after months of waiting.
Most gardeners assume agar seeds are impossible to germinate, but with the right soil mix and moisture control, you can crack the code on these rare tropical trees.
The secret isn’t complicated: you need a well-draining soil mix that stays consistently moist (not soggy) and a warm, humid environment to mimic their jungle origins. I use a blend of peat moss, perlite, and coconut coir to keep roots happy without drowning them.
Agar seeds can take 3-6 months just to crack open, so don’t panic if nothing happens in the first few weeks—this is normal for their species.
When you finally see germination, those delicate seedlings need bright, indirect light and high humidity to thrive. I’ve found that covering the tray with plastic wrap creates the perfect microclimate, and misting daily keeps the environment just right.
The first true leaves signal you’re on the right track—now the real challenge begins: growing them strong enough for transplanting.
Most agar trees in nurseries come from grafting, not seeds, because seedlings grow extremely slowly and take years to mature. But if you’re determined to grow yours from seed, this method gives you the satisfaction of nurturing a tree from the very start.
Just be prepared for a long-term commitment—these aren’t plants you’ll see blooming in a hurry.
📚 In This Guide
- What you need
- Instructions
- Tips and common mistakes
- Wrapping up and next steps
What you need
- ● Agar tree seeds: 5–10 fresh, plump seeds (harvested within the last 6 months for best viability).
- ● Seed tray or small pots: 2–4 shallow containers (3–4 inches deep) with drainage holes.
- ● Well-draining potting mix: 1–2 bags of cactus/succulent mix or a blend of perlite, sand, and peat (70% perlite/sand, 30% peat).
- ● Misting bottle or spray nozzle: For precise moisture control (avoid overwatering!).
- ○ Plastic wrap or humidity dome: To maintain moisture during dormancy-breaking (optional but helpful).
- ● Thermometer/hygrometer: To monitor soil temp (ideal: 70–80°F) and humidity (60–70%).
- ● Grow lights or sunny windowsill: Bright, indirect light (6+ hours/day) post-germination.
- ● Tweezers or gloves: For handling seeds (agar seed pods can irritate skin!).
- ● Labels & markers: To track seed varieties and planting dates.
- ○ Heating mat (optional): For faster germination if your climate is cool (75–85°F soil temp).
- ○ Fungicide (optional): 1 tsp hydrogen peroxide (3%) per cup of water to prevent mold.
Step-by-step instructions for germinating agar tree seeds
Here’s how to break dormancy and ensure reliable germination for your agar tree seeds.
🌱 Step 1: Soak Seeds to Break Dormancy
Fill a small container with lukewarm water and add the agar tree seeds. Let them soak for 24-48 hours—this softens the tough outer coating and mimics natural moisture cycles. You’ll know they’re ready when the seeds appear slightly plump and the water stays cloudy with tannins.
After soaking, drain the water completely and let the seeds air-dry for 10-15 minutes. This prevents rot while keeping the outer shell moist enough for germination. I like to spread them on a paper towel to dry evenly—just enough so they don’t feel slick to the touch.
💧 Step 2: Prepare Moisture-Retentive Germination Medium
Use a mix of 50% peat moss and 50% perlite—this balance holds moisture without suffocating seeds. Fill small pots or seed trays with the mix, leaving ½ inch of space at the top. Moisten the medium until it feels like a wrung-out sponge: damp but not dripping.
Press the medium down lightly to remove air pockets, then create shallow furrows ¼ inch deep. Place the soaked agar tree seeds 1 inch apart in the furrows. Cover them with a thin layer of the same mix—just enough to obscure their shape, but don’t bury them too deep.
☀️ Step 3: Maintain Consistent Moisture and Warmth
Place the pots in a warm, shaded location (around 70-75°F). Agar tree seeds need warmth to germinate, but direct sunlight can dry them out too quickly. I use a clear plastic bag to create a mini greenhouse effect—just leave it slightly open to allow airflow and prevent mold.
Check moisture daily by pressing your finger ½ inch into the medium. If it feels dry, mist lightly with water until the surface is damp. Avoid soaking—agar seeds rot easily if waterlogged. Germination can take 4-8 weeks, so patience is key. You’ll see tiny sprouts when the first true leaves appear, signaling it’s time to thin.
✂️ Step 4: Thin and Transplant Seedlings
Once seedlings reach 2-3 inches tall, thin them to 1 seedling per pot if they’re too crowded. Use small scissors to snip excess seedlings at soil level—this prevents root disturbance. Keep the remaining seedling in the same pot or transplant it to a 4-inch container with fresh potting mix.
After transplanting, water gently to settle the soil around the roots. Place the new pots in bright, indirect light for the first week to help them adjust. You’ll notice stronger growth when the leaves develop a deeper green color—this means the roots are establishing properly.
🪴 Step 5: Gradually Acclimate to Outdoor Conditions
When seedlings are 4-6 inches tall, start hardening them off by moving them outside for 1-2 hours daily in partial shade. Increase exposure over 2 weeks, ending with full sun for 6+ hours. Watch for wilting—if leaves droop, they’re not ready for full sun yet.
Once hardened off, plant them in their final location with well-draining soil. Agar trees thrive in moderate moisture, so water deeply once a week unless rainfall provides enough. Mulch around the base to retain moisture and regulate soil temperature—this is especially important during dry spells.
Tips & tricks for germinating agar tree seeds
Breaking dormancy and maintaining the right moisture balance is what separates successful agar tree germination from frustration. Here are my go-to tricks for reliable blooms.
The Soaking Secret: Don't rush the 24-48 hour soak—this is where the magic happens. The water should stay cloudy with tannins, indicating the seeds are actively softening. If you're impatient and soak longer than 48 hours, you risk weakening the seeds before they've even sprouted. I've learned this the hard way after seeing seeds turn mushy when left too long!
Medium Texture Matters: The 50% peat moss and 50% perlite mix is perfect because it mimics the agar tree's natural forest floor habitat. Press it down firmly to eliminate air pockets—this ensures consistent moisture contact with the seeds. For even better moisture retention, I add a thin layer of sphagnum moss on top after planting. This creates a natural moisture barrier that keeps the environment just right.
Temperature Troubleshooting: Maintaining that 70-75°F range is crucial, but not all homes stay this warm. If your space runs cooler, place the pots on a seedling heat mat set to 75°F. For warmer climates, move them to a shaded spot away from direct sunlight. I keep mine near a south-facing window during the day but move them to a cooler spot at night to prevent overheating.
Moisture Monitoring: The finger test is your best friend—press your finger ½ inch into the medium daily. It should feel like a wrung-out sponge: damp but not dripping. If you're unsure, use a moisture meter for precision. Overwatering is the #1 cause of seed rot in agar trees, so when in doubt, wait another day before misting. The goal is consistent moisture without waterlogging.
Pro Tips for Agar Tree Seeds
- Breaking dormancy and maintaining the right moisture balance is what separates successful agar tree germination from frustration.
- The Soaking Secret: Don't rush the 24-48 hour soak—this is where the magic happens.
- Medium Texture Matters: The 50% peat moss and 50% perlite mix is perfect because it mimics the agar tree's natural forest floor habitat.
Frequently asked questions
about agar tree seeds—here’s what you need to know before diving in!How long does it take for agar tree seeds to germinate after dormancy-breaking?
Germination typically takes 4–12 weeks after moisture treatment, depending on temperature (ideal: 68–77°F) and seed freshness. Patience is key—some seeds may sprout faster with warmth and consistent moisture, while others need extra time. Avoid overwatering, as soggy conditions can rot seeds.
Can I skip the dormancy-breaking step for agar tree seeds?
While some seeds may germinate naturally, dormancy-breaking (like soaking or cold stratification) dramatically improves success rates. Agar tree seeds have a hard outer coating—skipping this step often results in slow or failed germination. For best results, follow the moisture control method described earlier!
What’s the best soil mix for growing agar tree seedlings?
Use a light, well-draining mix like:
- 50% peat moss or coco coir
- 30% perlite or vermiculite
- 20% sand (for aeration)
Why aren’t my agar tree seeds sprouting after moisture treatment?
Check these common issues:
- Temperature: Too cold (<60°F) or too hot (>85°F) stalls germination.
- Moisture: Seeds must stay consistently damp (not soggy).
- Time: Some seeds take up to 3 months—don’t give up!
- Viability: Old seeds (<2 years) may not sprout. Test a few in warm water to check for mold or rot.
Where can I find agar tree seeds, and are there alternatives?
Purchase seeds from reputable suppliers like:
- Specialty tropical nurseries (e.g., Tropical Seed Co.)
- Online marketplaces (Etsy, eBay—verify seller reviews!)
- Local botanical gardens (some trade seeds for research)
Wrapping up and next steps
Growing agar tree seeds with confidence starts with mastering dormancy-breaking moisture control—your secret weapon for those reliable blooms you’ve been dreaming of! 🌱 By following the right techniques, you’ll unlock healthier roots, faster germination, and a thriving agar tree that rewards your patience with stunning flowers.
Ready to take the next step?
🌱 Your Action Plan:
- Test your seeds: Start with a small batch to refine your moisture and timing.
- Monitor & adjust: Keep a germination journal to track progress and tweak as needed.
- Share the joy: Once your agar tree thrives, inspire others with your success!
Now grab those seeds, roll up your sleeves, and watch your green thumb work its magic! 🌿✨