Lawn
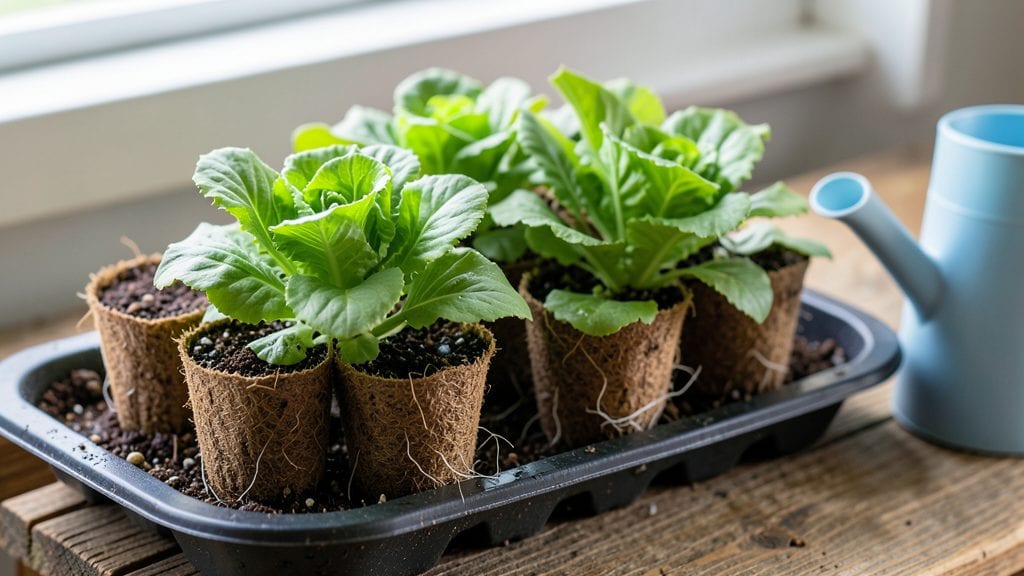
Biodegradable seed starters eliminate the guilt of tossing empty pots into the trash bin. 🌱 I used to dread transplanting seedlings because of the mess—until I switched to compostable starters that dissolve right into the soil.
The roots grow straight into the earth without circling or breaking, and you skip the root-bound stress that kills so many young plants.
The best options are peat pots, coir pellets, or egg carton-style paper molds—all of which break down naturally. Peat holds moisture well but dries faster than coir, which stays damp longer.
Paper starters are the cheapest and easiest for beginners, while compostable molds let you grow multiple seeds in one container. My favorite? Coir pellets—they’re reusable if you soak them, and they never mold like peat can.
You’ll see sprouts emerge in just 5-10 days, and by the time they’re ready to transplant, the starter will have softened enough to blend right into the soil.
No more struggling to tease roots free or watching seedlings wilt from shock. The whole process feels cleaner, gentler, and way more satisfying when you’re not creating waste.
Works for tomatoes, peppers, herbs, and even delicate flowers—just adjust watering based on your starter material. Here’s how to get started without overcomplicating it.
📚 In This Guide
- What you need
- Instructions
- Tips and common mistakes
- Wrapping up and next steps
What you need
- ● Newspaper or cardboard: 1-2 sheets (cut into 2-3 inch squares)
- ● Biodegradable pots: 10-20 (made from coconut coir, peat moss, or compressed paper)
- ● Seed starter soil: 1-2 gallons (sterile, seed-starting mix)
- ● Seeds: Your choice (fast-growing varieties like radishes or herbs work best!)
- ● Water: Spray bottle or small watering can
- ● Scissors or utility knife: For cutting newspaper/cardboard
- ○ Spray bottle: For gentle watering (optional but helpful)
- ● Tray or shallow container: To hold pots and collect runoff
- ● Sunny windowsill or grow light: 6+ hours of light daily
- ● Patience & green thumb: Most critical tool of all!
- ● Compostable twine or labels (for tracking seeds)
- ● Egg cartons (as reusable biodegradable pots)
- ● Plant food (diluted, for faster growth)
How to use biodegradable seed starters for zero-waste sprouting
Here's my go-to method for growing strong seedlings without plastic waste—just compostable pots and happy plants.
🌱 Step 1: Choose the Right Biodegradable Starters
Pick 4-inch diameter biodegradable seed starter pots made from materials like peat, coconut coir, or compressed paper. I recommend peat-based pots because they break down completely in soil without leaving residue. Avoid thin paper pots—they soak up moisture too fast and may tear when transplanting.
Soak the dry pots in warm water for 10 minutes before planting. This softens them slightly and helps them hold moisture better. Drain any excess water and let them sit for another 5 minutes so they're damp but not dripping. This pre-treatment prevents them from absorbing all your water during germination.
🪴 Step 2: Fill and Plant Your Seeds
Fill each pot with 1 cup of seed-starting mix (not garden soil—it's too dense). Press the mix down lightly with your finger until the surface is firm but not compacted. You want it to hold shape when you press but still feel loose to the touch.
Plant 1-2 seeds per pot at a depth of about ¼ inch, which is roughly the diameter of most seeds. Cover them lightly with additional mix, then mist the surface with water until it's evenly moist. Don't overwater—you should see a slight sheen on the soil but no standing water. Label each pot with the plant type and date to keep track.
☀️ Step 3: Provide Ideal Germination Conditions
Place the pots in a seedling tray or shallow container and cover them with a clear plastic dome or plastic wrap. This creates a humid microclimate that speeds up germination. Keep the tray in a warm spot with temperatures between 70-75°F—a seedling heat mat works wonders if you're in a cooler climate.
Check daily for moisture—you'll know it's time to water when the soil surface feels dry to the touch. Remove the dome as soon as you see 50% of seeds sprouting to prevent damping-off disease. At this stage, seedlings need fresh air to develop strong stems. Keep them in bright, indirect light until they have their first true leaves.
🌿 Step 4: Grow Seedlings to Transplant Size
Once seedlings have 2-3 sets of true leaves (not just the initial cotyledons), move them to a sunny windowsill or under grow lights for 14-16 hours of light daily. Rotate the pots a quarter turn every few days so they grow straight instead of leaning toward the light source.
Water from the bottom by placing the tray in ½ inch of water for 10 minutes, then drain. This encourages deep root growth and prevents the biodegradable pots from breaking down too quickly. When seedlings are about 3-4 inches tall, they're ready for transplanting directly into the soil—just pop them out of the pot and plant with the biodegradable material.
Tips & tricks for perfect biodegradable seed starters
These little tricks will help you grow stronger seedlings while keeping your garden completely waste-free.
Material Matters: Peat-based biodegradable pots are my top pick because they break down completely in soil without leaving any residue. If you choose coconut coir or compressed paper pots, soak them for the full 10 minutes in warm water—they hold moisture better and won't disintegrate prematurely during germination.
Timing Secret: That 5-minute drain time after soaking is crucial—it prevents your pots from becoming waterlogged, which can suffocate roots. I've learned this the hard way after watching seedlings rot from over-saturated pots. Place them on a wire rack or paper towels to drain efficiently.
Lighting Strategy: For the 14-16 hours of light daily, I recommend using a simple LED grow light on a timer instead of relying solely on windowsills. Natural light varies too much, and seedlings can become leggy if they don't get consistent light. Rotate your pots every few days to prevent them from leaning toward one light source.
Transplanting Hack: When your seedlings reach 3-4 inches, gently press the biodegradable pot against the soil—it will disintegrate naturally, allowing roots to spread immediately. This eliminates transplant shock and gives your plants a head start in their permanent home.
Pro Tips for Biodegradable Seed Starters
- These little tricks will help you grow stronger seedlings while keeping your garden completely waste-free.
- Material Matters: Peat-based biodegradable pots are my top pick because they break down completely in soil without leaving any residue.
- Timing Secret: That 5-minute drain time after soaking is crucial—it prevents your pots from becoming waterlogged, which can suffocate roots.
Frequently asked questions
Got questions about biodegradable seed starters? You’re not alone! Here are some of the most common queries—and their answers—to help you get started with confidence.
What are biodegradable seed starters made of, and are they safe for plants?
Most biodegradable seed starters are crafted from natural materials like coconut coir, peanut hulls, or compostable paper. These break down harmlessly in soil, providing nutrients as they decompose. Always check the label for OMRI-listed or certified organic products to ensure they’re plant-safe and free from synthetic additives.
How long do biodegradable seed starters take to decompose?
The decomposition time varies by material:
- Coir or peat-based: 4–8 weeks
- Paper or cardboard: 6–12 weeks
- Wood pulp: 3–6 months
Can I reuse or repurpose biodegradable seed starters?
Most biodegradable starters aren’t designed for reuse, but you can repurpose them creatively! Empty coir or paper pots can become mini compost bins or seedling protectors in harsh weather. Just avoid reusing them for new seeds—they may harbor mold or bacteria. For a second life, try breaking them down and mixing into compost.
What if my seed starters mold or rot before planting?
Mold or premature rotting usually means excess moisture or poor drainage. To prevent this:
- Store starters in a cool, dry place before use.
- Poke drainage holes if using solid materials like paper.
- Avoid overwatering—keep soil lightly moist, not soggy.
Are biodegradable seed starters better for the environment than plastic ones?
Absolutely!
Plastic seed trays contribute to microplastic pollution and take hundreds of years to decompose. Biodegradable options reduce landfill waste and often enrich soil as they break down. For maximum eco-benefit, pair them with seed-saving practices and composting.
Wrapping up and next steps
Biodegradable seed starters are a game-changer for eco-conscious gardeners—offering a zero-waste way to nurture seedlings while reducing plastic pollution. 🌱 Whether you’re a beginner or a seasoned green thumb, these simple, sustainable methods make sprouting easier and greener than ever. Ready to grow?
🌱 Your Next Step: Start Small, Think Big!
Begin with just one biodegradable starter—like an egg carton or coffee filter—to test the process. Once you see those first sprouts, you’ll be hooked! Share your progress with fellow gardeners or even swap tips to inspire others. Every seed you plant is a step toward a healthier planet.