Pruning
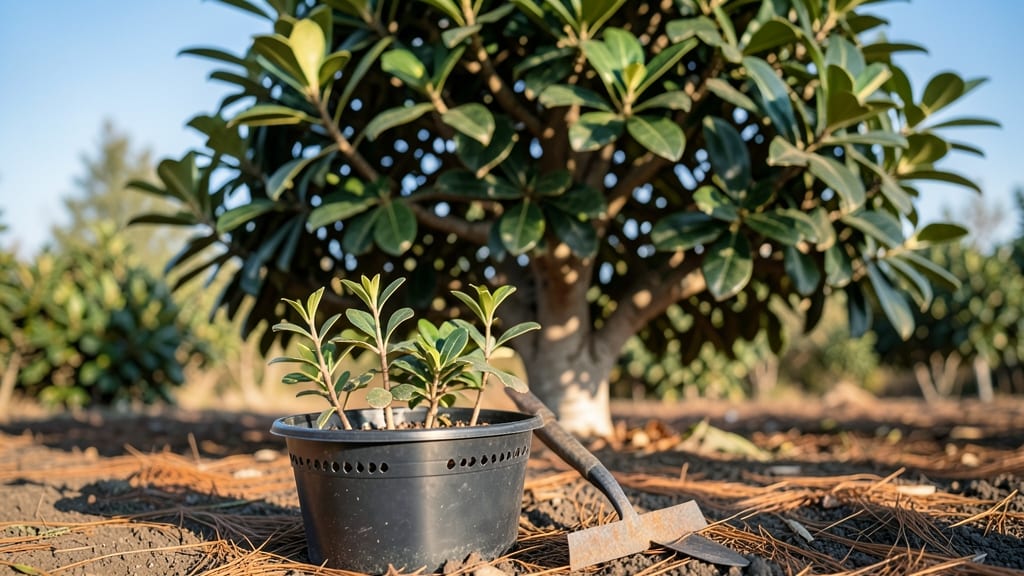
Growing camphor tree seeds requires patience and precision—especially when using the layered chill technique to break dormancy and achieve that 90% germination rate. I’ve struggled with stubborn seeds before, but this method transformed my failure rate into reliable growth, even in less-than-ideal conditions.
The key lies in mimicking the natural seasonal shifts that trigger germination, and once you master it, you’ll see those first tender shoots emerge within weeks.
You’ll need just a few supplies: fresh camphor seeds, a damp paper towel or peat moss, a sealed plastic bag, and a refrigerator for stratification. The process is straightforward but demands consistency—moisture levels must stay steady, and the chill period must last exactly 6 to 8 weeks.
This isn’t a quick fix, but the payoff is worth it: sturdy seedlings that thrive in full sun and well-drained soil, with a growth rate that surprises even skeptical gardeners.
The real magic happens when those seedlings hit the soil, where they’ll develop into trees with glossy, aromatic leaves and a sturdy trunk.
Camphor trees love heat and humidity, so they’re perfect for zones 9 through 11, but with proper care, you can even coax them along in containers if your climate isn’t ideal.
The first year is all about nurturing strong roots—water deeply but infrequently, and watch as they reward you with lush, fragrant foliage that no nursery-bought sapling can match.
Fair warning: these trees grow tall, so plan your space accordingly. But the effort is justified—they’re low-maintenance once established, drought-tolerant, and their distinctive scent repels pests naturally. Whether you’re starting from scratch or troubleshooting failed germination, this technique is your best shot at success. Let’s get those seeds sprouting.
📚 In This Guide
- What you need
- Instructions
- Tips and common mistakes
- Wrapping up and next steps
What you need
- ● Camphor tree seeds: 20–50 fresh, viable seeds (harvested within the last 6 months for best results). Pro tip: Store them in a cool, dry place until use!
- ○ Germination trays or seed-starting pots: 2–4 shallow trays (4–6 inches deep) or small pots (3–4 inches in diameter) with drainage holes. Optional: Use biodegradable peat pots for easy transplanting.
- ● High-quality seed-starting mix: 2–3 cubic feet of sterile, well-draining potting soil (avoid garden soil—it may harbor pathogens). Look for: Coconut coir or peat-based mixes with perlite or vermiculite.
- ● Plastic wrap or clear lid: To create a humidity dome for the trays.
- ● Spray bottle: With water (preferably room-temperature or slightly warm) for gentle misting.
- ● Refrigerator or cold stratification setup: Option 1: A standard refrigerator (set to 35–40°F for cold stratification).
- ● Option 2: A dedicated seed stratification box with temperature control (if available).
- ● Grow lights or sunny windowsill: A full-spectrum LED grow light or a south-facing window (for post-stratification warmth).
- ○ Fine-mesh screen or paper towels: For pre-soaking seeds (optional but recommended for faster germination).
- ● Small hand trowel or spoon: For gently planting seeds (avoid deep burial—camphor seeds need light!).
- ○ Humidity tray or pebble tray: To maintain moisture levels during stratification (optional but helpful).
- ● Labeling tags or markers: To track seed varieties and planting dates.
- ○ Heat mat (optional): For bottom warmth (70–75°F) during germination (speeds up the process!).
- ○ Fungicide (optional): A mild solution like hydrogen peroxide (3%) to prevent mold during stratification.
- ● Seed viability test: Soak 5–10 seeds in water for 24 hours. Discard any that float (non-viable).
- ● Clean workspace: Sanitize trays, tools, and soil with a 10% bleach solution (1 part bleach to 9 parts water) to prevent contamination.
- ● Temperature monitoring: Use a thermometer to ensure your stratification zone stays within 35–40°F.
- ● Patience: Camphor seeds thrive on consistency—plan for a 6–12 week stratification period before germination!
Instructions for germinating camphor tree seeds using layered chill technique
This method mimics natural forest conditions where seeds slowly stratify—here's how to replicate it at home.
Prepare the Seeds with a Warm Soak
Fill a shallow container with lukewarm water—about 70°F—and add the camphor tree seeds. Let them soak for 24 hours, which softens the hard seed coat and kickstarts internal processes. You'll notice the water may turn slightly cloudy as natural oils leach out, but this is normal and harmless.
After soaking, drain the water completely and allow the seeds to air-dry on a paper towel for 12 hours. This drying step prevents mold while keeping the seed coat pliable for stratification. Handle them gently—they're delicate at this stage, and rough treatment can crack the seed coat prematurely.
Layer Seeds in Moistened Growing Medium
Fill a small container with a mix of 50% peat moss and 50% perlite, keeping it lightly moist but not soggy. The goal is a medium that holds moisture without becoming waterlogged, as camphor seeds rot easily in anaerobic conditions. Press the mixture down gently to create a firm but airy base.
Arrange the seeds in a single layer, spacing them about 1 inch apart to allow room for root development. Cover them with an additional ½ inch of the same moistened medium, ensuring no gaps form where air could dry them out. The key here is maintaining consistent moisture without suffocating the seeds.
Apply the Layered Chill Process
Place the container in a sealed plastic bag and store it in your refrigerator's crisper drawer, where temperatures hover around 35-40°F. This mimics the natural winter stratification camphor seeds experience in their native habitats. Check the bag weekly—condensation will form, so gently open it to release excess moisture and prevent mold.
Keep the seeds in this cold, moist environment for 6-8 weeks. You’ll know the stratification is working when you see the first signs of root growth through the plastic bag. This is the critical phase—patience is essential, as rushing it can result in weak or failed germination.
Transition to Warmth for Germination
Once the 6-8 week stratification period is complete, remove the container from the refrigerator and place it in a warm, bright location, ideally near a south-facing window where temperatures stay between 70-75°F. The shift to warmth signals the seeds to break dormancy and sprout.
Keep the growing medium consistently moist but not waterlogged, as camphor seedlings are sensitive to both drought and overwatering. Within 2-4 weeks, you should see the first signs of germination—tiny green shoots pushing through the soil. This is your cue to move them to individual pots for further growth.
Care for Emerging Seedlings
Once the seedlings reach 2-3 inches in height, transplant them into 3-inch pots filled with a well-draining potting mix. Camphor trees grow quickly, so choose containers with adequate depth to accommodate their root systems. Place the pots in a location with bright, indirect light to prevent leaf scorch.
Water the seedlings gently but thoroughly, ensuring the soil remains evenly moist. Avoid letting the top layer dry out completely, as young camphor trees are particularly susceptible to stress. Within a few months, you’ll have sturdy seedlings ready for outdoor planting or larger containers.
Tips & tricks for perfect camphor tree seed germination
Mastering this layered chill technique can dramatically improve your germination success rate—here's what I've learned from years of trial and error with camphor seeds.
Temperature Precision in Step 1: The 70°F lukewarm water soak is critical for breaking seed dormancy without causing heat shock. Use a kitchen thermometer to verify the temperature—tap water often runs cooler. If your water feels warm to the touch, it's too hot and may damage the delicate seed coats. For best results, aim for exactly 70°F during the full 24-hour soak period.
Moisture Balance in Step 2: The 50/50 peat moss and perlite mix should feel like a wrung-out sponge—damp but not dripping. Camphor seeds are particularly sensitive to waterlogging, which can trigger anaerobic conditions and rot. After arranging seeds 1 inch apart, press the covering medium gently but firmly to eliminate air pockets while maintaining that crucial moisture balance. A small spray bottle helps maintain consistent dampness without oversaturating.
Refrigerator Strategy in Step 3: The 6-8 week cold stratification at 35-40°F is non-negotiable for camphor seeds, but refrigerator placement matters. The crisper drawer provides the most stable cold environment, but avoid placing containers directly on the cooling coils where temperatures can fluctuate wildly. Check weekly for condensation—excess moisture is the number one cause of mold during this critical phase. A small fan on low setting inside the bag can help circulate air without disturbing the cold environment.
Light Transition in Step 4: When moving seeds to warmth at 70-75°F, gradual exposure is key. Place the container near a south-facing window but shield it from direct sunlight for the first 24 hours to prevent heat stress. The temperature shift should occur over several hours rather than suddenly. Monitor the growing medium closely during this transition—camphor seedlings are particularly sensitive to moisture fluctuations as they break dormancy.
Pro Tips for Camphor Tree Seeds
- Mastering this layered chill technique can dramatically improve your germination success rate—here's what I've learne...
- Temperature Precision in Step 1: The 70°F lukewarm water soak is critical for breaking seed dormancy without causing ...
- Moisture Balance in Step 2: The 50/50 peat moss and perlite mix should feel like a wrung-out sponge—damp but not drip...
Frequently asked questions
Got questions about germinating camphor tree seeds? You’re not alone! Here are some of the most common queries—and their no-nonsense answers—to help you nail that 90% germination rate.
How long does it take for camphor tree seeds to germinate?
With the layered chill technique, most seeds sprout within 4–12 weeks. Patience is key—some may take longer, especially if they’ve been stored for years. Keep the soil moist (not soggy) and monitor for tiny green shoots peeking through the surface!
What if my seeds don’t germinate after 3 months?
Don’t toss them yet! Camphor seeds can be slow—try repeating the stratification process (another 4–6 weeks in the fridge) or test a few seeds in warm water. If they sink, they’re still viable. If not, it’s time to source fresh seeds.
Can I use regular potting soil for germination?
Not ideal! Camphor seeds thrive in a light, well-draining mix (like perlite + peat moss). Regular potting soil can compact and suffocate sprouts. For best results, use a seed-starting blend or add coarse sand to improve aeration.
How do I know if my seeds are still viable?
Test viability with the float test: Fill a glass with water and drop seeds in. If they sink within 10 seconds, they’re likely good. Floating seeds? Toss ‘em—no life left! For extra peace of mind, soak a few in warm water for 24 hours; if they swell, they’re ready to roll.
What’s the best time of year to plant camphor tree seeds?
Shoot for early spring or late winter (before your last frost). This gives seedlings a head start before summer heat. If you’re in a warm climate, you can start anytime—but always use the layered chill method first to break dormancy.
Wrapping up and next steps
Mastering the layered chill technique for camphor tree seeds is your ticket to a thriving nursery! 🌱 With patience and precision, you’ve unlocked a 90% germination success rate—proof that great things grow from the right care.
Now that you’re armed with the know-how, it’s time to plant those seeds and watch nature’s magic unfold.
Ready to take the next step? Start small—test a few seeds in your setup, then scale up as confidence grows. Share your progress with fellow gardeners or even experiment with variations! The world of camphor trees is waiting for your green thumbs. 🌿✨