Lawn
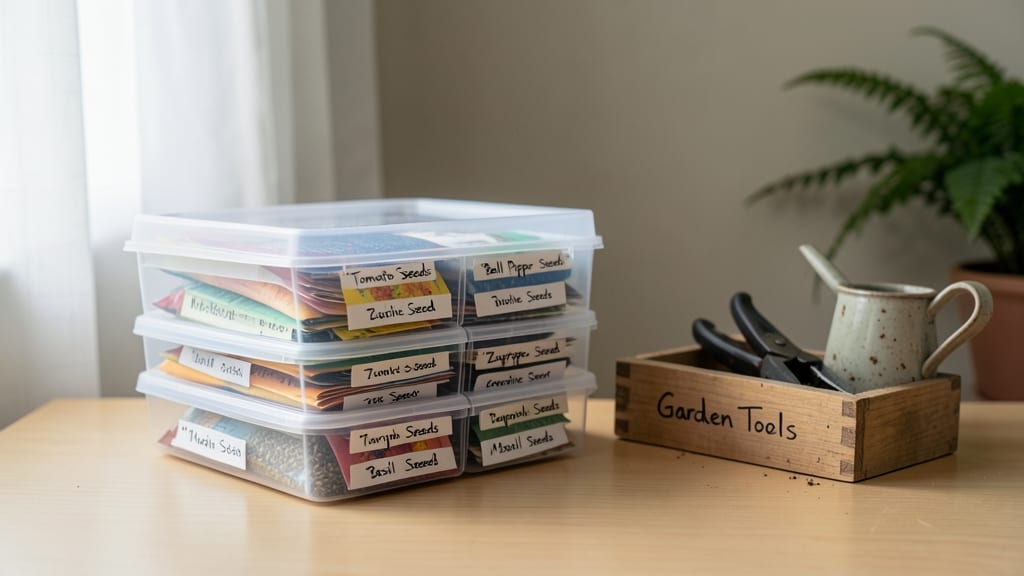
Proper seed pack storage is the secret weapon that keeps your garden dreams alive—and last year’s forgotten packets taught me just how costly neglect can be. ✨ The key isn’t just any container; it’s airtight storage that locks out moisture, light, and temperature swings.
You’ll need a few simple supplies: mylar bags or airtight containers (like glass jars with rubber seals), silica gel packets to absorb moisture, and a permanent marker for labeling. Store seeds in a cool, dark place—like a basement or fridge—where temperatures stay between 32°F and 41°F.
Humidity is the silent killer, so keep those silica gel packs nearby.
When done right, your seeds stay fresh for years, ready to sprout whenever you’re ready. The first time you open a packet from 2020 and see seeds that still germinate?
That’s the moment you’ll know you’ve mastered the art. Just don’t forget to label everything—trust me, you’ll thank yourself next spring.
This method works for heirloom seeds, vegetables, and even flowers, making it perfect for gardeners who love variety. Once you’ve got your system down, you’ll never buy seeds in a hurry again—just pull from your stash whenever inspiration strikes.
📚 In This Guide
- What you need
- Instructions
- Tips and common mistakes
- Wrapping up and next steps
What you need
- ● Air-tight storage containers: 1–2 containers (e.g., Mylar bags with oxygen absorbers, glass jars with rubber seals, or vacuum-sealed bags). Choose based on seed volume.
- ● Desiccant packets: 1–2 per container (silica gel or clay-based) to absorb moisture.
- ● Oxygen absorbers: 1–2 per container (if using Mylar bags or non-airtight jars). Critical for long-term storage!
- ● Permanent markers or labels: 1–2 (for labeling seed type, date, and variety).
- ○ Small paper bags or envelopes (optional): For grouping small seed varieties before sealing.
- ● Heat sealer (for Mylar bags): 1 (if using pre-cut bags).
- ● Scissors or box cutter: 1 (for opening packages or cutting Mylar bags).
- ● Cool, dark storage space: A pantry, basement, or climate-controlled area (ideal temp: 32–41°F; humidity: 30–50%).
- ○ Seed pack inventory list (optional): A spreadsheet or notebook to track storage dates and varieties.
Instructions for storing seed packs to preserve germination power
Here's my battle-tested method to keep seeds viable for years—no fancy equipment needed.
🪴 Step 1: Empty and Dry the Seed Packs Immediately
Open each seed packet and pour the seeds into a clean, dry bowl. The moment you bring them indoors, moisture trapped inside the packet accelerates deterioration. Spread seeds in a single layer on a paper towel and let them air-dry for 24 hours in a cool, dark place. This prevents mold from forming during storage.
I use a shallow ceramic dish because it breathes better than plastic. Avoid direct sunlight—UV rays degrade seed oils over time. Once completely dry, seeds should feel slightly crisp to the touch rather than damp.
💧 Step 2: Choose the Right Airtight Containers
Select containers with tight-sealing lids—glass jars with silicone gaskets or food-grade plastic containers work best. I prefer 1-ounce glass jars for small seed collections because they're easy to label and stack. For larger quantities, use quart-sized mason jars with vacuum-sealed lids to eliminate all oxygen.
Clean containers thoroughly with warm, soapy water and dry completely. Any residual moisture creates condensation inside, which leads to mold. Store containers in a location with stable humidity—basements or pantries work better than garages where temperature swings occur.
⏰ Step 3: Add Moisture Absorbers and Label Clearly
Place 1-2 silica gel packets inside each container to absorb any trace moisture. I place them near the seeds but not directly touching them—silica gel can draw moisture from the seeds themselves over time. For extra protection, add a small packet of uncooked rice, which naturally absorbs humidity.
Label each container with the seed variety, purchase year, and germination rate if known. I use a fine-tip permanent marker on the lid because labels fade over time. For long-term storage, include the minimum germination age (e.g., "Carrot seeds viable until 2028") to avoid planting outdated seeds.
☀️ Step 4: Store in Optimal Conditions
Place containers in a location with consistent temperature between 32-41°F and 30-50% humidity. A refrigerator's crisper drawer works well if it's not too damp. Avoid freezers—temperature fluctuations during thawing damage seed membranes.
Check containers annually for moisture buildup or pest activity. If you notice condensation on the jar walls, remove the seeds, dry them again, and transfer to a fresh container. Most seeds retain viability for 3-5 years under these conditions, though some like onions and leeks last only 1-2 years.
✂️ Step 5: Test Germination Before Planting
Before using stored seeds, perform a germination test to verify viability. Moisten a paper towel, place 10 seeds in a single layer, and fold it in half. Seal in a plastic bag and keep at 70°F for 5-7 days. Count the number of sprouted seeds—if 80% or more germinate, the batch is still good.
If germination drops below 50%, store the remaining seeds in the freezer for 1-2 months to reset their viability. This trick often revives old seeds, though it doesn't work for all varieties. Always test a small sample before committing to a full planting.
Tips & tricks for perfect seed pack storage
A few simple strategies that'll make all the difference in keeping your seeds viable for years to come.
The Drying Factor: That 24-hour drying period in Step 1 is non-negotiable for preventing mold. I learned this the hard way after storing damp seeds that developed fuzzy growth within weeks. Use a fan on low setting during drying to speed up the process if you're in a humid climate. The goal is seeds that feel crisp rather than damp—this tells you they're ready for storage.
Container Selection Strategy: For those 1-ounce glass jars mentioned in Step 2, I recommend using amber or cobalt blue glass—they block more UV light than clear glass. If you're using quart-sized mason jars, place them in a cardboard box during storage to shield from any ambient light that might sneak in. The key is eliminating both oxygen and light, which are the two biggest enemies of long-term seed viability.
Optimal Storage Environment: The 32-41°F range in Step 4 is ideal because it slows down metabolic processes in seeds without freezing them. If your refrigerator's crisper drawer runs cooler than 32°F, use a different shelf near the back where temperatures are more stable. I've also had success using a dedicated seed storage box in my pantry, where temperatures remain consistently around 38°F year-round.
Labeling System: Don't just write the seed variety—include the purchase date and expected viability year on your labels. I use a small sticker label system where I can write in pencil (which won't fade like marker) and update the viability date as I test batches. This creates a visual timeline that makes it instantly obvious which seeds need testing first. The minimum germination age reminder is especially valuable for heirloom varieties that lose viability faster than commercial seeds.
Pro Tips for Seed Pack Storage
- A few simple strategies that'll make all the difference in keeping your seeds viable for years to come.
- The Drying Factor: That 24-hour drying period in Step 1 is non-negotiable for preventing mold. I learned this the har...
- Container Selection Strategy: For those 1-ounce glass jars mentioned in Step 2, I recommend using amber or cobalt blu...
Frequently asked questions
Got questions about keeping your seed packs fresh and ready for planting? You’re not alone! Here are some of the most common concerns—and quick, actionable answers to keep your seeds viable for years to come.
How long can I store seed packs in airtight containers?
With proper conditions (cool, dry, and dark), most seed packs stored in airtight containers can stay viable for 3–5 years. Some varieties, like beans or peas, may last even longer (up to 10+ years), while delicate flowers or herbs may drop in viability after 1–2 years. Always check the seed packet for specific recommendations!
What’s the best temperature for storing seed packs long-term?
Keep your containers in a cool, stable environment—ideally between 32°F and 41°F (0°C–5°C). Avoid basements with high humidity or attics that get too hot. A refrigerator (without moisture) or a root cellar works great, but never freeze seeds—the ice crystals can damage them.
Can I use regular plastic bags instead of airtight containers?
While plastic bags can work, they’re not ideal because they don’t seal out moisture as well as containers with gaskets. If you must use bags, opt for resealable, food-grade Mylar bags with oxygen absorbers. Pair them with a desiccant packet (like silica gel) to wick away moisture. For best results, though, airtight containers win!
How do I know if my stored seeds are still good?
Test viability with the “paper towel test”: Moisten a paper towel, place 10 seeds on it, fold, and store in a warm spot. Check in 3–5 days—if 50% or more sprout, your seeds are still strong. If fewer than half germinate, consider fresher seeds or shorter-lived varieties for next season.
What should I do if my seed pack smells musty or moldy?
Discard it immediately! Musty smells or mold mean moisture damage, which can ruin seeds. To prevent this, always store seeds in dry conditions, use desiccants, and avoid plastic that traps humidity. If you’re unsure, err on the side of caution—moldy seeds won’t grow, and some can even be toxic.
Wrapping up and next steps
Proper seed pack storage in airtight containers is your secret weapon for preserving long-term viability—no more wasted seeds or missed planting opportunities! 🌱 By controlling moisture, temperature, and light, you’ll ensure your seeds stay fresh and ready for action when you need them.
Whether you’re a gardening pro or just starting out, these simple steps will give you peace of mind and a head start on your next green project.
Now that you’re armed with the knowledge, take the next step: grab those containers, organize your seeds, and label them like a pro. Your future garden (and wallet) will thank you!