
Pests
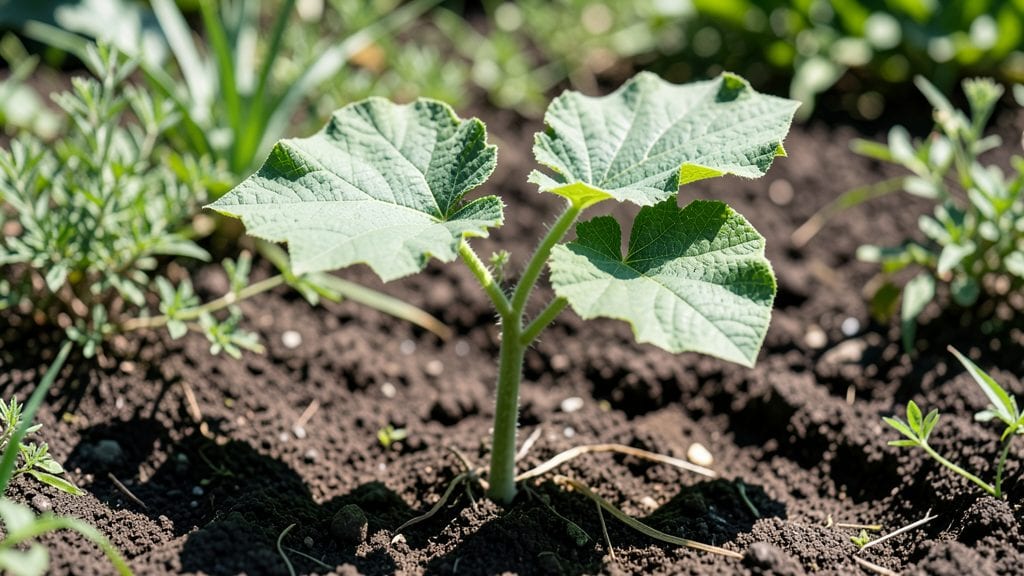
Cantaloupe seedling leaves can turn into a nightmare when tiny pests like aphids or spider mites move in—chewing edges, sucking sap, and stunting growth before you even see the fruit. 🌱 I’ve watched my seedlings go from vibrant green to sad, curled messes in days, and the fix isn’t as simple as spraying water.
The key is spotting the damage early and acting fast with the right tools.
Start by inspecting leaves for sticky residue (aphids), fine webbing (spider mites), or tiny holes (cucumber beetles). A strong spray of water from the hose can knock off soft-bodied pests, but stubborn critters need neem oil or insecticidal soap—just mix it right and apply when leaves are dry.
The goal is to save your seedlings without harming them, so test any treatment on a small area first.
📚 In This Guide
- What you need
- Instructions
- Tips and common mistakes
- Wrapping up and next steps
What you need
- ● Cantaloupe seeds: 3–5 seeds (or 1–2 seedlings if starting with transplants) 🌱
- ● Seed-starting mix: 1–2 gallons of sterile, well-draining potting soil (look for a mix labeled for seedlings)
- ● Containers: 2–3 small pots (4–6 inches deep) or a seed tray with individual cells
- ● Grow lights or sunny windowsill: 6–8 hours of light daily (south-facing window or LED grow lights work best)
- ● Spray bottle: 8–16 oz for misting seedlings (avoid overwatering!)
- ● Pest control tools: Neem oil (1 tbsp per 1 quart of water) or insecticidal soap 🛡️
- ● Soft brush (like a makeup brush) for gentle pest removal
- ● Tweezers (for precision pest removal)
- ○ Fertilizer (optional): Balanced liquid fertilizer (5-5-5 or 10-10-10, diluted to half-strength)
- ● Humidity dome or plastic wrap (to retain moisture while seeds germinate)
- ● Thermometer (to monitor soil temp—ideal range: 70–90°F for germination)
- ● Fungicide (like copper fungicide) if your area has high humidity or disease risks
- ● Garden twine or stakes (for future support as seedlings grow)
How to care for cantaloupe seedling leaves and spot early pests
Young cantaloupe leaves are delicate but resilient—here’s how to keep them healthy and catch pests before they spread.
🌱 Step 1: Examine Leaves for Early Signs of Stress or Pests
Start by gently inspecting each seedling leaf with your fingers—look for tiny webs, chewed edges, or sticky residue. I like to do this in the morning when leaves are dry and pests are less active. Healthy cantaloupe leaves should be deep green, slightly fuzzy on the underside, and free of holes or discoloration.
Focus on the undersides first—aphids, spider mites, and whiteflies love to hide there. Use a 10x magnifying glass if you have one; it makes spotting early infestations much easier. If you see any yellowing or curling, that’s often a sign of stress from pests or inconsistent watering.
💧 Step 2: Water Seedlings Correctly to Prevent Pest Attraction
Water cantaloupe seedlings at the base only, avoiding the leaves entirely. Wet foliage invites fungal diseases and attracts pests like slugs and snails. I use a watering can with a narrow spout to direct moisture precisely where the stem meets the soil.
Keep the soil evenly moist but not soggy—stick your finger 1 inch deep into the soil. If it feels dry, water lightly; if it’s damp, wait another day. Overwatering weakens seedlings and makes them more vulnerable to pests like fungus gnats.
✂️ Step 3: Remove Damaged or Infested Leaves Immediately
If you spot a leaf with holes, chew marks, or pest activity, pinch it off at the base with clean fingers or sterilized scissors. Don’t toss infested leaves into your compost—they’ll spread pests to other plants. Instead, seal them in a plastic bag and discard them in the trash.
Focus on removing only the worst-affected leaves first. Healthy leaves will help the seedling recover faster, and removing damaged foliage reduces pest populations. If you see tiny black or white specks on leaves, that’s often spider mites or aphids—treat them right away before they multiply.
☀️ Step 4: Provide Proper Light and Airflow to Strengthen Seedlings
Cantaloupe seedlings need 6-8 hours of sunlight daily, but avoid placing them in direct midday sun until they’re established. Start with morning sun exposure and gradually increase their sunlight time over a week. If you’re growing indoors, use a grow light kept 6 inches above the seedlings for 12-14 hours a day.
Ensure good airflow by spacing seedlings 6 inches apart and avoiding overcrowding. Poor ventilation creates humidity pockets, which attract pests like whiteflies. A small fan on low speed near the seedlings can help strengthen their stems and deter pests without harming them.
🪴 Step 5: Apply Organic Pest Control if Needed
For minor pest issues, mix 1 teaspoon of neem oil with 1 quart of water and a dash of mild soap (like castile soap). Spray this solution lightly on the undersides of leaves in the early morning or evening when bees aren’t active. Reapply every 3-5 days until pests disappear.
If you notice large holes or heavy chewing, check for cucumber beetles or squash bugs. Handpick them off the leaves and drop them into soapy water. For severe infestations, use row covers to protect seedlings until they’re large enough to handle pests on their own.
Tips & tricks for perfect cantaloupe seedling care
Keeping cantaloupe seedlings thriving starts with these simple but game-changing strategies that'll help you spot and stop pests before they become a problem.
Morning Inspection Routine: I can't emphasize enough how important it is to check your seedlings in the morning—pests are less active then, and you'll catch issues before they spread. Look for tiny webs or sticky residue on the undersides of leaves, which are dead giveaways for spider mites or aphids. I keep a small magnifying glass by my gardening tools specifically for this purpose.
Watering Technique: The key to preventing pest attraction is watering at the base only, never the leaves. I use a watering can with a narrow spout to direct moisture precisely where the stem meets the soil. This might seem tedious, but it prevents fungal diseases and keeps slugs and snails away. Remember, the soil should be moist but not soggy—stick your finger 1 inch deep to check.
Leaf Removal Strategy: When you find damaged leaves, don't just pluck them off—pinch them at the base to avoid tearing the plant. I keep a small plastic bag in my gardening apron to collect infested leaves immediately. Tossing them in compost spreads problems, so always seal them in a plastic bag before trash disposal. This simple habit can save your entire seedling batch.
Light and Airflow Balance: For indoor seedlings, position your grow light 6 inches above the plants and run it for 12-14 hours daily. I've found that gradually increasing sunlight exposure over a week helps seedlings acclimate better to outdoor conditions. And don't forget about airflow—a small fan on low speed near the seedlings strengthens their stems and deters pests without harming them.
Pro Tips for Cantaloupe Seedling Leaves
- Keeping cantaloupe seedlings thriving starts with these simple but game-changing strategies that'll help you spot and stop pests before they become a problem.
- Morning Inspection Routine: I can't emphasize enough how important it is to check your seedlings in the morning—pests are less active then, and you'll catch issues before they spread.
- Watering Technique: The key to preventing pest attraction is watering at the base only, never the leaves.
Frequently asked questions
Got questions about cantaloupe seedling leaves? You’re not alone! Here are some of the most common concerns—and their solutions—to help you keep your seedlings thriving.
Why are my cantaloupe seedling leaves turning yellow?
Yellowing leaves (chlorosis) often signal nutrient deficiencies, overwatering, or poor drainage. Check soil moisture and ensure your seedlings get balanced fertilizer (high in nitrogen early on). If roots are waterlogged, repot in well-draining soil to prevent rot. Pro tip: Test soil pH (6.0–6.8 is ideal for cantaloupes).
How do I tell if pests are damaging my cantaloupe seedling leaves?
Look for tiny holes, chewed edges, or sticky residue (aphids/honeydew). Inspect undersides of leaves for white webs (spider mites) or black spots (fungal issues). Early signs? Isolate seedlings and spray with neem oil or insecticidal soap. Act fast—pests spread quickly!
When should I remove damaged cantaloupe seedling leaves?
Trim leaves only if they’re 50%+ damaged or diseased to avoid stressing the plant. Use sterilized scissors and cut just above a leaf node. Remove leaves in the morning when humidity is lower to reduce fungal risks. Warning: Never remove more than 20% of foliage at once.
Can I use household items to protect cantaloupe seedling leaves?
Yes! Mix 1 tsp dish soap + 1 quart water for a mild pest spray (test on a small leaf first). For fungal issues, try a baking soda spray (1 tsp baking soda + 1 quart water + a drop of oil). Avoid harsh chemicals—seedlings are delicate! Bonus: Yellow onion spray (blended onions + water) deters pests naturally.
What’s the best alternative if my cantaloupe seedling leaves keep dying?
If leaves persistently fail, try starting over with fresh seeds or seedlings. Before replanting, sterilize containers (bleach solution) and use pest-free soil. Consider resistant varieties like ‘Athena’ or ‘Hale’s Best’ if pests are recurrent. Key: Healthy seedlings need 6–8 hours of sunlight and warm soil (70°F+).
Wrapping up and next steps
Growing healthy cantaloupe seedlings starts with vigilance and care—especially when it comes to spotting and addressing pests early. By recognizing the signs of common issues like aphids, spider mites, or fungal infections, you can protect your young plants and ensure a thriving harvest. Don’t wait until damage spreads! 🌱
Now that you’re armed with the right tools and knowledge, take action—inspect your seedlings regularly, and treat problems gently but decisively. Ready to nurture stronger plants? Check out our guide on organic pest prevention for long-term success!