
Advice
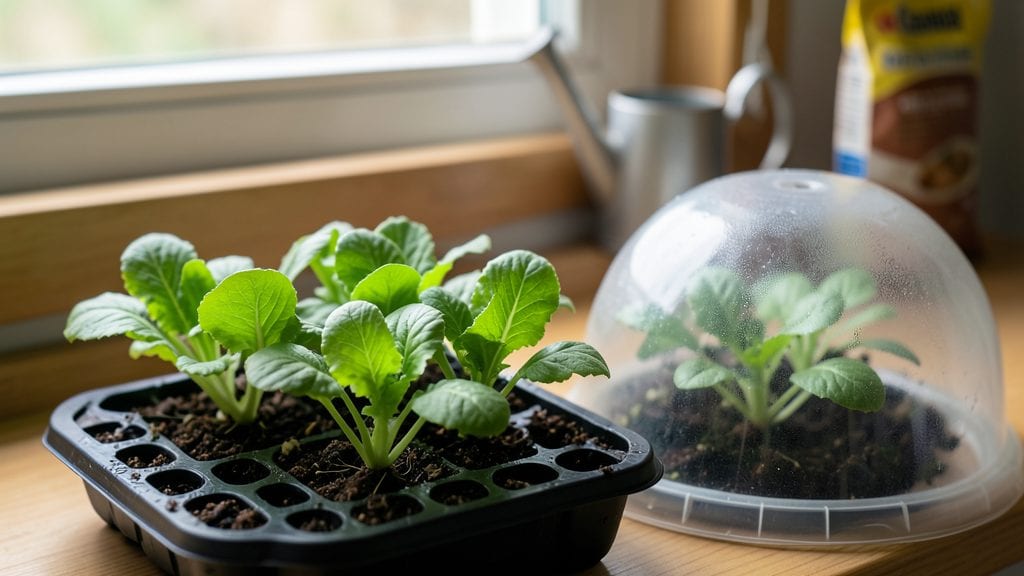
A DIY seedling greenhouse turned my late-winter starts into sturdy, sun-loving seedlings—no fancy gear required. 🌱 The first time I saw those tiny sprouts stretching toward the light under my homemade cover, I knew I’d never buy a plastic dome again.
This isn’t about perfection; it’s about giving seedlings the cozy, humid environment they crave until they’re ready for the great outdoors.
You’ll need just a few basics: a sturdy frame (wooden crates or PVC pipes work great), clear plastic sheeting or repurposed containers, and a sunny windowsill or sheltered spot. The key is balancing warmth with airflow—too much condensation and you’ll drown your babies; too little and they’ll stretch leggy.
My setup cost under $20 and saved me $50 on transplants last spring alone.
By the time your seedlings hit 3-4 inches tall, they’ll be tougher than store-bought babies, with strong stems and vibrant leaves. The best part? You can start them weeks earlier than usual, giving your garden a head start.
No more rushing to plant after the last frost or watching seedlings bolt from the cold.
Works for herbs, veggies, or flowers—just adjust the size based on what you’re growing. Even a simple plastic bottle greenhouse on a windowsill beats nothing. Let’s get those seeds sprouting right!
📚 In This Guide
- What you need
- Instructions
- Tips and common mistakes
- Wrapping up and next steps
What you need
- ● Clear plastic containers or jars: 1–2 (e.g., clean soda bottles, mason jars, or plastic clamshells). Size: 8–16 oz for small seedlings, larger for bigger batches.
- ● Seedling trays or small pots: 1–2 (biodegradable or plastic, 2–4" deep). Quantity: Enough for your seed count.
- ● Potting soil: 1–2 bags (seed-starting mix or well-draining soil). Tip: Avoid garden soil—it’s too dense!
- ● Seeds: Your chosen variety (fast-growing like lettuce or herbs work best).
- ● Spray bottle: 1 (for gentle watering).
- ● Scissors or box cutter: 1 (to cut plastic containers if needed).
- ● Grow lights: LED or fluorescent (12–16 hours/day for optimal growth).
- ● Humidity dome or plastic wrap: To retain moisture (remove once sprouts appear!).
- ● Thermometer/hygrometer: To monitor temperature/humidity (ideal: 65–75°F).
- ● Ventilation holes: Poke small holes in containers for airflow (prevents mold!).
- ● Labels & markers: To track seed types and planting dates.
Step-by-step instructions for building a DIY seedling greenhouse
Here's how to create a simple, effective greenhouse using everyday materials—no fancy tools required.
🪴 Step 1: Select and Prepare Your Base Container
Choose a large plastic storage bin (at least 12 inches deep) or a wooden crate with a clear plastic lid. If using a bin, drill 4-6 small drainage holes in the bottom to prevent root rot. I like to line the bottom with a piece of landscape fabric to keep soil in while allowing excess water to escape.
For a wooden crate, reinforce the corners with metal brackets if needed—seedlings can get heavy when watered. The container should be large enough to hold 4-6 seedling trays (about 18x12 inches minimum). Clean the container thoroughly with soapy water and rinse well to remove any chemical residue that could harm tender seedlings.
🌱 Step 2: Add Insulation and Moisture Control Layers
Cut two sheets of clear plastic sheeting (each 18x12 inches) to fit the top and sides of your container. The plastic will act as a mini greenhouse dome, trapping warmth and humidity. If your container has sharp edges, tape 1-inch strips of foam weatherstripping around the inside rim to protect seedlings from rubbing.
For extra insulation, line the inside bottom with a thin layer of bubble wrap (cut to fit). This reflects light back toward the seedlings and helps maintain consistent soil temperatures of 65-75°F. Avoid using thick insulation—you want the soil to stay warm but not overheated, which can stunt growth.
☀️ Step 3: Set Up Lighting and Ventilation
Place the container near a south-facing window or under a grow light (a 15-watt LED bulb works well for small setups). If using natural light, rotate the container quarter-turn daily so seedlings grow straight instead of leaning toward the window. For artificial light, position the bulb 4-6 inches above the seedlings and keep it on for 14-16 hours daily.
Ventilation is key—condensation buildup can lead to mold. Cut two small vents (about 2x2 inches) in the plastic lid using a box cutter, then cover them with fine mesh screen to keep pests out. On warm days, prop the lid open slightly with a small stick to allow airflow while retaining humidity.
💧 Step 4: Plant and Maintain Seedlings Inside
Fill the container with 2-3 inches of moistened seed-starting mix, then plant your seeds according to packet instructions. Mist the soil lightly with lukewarm water until it’s evenly damp but not soggy. Place the plastic lid on top and secure it loosely—you want airflow but not full enclosure yet. Check for first sprouts in 5-14 days, depending on the plant.
Water seedlings from the bottom by adding ½ inch of water to the tray underneath. This keeps the soil evenly moist without disturbing the delicate sprouts. Remove the lid for 10-15 minutes daily to prevent humidity buildup, especially once seedlings have 2-3 true leaves. Watch for yellowing leaves—a sign of overwatering or poor airflow—and adjust ventilation immediately.
⏰ Step 5: Harden Off and Transition Seedlings Outdoors
After 4-6 weeks, when seedlings show 4-6 true leaves, start hardening them off. Move the container to an outdoor shady spot for 1-2 hours the first day, gradually increasing time over 7-10 days. On the final day, leave them outside all day but bring them back in at night if temperatures drop below 50°F.
Once seedlings tolerate full sun without wilting, transplant them into the garden or larger pots. Remove the plastic sheeting completely 24 hours before transplanting to avoid shocking the plants. This DIY greenhouse gives you strong, disease-free starts—ready to thrive in any season.
Tips & tricks for perfect DIY seedling greenhouses
Here's what nobody tells you about building a greenhouse that actually works—these tricks save time, prevent common mistakes, and keep your seedlings thriving.
Container Material Matters: I learned this the hard way after my first plastic bin warped under heat. For better heat retention, choose a wooden crate with a clear plastic lid—it distributes heat more evenly and lasts longer. If using plastic, opt for a sturdy, food-grade bin that won't degrade under sunlight. The 12-inch depth is critical for root development, so don't skimp on size.
Ventilation is Non-Negotiable: That 10-15 minute daily ventilation window is your mold prevention secret weapon. On days above 75°F, increase ventilation to 30 minutes—condensation buildup is the #1 reason seedlings fail. I use a small stick to prop the lid open at a slight angle, creating a natural airflow without losing humidity. Watch for water droplets on the plastic—this is your warning sign to ventilate more.
Lighting Hack: The 14-16 hours of daily light is non-negotiable for strong seedlings, but positioning matters. Place your grow light 4-6 inches above the seedlings and adjust as they grow. For natural light, rotate your container quarter-turn daily to prevent leggy seedlings. I've had best results with a simple 15-watt LED bulb—it's energy-efficient and provides the right spectrum for early growth.
Soil Temperature Secret: That bubble wrap insulation isn't just for cold nights—it maintains the perfect 65-75°F soil temperature range even in cooler homes. Test your soil temperature with a thermometer if you're unsure. Too cold? Add a small heating pad underneath (set to low). Too hot? Remove the bubble wrap temporarily. The goal is consistent warmth—this is what triggers those first sprouts in just 5-14 days.
Pro Tips for Diy Seedling Greenhouse
- Here's what nobody tells you about building a greenhouse that actually works—these tricks save time, prevent common mistakes, and keep your seedlings thriving.
- Container Material Matters: I learned this the hard way after my first plastic bin warped under heat.
- Ventilation is Non-Negotiable: That 10-15 minute daily ventilation window is your mold prevention secret weapon.
Frequently asked questions
Got questions about building and using your DIY seedling greenhouse? You’re not alone! Here are some of the most common concerns—and their easy solutions—to help you grow like a pro.
How soon can I start using my DIY greenhouse?
You can set up your greenhouse as soon as you assemble it, but timing depends on your climate. For best results, start seedlings 6-8 weeks before the last frost date in your area. If you’re growing year-round, monitor indoor temps—keep them between 65-75°F (18-24°C) for optimal germination.
Can I reuse materials from other projects?
Many DIY greenhouses use repurposed materials like plastic bins, old windows, or even a clear plastic storage tote. Just ensure they’re clean, sturdy, and provide enough ventilation. Pro tip: Check for cracks in plastic or warping in wood to avoid moisture buildup.
What if my greenhouse gets too cold at night?
Cold snaps? No problem! Use insulated blankets, bubble wrap, or a small heat mat (like those for reptiles) to retain warmth. For extreme temps, consider a mini greenhouse with a built-in thermostat or move it indoors temporarily. Bonus: Grouping seedlings together creates a microclimate!
How do I keep pests out without chemicals?
Prevent pests naturally with fine mesh screens, neem oil spray, or companion planting (like basil near tomatoes). Avoid overwatering—moist soil attracts fungus gnats. Quick fix: Place a small fan on low to deter flies while still keeping humidity up for seedlings.
What’s the easiest way to ventilate my greenhouse?
Ventilation is key! For small setups, crack the lid or use a zippered vent. Larger DIY greenhouses benefit from a simple hinge system or removable panels. On hot days, open vents for 2-3 hours daily to prevent mold. Remember: More airflow = stronger seedlings!
Wrapping up and next steps
Building your own DIY seedling greenhouse is a game-changer for gardeners who want to nurture strong, healthy seedlings—without breaking the bank! With just a few budget-friendly materials and a little creativity, you’ve unlocked the power to grow year-round, no matter your space or skill level. 🌱
Now that you’re armed with the how-to and answers to common questions, it’s time to roll up your sleeves! Start small—pick one plant to test your setup, then expand as your confidence (and garden!) grows. Happy planting, and may your seedlings thrive like never before! 🌿