Propagation
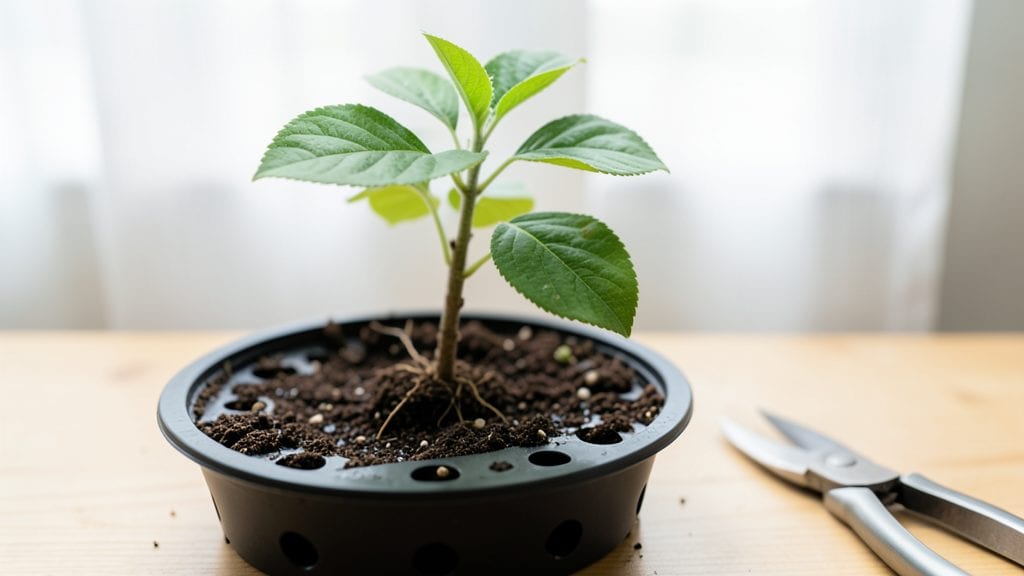
Germinated apple seeds turn kitchen scraps into future orchards—though the trees won’t match store-bought varieties. 🌱 I’ve grown three apple saplings from seeds, and while none produced fruit like the parent tree, watching those first green shoots push through soil is magic no nursery can replicate.
The process starts with a little patience: extracting clean seeds, giving them a cold period to break dormancy, and planting them in damp, sterile soil. Most people rush this step, but those extra weeks of chilling make all the difference between a weak sprout and a sturdy seedling.
You’ll need basic supplies—a paper towel, plastic bag, and a sunny windowsill—and the whole setup fits on a kitchen counter.
By late spring, you’ll have 6-inch saplings ready to transplant outdoors. They’ll grow slowly at first, but with proper care—watering when the top inch of soil dries, protecting from pests, and giving them full sun—they’ll develop into small trees with real character.
The twist? Those apples won’t taste like the grocery store kind, but the journey is half the joy.
Works for indoor starters or direct outdoor sowing in mild climates. The real surprise? Even if the fruit doesn’t impress, the process teaches patience and connection to nature’s cycles. Ready to grow your own legacy tree?
📚 In This Guide
- What you need
- Instructions
- Tips and common mistakes
- Wrapping up and next steps
What you need
- ● Apple seeds: 5–10 fresh, organic seeds (from a non-hybrid apple variety—avoid store-bought seeds if possible!)
- ● Paper towels or coffee filters: 2–3 sheets (or a small seed-starting tray with a moisture-retentive pad)
- ○ Spray bottle (optional but helpful): For gentle watering—aim for a fine mist to avoid over-saturating seeds.
- ● Small plastic bag or airtight container: A ziplock bag (quart-sized) or a clear container with a lid works perfectly.
- ● Water: Room-temperature, filtered if possible (chlorine-free is ideal).
- ● Toothpick or tweezers: For gently placing seeds on the paper towel.
- ● Rubbing alcohol (70% or higher): To sterilize seeds or tools if you’re concerned about mold.
- ● Label and marker: To track seed varieties or germination dates.
- ● Grow light or sunny windowsill: For post-germination care (once sprouts appear).
- ● Potting soil and small pots: Only needed after seeds sprout (2–3 inch pots for young seedlings).
Step-by-step instructions for germinating apple seeds
Here's the straightforward method I use to turn apple scraps into thriving young trees.
🌱 Step 1: Extract and Clean the Seeds
Cut open a fresh apple and scoop out the core carefully. You'll find 3-5 seeds nestled inside—select the plumpest ones for best results. Rinse them under cool water to remove any fruit residue, then let them dry on a paper towel for 24 hours.
This drying step prevents mold from forming later. I like to place the seeds in a single layer on the towel, then set them in a warm, dry spot. You'll know they're ready when they feel slightly rough to the touch rather than slimy.
🌱 Step 2: Stratify Seeds for Faster Germination
Apple seeds need a cold period to break dormancy. Place the dried seeds in a small container with a damp paper towel—just enough moisture to keep it slightly damp, not soggy. Seal the container loosely and refrigerate for 4-6 weeks.
Check the towel weekly and mist if it feels dry. This cold treatment mimics winter conditions and signals the seed it's time to grow. I set a reminder on my phone so I don't forget—seeds can dry out or rot if left too long.
☀️ Step 3: Plant the Stratified Seeds
After stratification, fill small pots with well-draining potting mix—I use 4-inch pots for each seed. Plant each seed about ½ inch deep and cover lightly with more mix. Water gently until the soil feels evenly moist but not wet.
Place the pots in a warm spot with bright indirect light—a south-facing window works well. Keep the soil consistently moist but never waterlogged. You'll see sprouts in 2-4 weeks, though some seeds may take longer.
🌿 Step 4: Care for Seedlings After Germination
Once sprouts appear, move them to a slightly cooler spot with 6+ hours of sunlight daily. Thin weaker seedlings to keep only the strongest one per pot. Water when the top inch of soil feels dry to the touch.
Apple seedlings grow slowly at first, so patience is key. You'll notice true leaves (not the initial seed leaves) appear in 4-6 weeks. This is when the real growth spurt begins—keep the soil consistently moist and fertilize lightly with diluted houseplant food every 4-6 weeks.
⏰ Step 5: Transplant to Larger Pots
When seedlings reach 6-8 inches tall with several sets of true leaves, transplant them to 5-gallon pots. Choose pots with drainage holes and fill with fresh potting mix. Dig a hole slightly larger than the root ball and place the seedling in, firming soil around the base.
Water deeply after transplanting to settle the soil. Place the pots in a protected outdoor spot for 2-3 weeks before moving them to their permanent location. This gradual transition helps prevent shock.
Tips & tricks for perfect germinated apple seeds
A few simple tricks will help you maximize your chances of growing healthy apple trees from those kitchen scraps.
Seed Selection Matters: Not all apple seeds are created equal! Choose the plumpest, firmest seeds from the core—they've got the best energy reserves to fuel germination. I learned this the hard way after trying to grow tiny, shriveled seeds that never sprouted. Also, avoid seeds from store-bought apples treated with sprout inhibitors—stick with organic or homegrown apples when possible.
Stratification Secret: The 4-6 week cold treatment is non-negotiable for apple seeds. I've tried skipping it, and the seeds either took months to sprout or never germinated at all. Use a small plastic container with ventilation holes in the lid—this prevents condensation buildup that can cause mold. Place a damp paper towel in the bottom, then add your seeds on top of that. The seeds should be slightly buried in the towel, not just sitting on top.
Lighting Tips: That bright indirect light in Step 3 is crucial—direct sunlight can scorch delicate seedlings. A south-facing window works best, but if you don't have one, use a grow light 6-12 inches above the pots. I've seen seedlings get leggy and weak when they don't get enough light early on. Rotate your pots weekly so all sides get even exposure, which prevents them from growing toward one light source.
Transplanting Strategy: When moving your 6-8 inch seedlings to 5-gallon pots, make the transition gradual. I harden off mine by placing them outside during the day for 2-3 weeks before full outdoor planting. Start with just a few hours of protected outdoor time, then gradually increase. This toughens up the seedlings so they're not shocked when you plant them permanently. Also, use pots with drainage holes—waterlogged roots are the #1 killer of young apple trees.
Pro Tips for Germinated Apple Seeds
- A few simple tricks will help you maximize your chances of growing healthy apple trees from those kitchen scraps.
- Seed Selection Matters: Not all apple seeds are created equal!
- Stratification Secret: The 4-6 week cold treatment is non-negotiable for apple seeds.
Frequently asked questions
How long does it take for apple seeds to sprout?
Germination can take anywhere from 2 to 6 weeks, depending on conditions like temperature (ideal: 60–75°F) and moisture. Keep seeds in a warm, dark place and check weekly for tiny sprouts. Patience is key—some seeds take longer than others!
Can I use store-bought apple seeds, or do I need heirloom varieties?
Store-bought seeds might not grow true to the parent tree—they could produce wild apples or even take years to fruit. For better results, save seeds from heirloom or named varieties (like Granny Smith or Fuji) and cross-pollinate them for stronger trees.
What if my seeds rot or mold instead of sprouting?
Overwatering or poor drainage causes rot. Fix it by:
- Rinsing seeds gently with cool water
- Letting them dry for 12–24 hours in a paper towel
- Planting in fresh, well-draining soil or a new growing medium
Do I need to stratify apple seeds before planting?
Stratification (simulating winter) helps break seed dormancy. Try this: Place seeds in a damp paper towel, seal in a bag, and refrigerate for 4–8 weeks. Then, plant them in soil. This mimics nature and speeds up germination!
Can I grow apple trees indoors, or do they need outdoor space?
Apple trees thrive outdoors but can start indoors in pots. For indoor growth:
- Use a sunny windowsill or grow light
- Repot seedlings outdoors after 1–2 years
- Expect dwarf varieties to adapt better than standard trees
What’s the best time of year to plant germinated apple seeds?
Spring (after last frost) is ideal for outdoor planting. If starting early:
- Keep sprouted seeds indoors under grow lights until warm weather
- Avoid transplanting in frost or extreme heat
- Hardening off seedlings (acclimating to outdoor conditions) takes 1–2 weeks
Wrapping up and next steps
Germinating apple seeds from kitchen scraps isn’t just a fun, eco-friendly project—it’s a rewarding way to grow your own fruit tree!
With patience, the right conditions, and a little care, you can nurture a seedling that may one day bear delicious apples. Ready to take the next step? Start with just one seed, follow the steps, and watch your tiny sapling grow into a symbol of sustainability and nature’s magic. 🌱✨
Now that you’re armed with knowledge, why not try it today? Grab those apple cores, set up your sprouting station, and let the adventure begin!