Propagation
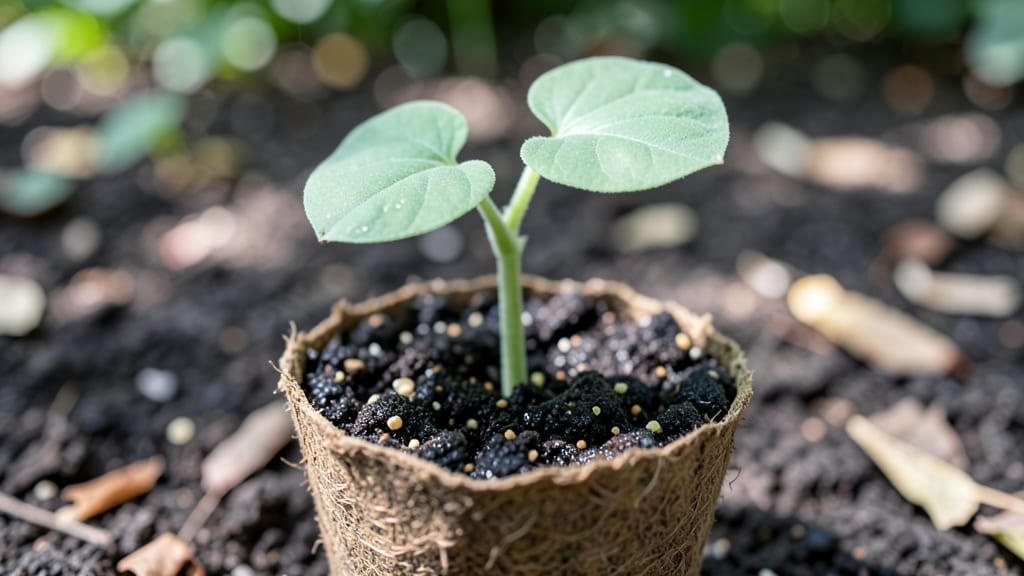
Germinated pumpkin seeds are ready to transform into nutrient-packed microgreens in just seven days—no fancy equipment needed. 🌱 I’ve grown dozens of batches, and the secret lies in the first 48 hours after those tiny roots appear.
The key isn’t rushing them; it’s giving them exactly what they need: bright light, consistent moisture, and just enough space to stretch without crowding.
You’ll need a shallow tray, some damp paper towels or a seed-starting mat, and a sunny windowsill or grow light. Most people overwater at this stage, but pumpkin seeds hate soggy conditions.
A light mist twice daily keeps them happy until true leaves appear. By day three, you’ll see those first vibrant green leaves unfurling—proof you’re on the right track.
Once they’re a few inches tall, transplant them into individual pots or a shared tray with well-draining soil. They’ll grow fast, so keep them in a warm spot with at least six hours of sunlight daily.
Within a week, you’ll have microgreens packed with nutrients, ready to harvest or transplant outdoors after the last frost—just don’t let them get leggy.
This method works for any pumpkin variety, from sugar pie to jack-o’-lantern seeds. The best part? You can grow them year-round, even in small spaces. Here’s how to keep them thriving without the guesswork.
📚 In This Guide
- What you need
- Instructions
- Tips and common mistakes
- Wrapping up and next steps
What you need
- ● Pumpkin seeds: ½ cup (about 60–80 seeds) – choose raw, organic, and ungerminated seeds (avoid pre-sprouted or roasted varieties).
- ○ Growing container: A shallow tray (9x13 inches) or any wide, flat dish with drainage holes. Optional: Use a mesh sprouting lid or paper towels for easier rinsing.
- ● Growing medium: Option 1 (Best for beginners): 2–3 layers of damp paper towels or a clean kitchen towel.
- ● Option 2 (For soil-based growth): 2–3 inches of organic potting mix or coconut coir in a tray with drainage.
- ● Water: Room-temperature, filtered water (avoid chlorinated tap water—let it sit out for 24 hours if needed).
- ○ Spray bottle: For gentle misting (optional but helpful for humidity control).
- ● Small hand trowel or spoon – for gently pressing seeds into soil.
- ● Fine-mesh strainer – if rinsing seeds daily (prevents overcrowding).
- ● Grow light or sunny windowsill – for optimal light exposure (6+ hours/day).
- ● Humidity dome or plastic wrap – to retain moisture during germination.
- ● Food scale – for precise seed measurements (if experimenting with quantities).
- ● Warm, dark space (70–75°F) for the first 2–3 days of germination.
- ● Bright, indirect light after sprouts emerge (direct sun can scorch delicate greens).
- ● Patience! Germination takes 3–5 days, and harvest-ready sprouts in 7 days.
Step-by-Step instructions for growing germinated pumpkin seeds
Here's how to transform store-bought pumpkin seeds into vibrant microgreens bursting with nutrients.
🌱 Step 1: Soak Seeds for 8-12 Hours
Place ¼ cup pumpkin seeds in a bowl and cover completely with room-temperature water. This softens the hard outer shell and kickstarts germination. I like to use a fine-mesh strainer inside the bowl so seeds don't sink to the bottom and get waterlogged.
Let them soak overnight—8-12 hours is perfect. You'll see tiny white sprouts emerging from the seeds when they're ready. Drain thoroughly using a colander, shaking gently to remove excess water. Don't skip this step; dry seeds won't germinate evenly.
💧 Step 2: Prepare Trays and Plant Seeds
Line a 10x20-inch growing tray with damp paper towels or a thin layer of coconut coir. Spread the soaked seeds ½-inch apart in a single layer—crowding leads to weak, tangled sprouts. I use a spoon to space them evenly across the tray surface.
Lightly mist the seeds with water until the paper towels or coir feel damp but not soggy. Cover the tray with another layer of damp paper towels or a breathable cloth. This creates a humid environment that mimics the seed's natural soil conditions. Place the tray in a warm, dark spot like a cabinet.
☀️ Step 3: Monitor Germination Over 3-5 Days
Check the seeds daily for sprouts. Within 3-5 days, you'll see 1-inch-long radicles (tiny white roots) and cotyledons (first true leaves). Keep the paper towels moist but never dripping—excess water drowns the delicate sprouts.
When 50% of seeds have sprouted, remove the cover and move the tray to bright, indirect light. Direct sunlight at this stage can scorch the tender sprouts. You'll notice the stems straighten and leaves turn a vibrant green within 24 hours of light exposure.
🌿 Step 4: Harvest at Peak Nutrients
Harvest when the sprouts reach 2-3 inches tall, typically 7-10 days total from planting. Use clean scissors to snip just above the soil line. I harvest in batches—cutting a few at a time prevents wilting while I rinse and store the rest.
Rinse the sprouts under cool water to remove any debris, then gently pat dry with paper towels. Store in an airtight container in the fridge for up to 5 days. For best flavor, use within 3 days of harvesting. These microgreens pack a punch—just ¼ cup delivers 100% of your daily vitamin K!
⏰ Step 5: Clean and Repeat
After harvesting, compost the remaining seeds and coir. Rinse the tray thoroughly with hot, soapy water to remove any residual oils from the seeds. Let it air dry completely before reuse. I reuse the same tray for 3-4 batches before replacing it.
For continuous harvests, start a new batch every 3-4 days. This ensures a steady supply of fresh, nutrient-dense microgreens. Keep track of your batches—I label each tray with the harvest date to stay organized. These sprouts are ready in a week, but the flavor peaks when used immediately after harvest.
Tips & tricks for growing germinated pumpkin seeds
Transforming pumpkin seeds into nutrient-packed microgreens is easier than you think—once you know these game-changing tricks.
Soaking Secret: The 8-12 hour soak is non-negotiable for even germination. I like to add a pinch of sea salt to the soaking water—it helps prevent bacterial growth while softening the shells. After draining, give the seeds a gentle shake in the colander to remove water trapped between them. This prevents mold from forming during germination.
Spacing is Everything: That ½-inch spacing in Step 2 might seem excessive, but it's crucial. Crowded sprouts compete for nutrients and light, leading to weak, leggy growth. Use a spoon to create small divots in your paper towels or coir—this helps maintain consistent spacing without requiring perfect precision. Trust me, your harvest will thank you!
Light Transition: Moving sprouts to light at the 50% germination mark is where magic happens. I use a simple grow light on a timer for 12 hours a day—it's more consistent than natural light. Watch for the stems to straighten within 24 hours; this tells you they're getting the right light exposure. If they stay bent, you need brighter light or more distance from the source.
Harvesting Hack: Those 2-3 inches might seem small, but they pack maximum nutrition. Harvest in batches by cutting just above the soil line—this prevents wilting while you finish the rest. For extra flavor, rinse the sprouts in ice water before storing. The cold shock helps preserve their vibrant green color and crisp texture for up to 5 days in the fridge.
Pro Tips for Germinated Pumpkin Seeds
- Transforming pumpkin seeds into nutrient-packed microgreens is easier than you think—once you know these game-changing tricks.
- Soaking Secret: The 8-12 hour soak is non-negotiable for even germination.
- Spacing is Everything: That ½-inch spacing in Step 2 might seem excessive, but it's crucial.
Frequently asked questions
Got questions about germinating pumpkin seeds?
You’re not alone! Here are answers to the most common queries to help you grow these nutrient-packed microgreens like a pro.
How long do pumpkin seeds take to germinate?
Germination typically takes 3–7 days under ideal conditions (warmth, moisture, and darkness). Most seeds sprout within 48–72 hours if kept in a cozy, humid environment like a jar or tray with a damp paper towel. Patience is key—don’t rush it!
Can I use store-bought pumpkin seeds for germinating?
Yes! Raw, organic, unsalted pumpkin seeds work best—just rinse them thoroughly to remove any coatings or preservatives. Avoid roasted or salted seeds, as these can inhibit germination. Pro tip: Check the label for "raw" or "organic" to ensure success.
What do I do if my seeds aren’t sprouting?
If seeds stay dormant after a week, try these fixes:
- Check moisture: Seeds need consistent dampness (not soggy!). Spritz with water if the paper towel/tray feels dry.
- Warmth matters: Place them near a heat source (like a sunny windowsill or heating pad) if your space is cool.
- Test viability: Soak 10 seeds in water overnight—if fewer than half float, they may be old or damaged.
If all else fails, grab fresh seeds from a trusted source!
Are germinated pumpkin seeds safe to eat raw?
Once sprouted, these seeds are crunchy, fresh, and packed with nutrients like magnesium, zinc, and healthy fats. Rinse them gently before eating to remove any dirt or debris. Enjoy them in salads, smoothies, or as a protein-rich snack!
How long can I keep germinated pumpkin seeds before they spoil?
Store them in an airtight container in the fridge for up to 5–7 days to preserve freshness. For longer storage, dry them thoroughly and store in a cool, dark place (like a mason jar) for 1–2 months. Watch for sliminess or off smells—signs it’s time to compost.
Wrapping up and next steps
Germinated pumpkin seeds are a nutrient powerhouse—packed with protein, healthy fats, and essential vitamins—all ready in just 7 days! Whether you're a gardening newbie or a seasoned grower, these microgreens are easy, rewarding, and delicious to cultivate. 🌱
Now that you’re armed with the know-how, why not start your batch today? Try them in salads, smoothies, or as a crunchy snack—your taste buds (and body) will thank you. Happy growing! 🌟