
Watering
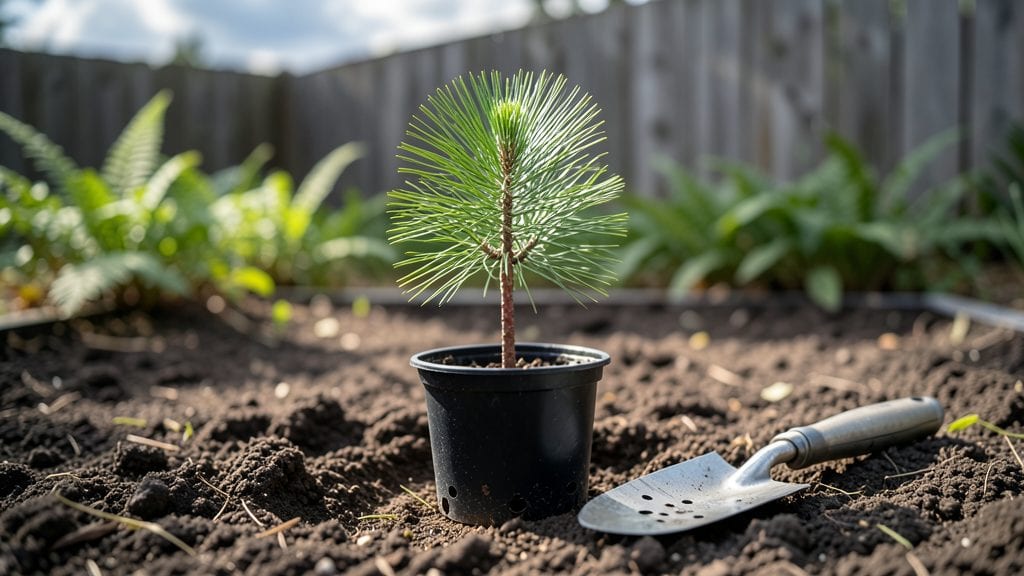
Growing a giant sequoia seedling starts with the right moisture balance—too dry and it sleeps forever, too wet and it rots before it wakes. ✨ I’ve nursed these ancient giants from seed, and the key is patience paired with precise watering that mimics their foggy mountain homeland.
The secret isn’t complicated, but it’s easy to mess up if you rush.
You’ll need a well-draining mix of peat, perlite, and sand (equal parts), a humidity dome or plastic bag, and a spray bottle for gentle watering—never soaking. Sequoias hate soggy roots but need consistent dampness to break dormancy.
Think of it like a sponge: always moist, never drenched. Most beginners overwater, so start light and adjust as you learn the rhythm of your seedling.
Within 6-12 weeks, you’ll see the first true leaves—tiny, bright green needles that signal success. These seedlings grow slowly at first, but with the right moisture and bright, indirect light, they’ll develop into sturdy saplings ready for transplanting in 2-3 years.
The payoff? A tree that could live for millennia, starting right on your windowsill.
Works indoors or out, but move it outdoors gradually after the last frost. Just don’t expect overnight growth—these trees take their time, and that’s part of their magic. Let’s get those seeds sprouting!
📚 In This Guide
- What you need
- Instructions
- Tips and common mistakes
- Wrapping up and next steps
What you need
- ● Giant sequoia seeds: 3–5 fresh, viable seeds (harvested from a reputable source or your own tree).
- ● Seed-starting mix: 1–2 gallons of sterile, well-draining mix (e.g., 50% peat moss, 30% perlite, 20% coarse sand).
- ● Seed trays or small pots: 4–6 shallow containers (3–4 inches deep) with drainage holes.
- ● Clear plastic dome or humidity tent: To maintain moisture and warmth during germination.
- ● Misting bottle or spray nozzle: For gentle, even watering (avoid soaking!).
- ● pH test kit: To ensure soil pH is between 5.5–6.5 (sequoias prefer slightly acidic soil).
- ● Thermometer/hygrometer: To monitor soil temp (ideal: 65–75°F) and humidity (70–80%).
- ● Gloves: To protect hands from sharp seed coats.
- ○ Heat mat (optional): For faster germination (set to 70–75°F).
- ● Grow lights or sunny windowsill: 12–14 hours of indirect light daily post-germination.
- ● Fertilizer (balanced, low-nitrogen): 1 tsp diluted 10-10-10 or fish emulsion (after 4–6 weeks).
- ● Transplanting tools: Small trowel and biodegradable pots (for later stages).
- ● Notebook/journal: To track watering schedules, soil moisture, and growth milestones!
Step-by-Step instructions for giant sequoia seedling dormancy-breaking
Here’s how to coax these ancient giants from dormancy—keeping moisture just right is the secret.
🌱 Step 1: Stratify Seeds to Break Dormancy
Giant sequoia seeds need 120 days of cold stratification to mimic winter conditions. Place the seeds in a sealed container with damp but not soggy peat moss or a paper towel. Store them in a refrigerator at 34-41°F—this slows metabolism and triggers germination hormones.
Check the moisture weekly. If the mix feels dry, lightly mist it; if it’s damp, leave it be. You’ll see the first signs of life in 4-8 weeks as tiny roots emerge. This is where patience pays off—rushing the process will leave you with weak, stunted seedlings.
💧 Step 2: Sow Stratified Seeds in Moisture-Controlled Medium
Fill a shallow tray with a mix of 50% peat moss and 50% perlite to ensure excellent drainage while retaining moisture. Plant the stratified seeds ¼ inch deep, spacing them 1 inch apart—they’re tiny but will grow quickly once they break dormancy.
Water gently with a spray bottle until the surface is evenly moist but not saturated. Giant sequoias despise waterlogged roots, so avoid heavy watering. Place the tray in a warm, shaded area (65-70°F) with indirect light. Germination can take 2-4 weeks, but some seeds may take longer—don’t give up after three weeks.
☀️ Step 3: Provide Gradual Light and Humidity
Once seedlings emerge, move them to a location with bright, indirect light for the first 2 weeks. Direct sun at this stage can scorch tender leaves. Use a humidity dome or plastic wrap to maintain moisture levels, especially if your home is dry. Mist the seedlings daily to keep the air around them humid.
After 2 weeks, gradually introduce morning sunlight for 1-2 hours daily, increasing exposure over 2 weeks until they tolerate 4-6 hours of filtered sun. You’ll know they’re adapting when the leaves stay firm and green—not yellow or wilted.
🪴 Step 4: Transplant into Individual Pots with Care
When seedlings reach 3-4 inches tall with 2-3 sets of true leaves, transplant them into 4-inch pots filled with a mix of 60% peat moss and 40% perlite. Handle the seedlings by their leaves, not the stems, to avoid damaging the delicate root systems. Water thoroughly after transplanting to settle the soil.
Place the pots in a shaded area for 1 week to reduce transplant shock. After that, gradually reintroduce sunlight. Keep the soil consistently moist but never soggy—stick your finger 1 inch deep; if it feels dry, water lightly. Overwatering at this stage is the fastest way to kill young sequoias.
⏰ Step 5: Monitor Growth and Adjust Conditions
Giant sequoias grow slowly, so expect only 2-4 inches of growth per year in their early stages. Fertilize lightly with a balanced, water-soluble fertilizer (10-10-10) diluted to half-strength every 4-6 weeks during the growing season. Too much fertilizer will burn delicate roots.
Watch for signs of stress: yellowing leaves mean too much water or poor drainage, while stunted growth could indicate insufficient light. Adjust their environment as needed—these ancient trees are worth the careful attention. With patience, your seedlings will one day reach heights that dwarf your garden.
Tips & tricks for perfect giant sequoia seedling growth
Working with giant sequoia seedlings demands precision—especially when it comes to moisture and timing. These insights will help you navigate the delicate balance between patience and proper care.
Moisture Precision in Step 1: The key to successful stratification lies in maintaining that "damp but not soggy" balance. I use a spray bottle to mist the peat moss every 7-10 days rather than relying on weekly checks—this prevents over-moisture while keeping conditions ideal. Think of it like wringing out a damp sponge: just enough moisture to support life without drowning the seeds. The refrigerator's 34-41°F environment helps maintain this delicate balance without requiring constant adjustments.
Light Transition Strategy in Step 3: When gradually introducing sunlight after the initial 2 weeks of indirect light, I recommend using a sheer curtain to diffuse the morning sun before removing it completely. This creates a natural light gradient that mimics how these ancient trees would experience sunlight in their native forest understory. Watch for subtle color changes in the leaves—healthy green indicates proper adaptation, while yellowing signals too much direct exposure. The 4-6 hours of filtered sun goal should be your target, but don't rush this transition.
Transplanting Technique in Step 4: The most critical moment during transplanting is when you handle the seedlings. Always support the base of the stem with your thumb while gently grasping the leaves—this minimizes root disturbance. I've found that using a small spoon to lift seedlings from the tray preserves more root structure than pulling them directly. After transplanting into 4-inch pots, I water from the bottom by placing the pots in a shallow tray of water for 10 minutes, allowing the roots to absorb moisture without surface disturbance.
Fertilizer Timing in Step 5: The 4-6 weeks fertilization schedule is crucial because giant sequoias are sensitive to nutrient overload. I dilute the 10-10-10 fertilizer to half-strength and apply it only after verifying the seedlings have established new growth. You'll know they're ready when you see fresh, vibrant leaves—this indicates they're actively photosynthesizing and can handle the nutrients. Too much fertilizer at this stage can actually stunt growth rather than promote it, so less is definitely more with these ancient trees.
Pro Tips for Giant Sequoia Seedling
- Working with giant sequoia seedlings demands precision—especially when it comes to moisture and timing.
- Moisture Precision in Step 1: The key to successful stratification lies in maintaining that "damp but not soggy" balance.
- Light Transition Strategy in Step 3: When gradually introducing sunlight after the initial 2 weeks of indirect light, I recommend using a sheer curtain to diffuse the morning sun before removing it completely.
Frequently asked questions
How often should I water a giant sequoia seedling to break dormancy?
Keep the soil consistently moist (not soggy) during dormancy-breaking—water every 2-3 days if the top inch feels dry. Reduce to once weekly once active growth begins. Use a spray bottle for gentle hydration to mimic natural mist. Pro tip: Morning watering prevents fungal risks.
Can I use tap water for my giant sequoia seedling?
Tap water is fine, but if your area has high chlorine or fluoride, let it sit for 24 hours before use. Rainwater or distilled water is ideal for sensitive seedlings. Avoid salty or acidic water, which can stunt growth. Pro tip: Test pH (6.5–7.5 is perfect) if using well water.
What if my seedling’s leaves turn yellow or brown?
Yellowing often signals overwatering (root rot) or underwatering (drought stress). Brown edges? Check humidity—sequoias love 60–70% air moisture. Adjust care: overwatered? Reduce frequency; underwatered? Increase misting. Pro tip: Trim damaged leaves to redirect energy.
How long does dormancy-breaking take for a giant sequoia seedling?
Dormancy-breaking typically takes 4–8 weeks of consistent moisture and warmth (60–70°F). Monitor for new needle growth—a sign it’s ready for slower, deeper watering. Patience is key! Pro tip: Track progress with a growth journal for personalized adjustments.
What’s a good alternative if my seedling isn’t responding to moisture?
Try bottom-watering (place the pot in a tray of water for 10–15 mins) to encourage deep root hydration. If stagnant, repot in fresh, well-draining soil (50% peat, 30% perlite, 20% sand). For stubborn cases, a growth hormone spray (like seaweed extract) can boost resilience. Pro tip: Avoid fertilizers during dormancy—they stress seedlings.
Wrapping up and next steps
Growing a giant sequoia seedling is a rewarding journey that demands patience, precision, and a deep connection to nature.
By mastering the delicate balance of moisture—avoiding both drought and waterlogging—you’re not just nurturing a plant; you’re cultivating a legacy. 🌱 Every careful watering step brings you closer to witnessing its majestic growth over time.
Ready to take the next step? Start by monitoring your seedling’s progress and adjusting your care routine as it matures. Share your experiences with fellow plant enthusiasts—your insights could inspire others to grow these ancient giants too!