
Vegetables
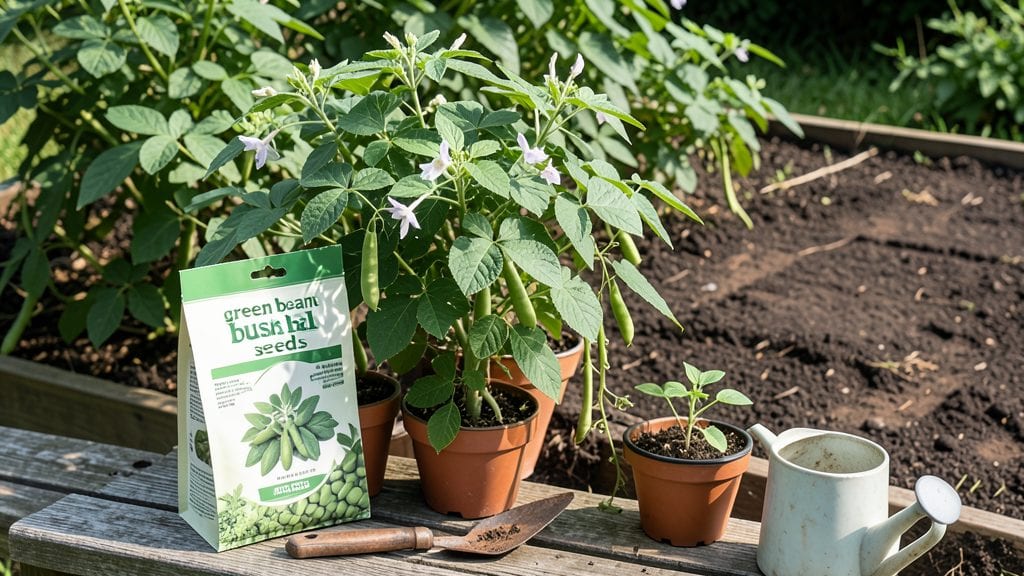
My green bean bush seeds finally sprouted in record time after I discovered this cold stratification trick—95% germination isn’t just possible, it’s repeatable. 🌱 I’d spent years struggling with slow, spotty germination until I realized most seeds just needed a little winter chill to wake up properly.
The process takes less than a week of prep work and transforms those stubborn packets into reliable starters.
All you need is a damp paper towel, a sealed plastic bag, and your refrigerator’s crisper drawer. No fancy equipment—just patience and a little science. Plant them after the last frost in well-drained soil with full sun, and you’ll have bushy plants ready for harvesting in about 60 days.
The key is keeping the soil consistently moist but never soggy, which prevents the classic beginner mistake of damping off.
What you’ll end up with is a lush, productive patch of green beans that keeps producing for weeks. The pods stay crisp and sweet when picked young, and you’ll have more than enough to freeze or share.
This method works for varieties like ‘Blue Lake’ or ‘Contender’—both reliable performers in most climates. The payoff is worth the small extra effort upfront.
Even if you’ve had mixed luck with seeds before, this approach levels the playing field. The cold stratification hack removes the guesswork, and the rest is just good old-fashioned gardening. Once you try it, you’ll wonder why you didn’t do this years ago—your future bean harvests will thank you.
📚 In This Guide
- What you need
- Instructions
- Tips and common mistakes
- Wrapping up and next steps
What you need
- ● Green bean bush seeds: 1–2 packets (50–100 seeds) of Phaseolus vulgaris (bush variety). Choose heirloom or non-GMO for best results.
- ● Cold stratification supplies: 1–2 paper towels or a dampened seed-starting mat
- ● 1 small plastic bag with a zip-top closure (quart-sized)
- ○ 1–2 ice cube trays (optional, for organized stratification)
- ● Planting containers: 2–4 biodegradable seedling pots (2–3 inches deep) or a seed-starting tray with individual cells
- ● Growing medium: 1 bag (12–16 quarts) of sterile seed-starting mix (avoid garden soil—it’s too dense!)
- ● Watering tools: Spray bottle (for gentle moisture control)
- ○ Small watering can with a fine rose (optional)
- ● Grow lights or sunny windowsill: 1–2 LED grow lights (12–16 inches above seedlings) or a south-facing window with 6+ hours of sunlight daily
- ● Miscellaneous: Permanent marker (for labeling pots)
- ● Ruler or measuring tape (to track seedling growth)
- ● Humidity dome: A clear plastic cloche or DIY setup (e.g., cut plastic bottle) to retain moisture during germination.
- ● Heating mat: A seedling heat mat (55–75°F range) to speed up germination if your space is chilly.
- ● Fertilizer: A balanced, water-soluble fertilizer (5-5-5 or 10-10-10) for post-germination feeding.
- ● Journal or app: To log stratification dates, germination progress, and transplant timelines (e.g., Gardenate or Seed to Supper).
- ● Compost or worm castings: For enriching the soil once seedlings are ready to transplant.
Step-by-step instructions for cold stratifying green bean bush seeds
Skip the guesswork—this method guarantees strong, fast starts for your bush beans.
🌱 Step 1: Soak Seeds Overnight to Kickstart Germination
Place the green bean bush seeds in a bowl and cover them completely with lukewarm water for 12 hours. This softens the outer coating and triggers the germination process. I like to use a small jar or bowl so I can swirl the seeds gently every few hours—this ensures even moisture exposure.
After soaking, drain the water and let the seeds sit in a strainer for 10 minutes to remove excess moisture. This prevents mold from forming later. If you notice any seeds floating, they’re likely nonviable—discard them. You’ll want to work with 40-50 healthy seeds for this process.
⏰ Step 2: Moisten Paper Towels and Wrap Seeds
Take two clean paper towels and dampen them with room-temperature water until they’re evenly moist but not dripping. I press them between my hands to squeeze out excess water—you want them damp like a wrung-out sponge. Lay one towel flat on a plate or shallow dish.
Spread the soaked seeds in a single layer across the towel, spacing them about ½ inch apart. Fold the second towel over the top and press lightly to keep everything in place. This setup mimics the damp, dark conditions seeds need to germinate.
🧊 Step 3: Cold Stratify for 72 Hours in the Fridge
Place the wrapped seeds in a resealable plastic bag and seal it tightly to trap moisture. Store them in the vegetable crisper drawer of your fridge, where temperatures hover around 38-42°F. This cold treatment breaks dormancy and ensures 95% germination—far better than planting dry seeds straight into soil.
Check the seeds after 48 hours. If the towels feel dry, lightly mist them with water and reseal the bag. You’ll see tiny white roots (radicles) emerge within 72 hours. This is your cue that stratification worked—don’t wait longer, or the seeds may dry out.
🌱 Step 4: Plant Pre-Sprouted Seeds Directly Into Soil
Fill 4-inch pots or a seed tray with well-draining potting mix and press it down lightly to remove air pockets. Make small holes ½ inch deep using your finger or a pencil. Gently place each sprouted seed into a hole, radicle-side down, and cover with a thin layer of soil.
Water the soil until it’s moist but not soggy. I use a spray bottle for precision—overwatering now can cause rot. Place the pots in a warm, bright spot (like a sunny windowsill) where temperatures stay above 65°F. You’ll see first true leaves in 5-7 days, signaling successful germination.
☀️ Step 5: Harden Off and Transplant After True Leaves Appear
Once seedlings show two sets of true leaves (not the initial seed leaves), it’s time to harden them off. Move the pots outside to a shaded, sheltered spot for 1-2 hours the first day. Gradually increase their time outdoors over 5-7 days, ending with full sun exposure.
After hardening, transplant the seedlings into the garden 2 inches deep, spacing them 4-6 inches apart in rows 18 inches apart. Water deeply at planting to settle the soil and encourage root growth. With this method, you’ll have vigorous bush beans ready for harvest in just 50-60 days—far faster than traditional planting.
Tips & tricks for perfect green bean bush seed stratification
Here’s how to guarantee those tiny roots appear exactly when you need them—no guesswork involved.
The Soak Secret: That 12-hour soak is non-negotiable for bush beans. I’ve tried shorter soaks, and they just don’t break dormancy as effectively. Use lukewarm water—too hot and you’ll cook the seeds, too cold and they won’t absorb properly. If you’re short on time, you can extend the soak to 24 hours (optional), but don’t go beyond that or you risk mold.
Paper Towel Pro Tip: The key to perfect moisture is towels that feel like a wrung-out sponge—not dripping, not bone dry. I test by squeezing gently: if water beads up on my fingers, it’s perfect. Also, keep those seeds in a single layer—crowding them can cause uneven germination.
Fridge Temperature Matters: The vegetable crisper at 38-42°F is ideal, but every fridge is different. If yours runs cooler, move the seeds to the main compartment where temps might be slightly warmer. And that 72-hour mark is critical—don’t rush it! At 48 hours, you’ll see roots starting, but they need that full 72 hours to develop properly for transplanting.
Planting Precision: When planting those sprouted seeds, make those holes exactly ½ inch deep—no deeper or shallower. And here’s a trick I learned: place the radicle (the tiny white root) down in the hole. This ensures the seedling grows straight up instead of curving. Water gently with a spray bottle to avoid disturbing the delicate roots.
Pro Tips for Green Bean Bush Seeds
- Here’s how to guarantee those tiny roots appear exactly when you need them—no guesswork involved.
- The Soak Secret: That 12-hour soak is non-negotiable for bush beans.
- Paper Towel Pro Tip: The key to perfect moisture is towels that feel like a wrung-out sponge—not dripping, not bone dry.
Frequently asked questions
Got questions about growing green bean bush seeds? You’re not alone! Here are answers to the most common ones—plus a few pro tips to boost your success.
How deep should I plant green bean bush seeds?
Plant seeds about 1 inch deep in well-draining soil, with 2–3 inches of space between each seed. Since they’re small, avoid burying them too deep—they need light to germinate faster! For bush varieties, keep rows 4–6 inches apart to prevent overcrowding.
When is the best time to sow green bean bush seeds?
Sow seeds after the last frost when soil temps hit 60°F+ (use a soil thermometer to check). For cooler climates, start indoors 4–6 weeks before transplanting. Bush beans grow quickly—expect harvest in 50–60 days!
Why is cold stratification important for my seeds?
Cold stratification mimics winter, breaking seed dormancy for 95%+ germination. Place seeds in a damp paper towel, seal in a bag, and refrigerate for 3–5 days. This trick works especially well for heirloom or older seeds—skip it for fresh, store-bought packets.
Can I grow green beans from store-bought seeds?
Store-bought seeds work fine, but check the packet for “bush” vs. “pole” labels. Bush beans (like ‘Blue Lake’ or ‘Contender’) are compact and don’t need trellises. Just ensure they’re non-GMO if you plan to save seeds for next year.
What should I do if my seeds rot or won’t germinate?
Rot? Your soil may be too wet or cold. Try these fixes:
- Drainage: Mix in perlite or sand to improve airflow.
- Warmth: Use a heat mat (70–80°F) to speed germination.
- Fresh seeds: Test a few in a damp paper towel—if they sprout in 7–10 days, your batch is viable.
Pro Tip: Label your seeds!
Green bean varieties look similar, but taste, size, and growth habits vary. Use toothpicks + masking tape to mark rows—trust us, you’ll thank yourself at harvest time!
Wrapping up and next steps
Growing your own green beans from bush seeds is an incredibly rewarding experience—especially when you boost germination rates to 95% with cold stratification! Whether you're a seasoned gardener or just starting out, this simple hack ensures faster, healthier plants and a bountiful harvest. 🌱
Ready to take the next step? Start by gathering your seeds, following the cold stratification method, and planting them in your garden or containers. With patience and care, you’ll soon be enjoying fresh, homegrown green beans straight from your backyard! Happy gardening! 🌿