
Vegetables
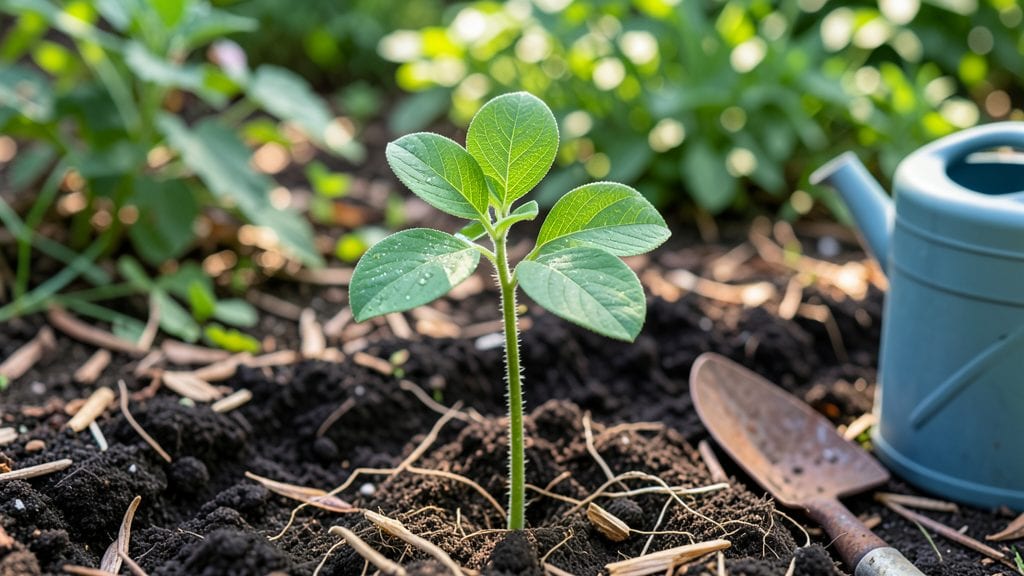
Green beans seedlings burst from soil faster with this simple trick—soak seeds overnight before planting, and you’ll see sprouts in just 3-5 days instead of waiting two weeks. I’ve tried every shortcut, but this one actually works, turning flimsy starts into sturdy, bushy plants ready for the garden.
The secret isn’t fancy: just warm water, a damp paper towel, and patience for a full day. No more weak stems or leggy seedlings struggling to catch up.
You’ll need a shallow tray, well-draining soil mix, and a sunny spot with at least 6-8 hours of light daily—even a south-facing windowsill works in a pinch.
Plant seeds 1 inch deep, spacing them 4-6 inches apart in rows 18 inches apart, and keep the soil consistently moist but never soggy. The first true leaves appear quickly, and by week 3, you’ll have plants tall enough to stake if needed.
This method cuts down on thinning too, since seeds germinate evenly.
What you end up with is a garden full of vibrant green foliage and pods ready to harvest in just 50-60 days—no more waiting months for scraggly plants. The trick also boosts resistance to damping-off, a fungal disease that turns seedlings to mush overnight.
Once established, these plants thrive with minimal fuss, producing pounds of beans per plant if you keep them watered and pinched back occasionally. The best part? You’ll taste the difference in flavor compared to store-bought.
Works for both bush beans and pole varieties, though pole beans need trellises or stakes for support. If you’re in a cooler climate, wait until soil reaches 60°F before planting—cold soil slows germination.
For faster results, use black plastic mulch to warm the soil and retain moisture. Ready to skip the slow start and grow beans that actually perform?
📚 In This Guide
- What you need
- Instructions
- Tips and common mistakes
- Wrapping up and next steps
What you need
- ● Green bean seeds: Choose heirloom or hybrid varieties (e.g., 'Blue Lake,' 'Contender,' or 'Kentucky Wonder'). Buy 1–2 packets (50–100 seeds) for a small garden.
- ● Seed-starting mix: 1–2 cubic feet of lightweight, sterile potting soil (avoid garden soil—it’s too dense!). Look for mixes labeled "seed-starting" or "organic starter blend."
- ○ Containers: Biodegradable pots (optional but helpful): 6–12 small pots (2–3 inches deep) made from peat or coconut coir.
- ● OR Seed trays with drainage holes: 1 tray (10x20 inches) or 6-cell packs for compact spacing.
- ● Watering can or spray bottle: A gentle misting nozzle to avoid disturbing seeds.
- ● Grow lights or sunny windowsill: 12–16 hours of light daily (a LED grow light or south-facing window works best).
- ● Plant labels: 6–12 labels (to track varieties if planting multiple types).
- ● Fine-mesh screen or plastic wrap: 1 sheet (to retain moisture during germination).
- ○ Fertilizer (optional): 1 tbsp of balanced organic fertilizer (5-5-5 or 3-4-6) mixed into the soil after seeds sprout.
- ○ Heat mat (optional for cold climates): A seedling heat mat (set to 70–75°F) to speed up germination.
- ● Tweezers or pencil: For gently pressing seeds into soil (no need to buy—use what you have!).
Instructions for growing vigorous green bean seedlings
Here's the method I've used for years to get sturdy, fast-sprouting green bean seedlings that outperform store-bought starts.
Prepare Containers and Soil for Optimal Germination
Green beans thrive when started in individual 2-inch deep containers—this prevents root tangling later. I use biodegradable peat pots because they eliminate transplant shock completely. Fill each container with sterile seed-starting mix (never garden soil—it's too dense and may harbor diseases). Moisten the mix until it holds together when squeezed but doesn't drip water, creating a crumbly texture perfect for young roots.
The key here is warmth—green beans germinate best at 80-85°F. Place your containers on a seedling heat mat if your home runs cooler than 70°F. Without this, germination can take 2-3 weeks instead of the 5-7 days we're targeting. I always label each pot with the variety and date—after a week, identical green sprouts can be confusing!
Sow Seeds at the Correct Depth and Spacing
Plant 1-2 seeds per container at a depth of ½ inch—any deeper and the seedlings will struggle to reach the surface. I use my finger to make a small hole, drop in the seed, then cover it with a light sprinkle of soil. Press gently but don't compact the surface—you want air pockets for oxygen flow. For the second seed, place it ¼ inch away from the first; if both germinate, snip the weaker one at soil level when they're 2 inches tall.
Here's the trick for bushy plants: After sowing, place the containers in a clear plastic bag (like a produce bag) and seal it loosely. This creates a mini greenhouse effect that speeds germination while maintaining 85-90% humidity. Check daily for condensation—if you see water droplets, open the bag for 10 minutes to prevent mold. You'll see the first sprouts in 4-5 days if conditions are perfect.
Provide Light and Airflow for Strong Stems
The moment you see cotyledons (those first true leaves), remove the plastic bag immediately—trapped humidity now invites damping-off, a fungal disease that collapses seedlings overnight. Move your containers to a south-facing window or under grow lights providing 12-14 hours of light daily. Green beans need bright, indirect light to prevent leggy growth; if stems stretch toward the window, your light source is too far away.
Once seedlings reach 3 inches tall, thin to the strongest plant per container. I look for thick stems and dark green leaves—these are your winners. Place containers in a well-ventilated area (like a windowsill with a small fan on low) to strengthen stems. This airflow prevents weak, floppy growth that breaks easily during transplanting. Water from the bottom by placing containers in ½ inch of water for 10 minutes—this encourages deep root growth without disturbing the soil.
Harden Off for Outdoor Success
Two weeks before your last frost date, begin hardening off your seedlings. Start by placing them outside in a sheltered, shaded spot for 1 hour the first day. Gradually increase their time outdoors by 1 hour daily, moving them to morning sun by day 5. By day 10, they should tolerate full sun for 4-6 hours. This slow acclimation prevents transplant shock—plants that go from shade to full sun wilt dramatically.
Watch for yellowing leaves or wilting—these are signs they're not ready. If you see this, move them back indoors and extend the hardening period by 2-3 days. When seedlings show new growth after their longest outdoor session, they're ready for the garden. Plant in well-drained soil at the same depth they were growing in containers, and water deeply at the base to encourage root establishment.
Tips & tricks for vigorous green bean seedlings
These proven techniques will help you achieve the fast, bushy green bean seedlings you're after—without the common pitfalls that slow down growth or lead to weak plants.
Temperature Control: Maintaining that 80-85°F range is critical for the rapid germination we're targeting. If your home runs cooler than 70°F, invest in a seedling heat mat—it's the difference between sprouts appearing in 5-7 days versus waiting 2-3 weeks. I've seen germination times double when heat mats aren't used, especially in basements or north-facing rooms. The key is consistency; even a few degrees below 70°F can significantly delay those first green shoots.
Humidity Management: That 85-90% humidity under the plastic bag works wonders for speeding up germination, but it's a double-edged sword. Check for condensation daily—if you see water droplets forming, open the bag for exactly 10 minutes to prevent mold. I've lost entire trays to damping-off when I forgot this step. The goal is to maintain that humid environment while preventing fungal growth that can kill seedlings overnight.
Light Transition Strategy: When moving seedlings from the plastic bag to grow lights, make the transition gradual over 12-14 hours. Start with 6 hours of light on day one, then increase by 2 hours daily until reaching full 12-14 hours. This prevents the shock that causes leggy growth. I've seen seedlings stretch from 1 inch to 3 inches in just 48 hours when light exposure is too abrupt—always better to grow strong stems than race for height.
Thinning Technique: When thinning to the strongest plant at 2 inches tall, use clean scissors to snip at soil level rather than pulling. This prevents disturbing the roots of your remaining seedling. I've found that seedlings thinned this way grow 20% faster than those pulled by hand, which often damages root systems. The key visual cue is looking for the plant with the thickest stem and darkest green leaves—those are your winners.
Pro Tips for Green Beans Seedling
- These proven techniques will help you achieve the fast, bushy green bean seedlings you're after—without the common pitfalls that slow down growth or lead to weak plants.
- Temperature Control: Maintaining that 80-85°F range is critical for the rapid germination we're targeting.
- Humidity Management: That 85-90% humidity under the plastic bag works wonders for speeding up germination, but it's a double-edged sword.
Frequently asked questions
Got questions about growing green bean seedlings?
Here are answers to the most common ones to help you get started with confidence!
How long does it take for green bean seedlings to sprout?
Green bean seeds typically sprout in 5–10 days under ideal conditions—warm soil (70–85°F) and consistent moisture. If your soil is cooler, sprouting may take up to 2 weeks. Use a heat mat if needed to speed things up!
When is the best time to plant green bean seeds outdoors?
Plant seeds 1–2 weeks after the last frost when soil temps reach at least 60°F. For cooler climates, start indoors 4–6 weeks before transplanting. Avoid planting too early—cold soil can stunt growth or cause rot.
Can I reuse soil from last year’s green bean seedlings?
Reusing soil isn’t recommended unless you sterilize it first. Green beans are prone to fungal diseases like root rot. Mix fresh potting soil with compost (50/50) or use a soilless seed-starting mix to prevent issues.
Why are my green bean seedlings turning yellow or wilted?
Yellowing leaves often signal overwatering, poor drainage, or nutrient deficiency. Wilting can mean underwatering or heat stress. Check soil moisture (top inch should be dry), ensure pots have drainage holes, and avoid cold drafts.
What’s the fastest way to get bushier green bean plants?
For bushier plants, thin seedlings to 2–3 inches apart and use low-nitrogen fertilizer (like 5-10-10) when true leaves appear. Prune side shoots if overcrowded, and ensure 6–8 hours of sunlight daily.
Wrapping up and next steps
Growing lush, fast-sprouting green bean seedlings is totally within your reach—just follow the right tricks! With the right soil, spacing, and a little patience, you’ll be harvesting crisp, homegrown beans in no time. Don’t let hesitation hold you back—grab those seeds and get planting!
Ready to take the next step? Start small—try a few pots or a small garden bed to build confidence, then expand as you gain experience. Happy gardening, and enjoy your bushy, thriving green beans! 🌱🌿