
Vegetables
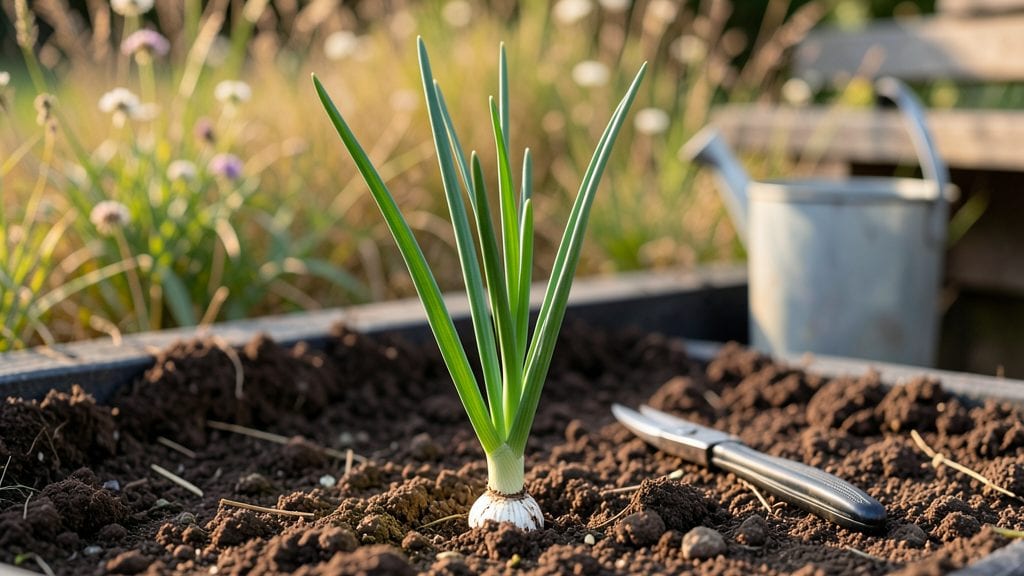
Growing green onion seedlings from seed is the fastest way to get fresh scallions on your table in just 4 weeks—no waiting for store-bought plants to mature.
I’ve grown them every spring for years, and the difference between homegrown and store-bought is shockingly noticeable: crisp, tender, and packed with flavor. The key is starting them indoors or in a sunny spot where they’ll get consistent moisture and light.
You’ll need a shallow container, seed-starting mix, and patience for a few weeks of close attention. Green onions tolerate crowding, so you can plant them 2 inches apart in rows spaced 6 inches apart.
Keep the soil moist but not soggy—they hate drying out—and place them in full sun (6+ hours daily). Most beginners overwater or let them dry out, which stunts growth, so check soil moisture daily.
By week 3, you’ll see 6-inch-tall seedlings ready for thinning or transplanting. Snip the outer leaves as needed for fresh use, and let the roots grow longer for thicker scallions. The first harvest comes in 4 weeks, and if you keep them going, you’ll get continuous harvests for months.
It’s the easiest way to always have fresh scallions on hand.
Works for both indoor windowsills and outdoor beds—just adjust sunlight and spacing. Here’s how to keep them thriving from seed to harvest without a single failure.
📚 In This Guide
- What you need
- Instructions
- Tips and common mistakes
- Wrapping up and next steps
What you need
- ● Green onion seeds (scallion seeds) – 1 packet (approx. 50-100 seeds) or pre-sprouted seeds for faster growth.
- ● Seed-starting trays or small pots – 4-6" deep with drainage holes (biodegradable pots work too!).
- ● High-quality seed-starting mix – Lightweight, sterile, and well-draining (avoid garden soil).
- ● Watering can or spray bottle – With a fine mist setting to keep seeds moist without overwatering.
- ● Grow lights or sunny windowsill – 6-8 hours of light daily (south-facing windows or LED grow lights work best).
- ● Plant labels – To track planting dates and varieties (use popsicle sticks or small tags).
- ● Fertilizer (balanced or organic) – Diluted liquid fertilizer (e.g., fish emulsion) every 2 weeks for extra nutrients.
- ● Humidity dome or plastic wrap – To retain moisture until germination (remove once sprouts appear).
- ○ Heat mat (optional) – For faster germination if your space is cool (70-75°F ideal).
- ● Scissors or pruners – For harvesting mature seedlings (clean cuts prevent damage).
Step-by-step instructions for growing green onion seedlings
Here’s how to grow vigorous green onion seedlings that’ll deliver fresh scallions in just four weeks.
Prepare Containers and Planting Medium
Use shallow containers like a seed tray or even a repurposed takeout container with drainage holes. Fill each cell or section with a lightweight, well-draining seed-starting mix—never garden soil, which can compact and suffocate young roots. Moisten the mix until it’s damp but not soggy, like a wrung-out sponge.
Press the soil down lightly with your fingers to eliminate air pockets, then create small furrows about ¼ inch deep using a pencil or your fingernail. Space the furrows ½ inch apart—this gives seedlings room to establish without crowding. I like to label each container with the date to track growth progress.
Sow Seeds and Maintain Ideal Conditions
Place 2-3 seeds per furrow, spacing them 1 inch apart—this ensures you’ll have multiple seedlings to thin later. Cover the seeds lightly with a thin layer of soil, just enough to obscure them from view. Gently pat the soil surface to secure the seeds in place.
Cover the container with a clear plastic dome or plastic wrap to retain warmth and humidity, which speeds up germination. Place the container in a warm spot with a consistent temperature of 65-75°F. You’ll see the first sprouts in 7-10 days, but don’t be surprised if it takes a few extra days in cooler conditions.
Thin Seedlings and Provide Optimal Light
Once seedlings reach 2 inches tall and show their first true leaves (the second set after the initial cotyledons), thin them to the strongest plant per furrow. Use small scissors or your fingers to snip the weaker seedlings at soil level—this prevents disturbing the roots of the ones you’re keeping.
Move the seedlings to a location with bright, indirect light for the first few days to avoid shocking them. After a week, transition them to a spot with 6-8 hours of direct sunlight daily. If you’re growing indoors, supplement with a grow light kept 4-6 inches above the plants. Watch for leggy growth—a sign they’re stretching toward light—and adjust the light source immediately if needed.
Water and Fertilize for Rapid Growth
Water the seedlings when the top ½ inch of soil feels dry to the touch. Use a spray bottle or watering can with a fine rose to avoid disturbing the soil. Keep the soil consistently moist but never waterlogged—green onions hate soggy roots. I like to water in the morning so excess moisture evaporates by evening.
After the seedlings have been thinned and are actively growing, apply a diluted balanced liquid fertilizer (like a 10-10-10 mix) at half strength. Feed them every 2 weeks to encourage strong, leafy growth. You’ll notice the leaves turning a deeper green and the stems thickening within a week of fertilizing.
Harvest Scallions in 4 Weeks
When the green onion seedlings reach 8-10 inches tall and the stems are about ¼ inch thick, they’re ready to harvest. Use a sharp knife or clean scissors to cut the entire plant just above the soil line. This encourages regrowth, so you can harvest multiple times over the season.
Rinse the scallions gently under cool water to remove any soil, then store them in a sealed container in the refrigerator for up to 2 weeks. For continuous harvests, replant new seeds every 3-4 weeks—this ensures you always have fresh scallions on hand. The key to success is consistency in light, water, and thinning, so don’t rush the process.
Tips & tricks for perfect green onion seedlings
Growing green onion seedlings successfully comes down to a few key details that make all the difference between healthy plants and disappointing failures.
Seed-Starting Mix Quality: The foundation of your seedlings begins with the right planting medium. I can't emphasize enough how important it is to use a lightweight, well-draining seed-starting mix rather than garden soil. Garden soil compacts easily, suffocating tender roots and preventing proper drainage. Look for mixes specifically formulated for seedlings—they're designed to retain just enough moisture while allowing excess to escape. If you're using a repurposed container, make sure it has adequate drainage holes to prevent waterlogging, which can lead to root rot before your seedlings even emerge.
Temperature Consistency: Maintaining that 65-75°F range during germination is crucial, but achieving it can be tricky. If you're growing in a cooler environment, consider using a seedling heat mat beneath your containers. These inexpensive tools provide consistent warmth from below, accelerating germination time. I've found that placing containers on top of refrigerators (which give off heat) or near sunny windows can also help maintain optimal temperatures. Just remember that sudden temperature fluctuations can shock the seeds and delay sprouting.
Light Transition Strategy: The transition from bright indirect light to direct sunlight after one week requires careful attention. I recommend gradually increasing exposure over 3-4 days rather than moving seedlings directly into full sun. Start with 2 hours of direct sunlight on day one, then add an hour each subsequent day until reaching the full 6-8 hours. This gradual acclimation prevents sunburn and helps seedlings develop stronger cell walls. For indoor growers, position your grow light slightly higher than the 4-6 inch recommendation during this transition period to reduce light intensity.
Fertilizer Timing: The instructions specify applying diluted fertilizer every 2 weeks after thinning, but timing is everything with young seedlings. I've learned that waiting until seedlings have developed their first true leaves before fertilizing prevents overloading their delicate systems. When applying that half-strength 10-10-10 mix, water thoroughly first to help distribute nutrients evenly through the soil. This prevents fertilizer burn, which can appear as brown leaf tips or stunted growth. You'll know you're doing it right when you see vibrant green leaves and notice the stems thickening within a week.
Pro Tips for Green Onion Seedling
- Growing green onion seedlings successfully comes down to a few key details that make all the difference between healthy plants and disappointing failures.
- Seed-Starting Mix Quality: The foundation of your seedlings begins with the right planting medium.
- Temperature Consistency: Maintaining that 65-75°F range during germination is crucial, but achieving it can be tricky.
Frequently asked questions
Got questions about growing your own green onion seedlings? You’re not alone! Here are some of the most common queries—and their straightforward answers—to help you grow like a pro.
How soon can I harvest green onion seedlings after planting?
With proper care, you can start harvesting microgreen scallions in just 2–3 weeks, while full-sized green onions take about 4–6 weeks. For continuous harvests, snip outer stems every 2 weeks—they’ll regrow!
Do green onion seedlings need full sun?
While they thrive in full sun (6+ hours/day), seedlings can tolerate partial shade (4–6 hours). Just expect slower growth and smaller stalks. If indoors, place them near a bright window or under grow lights for best results.
Why are my green onion seedlings turning yellow or wilted?
Yellowing leaves often signal overwatering or poor drainage. Wilting may mean underwatering or root stress (e.g., compacted soil). Check soil moisture—it should stay consistently damp but not soggy. Loosen soil if roots look crowded.
Can I grow green onions from store-bought scraps?
Place the white root end in a shallow dish of water (change daily) or soil. Roots regrow in 1–2 weeks, and green shoots follow. Just avoid store-bought onions treated with growth inhibitors (organic scraps work best).
What’s the best way to use harvested green onion seedlings?
Snip seedlings at the base or cut into 1-inch pieces for stir-fries, soups, or garnishes. For regrowth, leave 1–2 inches of stem in the soil. Store harvested seedlings in the fridge (wrapped in a damp paper towel) for up to 1 week.
Wrapping up and next steps
Growing green onion seedlings is a rewarding journey that brings fresh, homegrown flavor to your table in just four weeks! With the right materials, patience, and care, you’ll enjoy a steady harvest of crisp, vibrant scallions—perfect for soups, salads, or garnishes. 🌱
Now that you’re equipped with tips and answers, take the next step: grab your supplies, follow the steps, and watch your seedlings thrive. Happy gardening—your kitchen (and taste buds) will thank you!