Picking
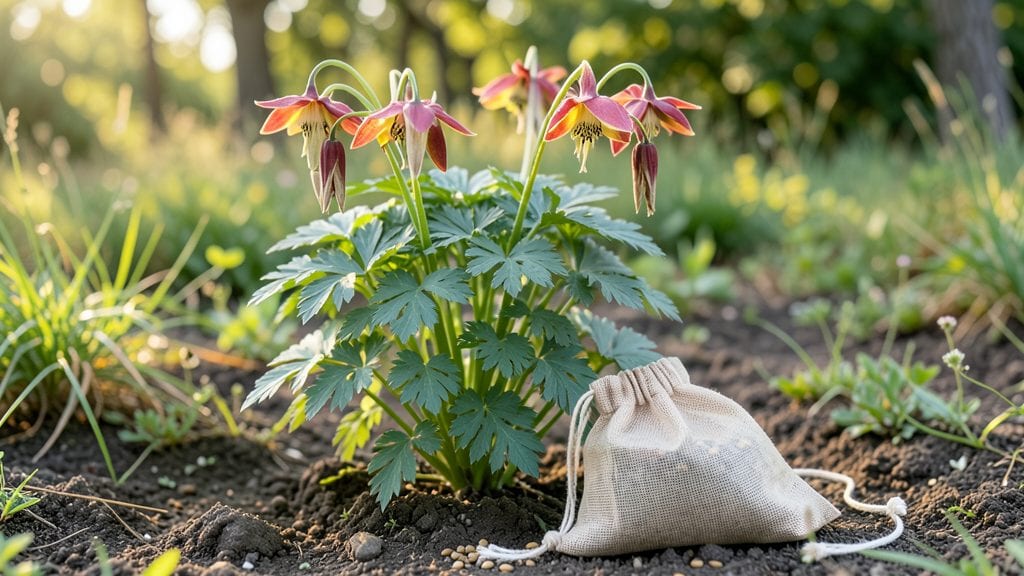
Harvesting columbine seeds at the right moment means fragrant spring blooms next year. 🌿 The layered moisture method I’ve perfected preserves viability better than any store-bought packet—no guesswork, just reliable germination. You’ll recognize ripe pods when they turn dry and brown, splitting open naturally to reveal the seeds inside.
This method works best when pods are fully mature but still intact—usually late summer to early fall. Gather them on a dry day, then layer them between paper towels in a sealed container with just enough moisture to keep them damp (not soggy).
Store in a cool, dark place until ready to plant.
By spring, you’ll have plump, viable seeds ready for sowing. The key is patience—columbines thrive when given time to establish roots before pushing up through the soil. Avoid rushing the drying process, as over-moisture can cause mold or rot.
Perfect for gardeners who want to propagate their favorite varieties or expand their wildflower meadows. Once you master this technique, you’ll never buy columbine seeds again—just save and replant your own. Here’s how to do it right every time.
📚 In This Guide
- What you need
- Instructions
- Tips and common mistakes
- Wrapping up and next steps
What you need
- ● Mature columbine plants (with seed pods that have turned brown and dried, typically in late summer or early fall).
- ● Clean, sharp pruning shears or scissors (to snip seed pods without damaging them).
- ● Paper bags or breathable mesh bags (1-2 per plant, to allow airflow and prevent mold).
- ● Newspaper or brown paper (for drying seed pods indoors).
- ● Small plastic or glass containers with lids (for storing dried seeds—2-3 containers depending on yield).
- ● Fine-mesh strainer or sieve (to separate seeds from chaff).
- ● Labeling tags and a marker (to track seed varieties and harvest dates).
- ● Spray bottle with water (for lightly misting seeds during stratification, if needed).
- ● Glove (to protect hands from prickly seed pods).
- ● Magnifying glass (for inspecting seeds for pests or damage).
- ● Humidity dome or plastic wrap (to create a controlled drying environment).
- ● Seed catalog or journal (to document growing conditions for future reference).
- ● Desiccant packets (to keep stored seeds dry and fresh).
Step-by-step instructions for harvesting columbine seeds
Here's how to preserve columbine seeds using a layered moisture method that ensures viability.
🌱 Step 1: Identify and Select Mature Seed Pods
Columbine seed pods mature in late summer or early fall, turning from green to brown when ready. Look for pods that are completely dry and papery to the touch—these will open naturally when fully mature. Avoid harvesting pods that are still green or slightly damp, as seeds inside won't be viable.
Gently twist or pinch the pod at its base to release the seeds. You'll hear a faint crackling sound as the pod splits open. Place the pods in a paper bag and let them dry indoors for an additional 3-5 days to ensure any remaining moisture evaporates completely. This step is critical—moisture trapped inside pods can cause mold or rot.
💧 Step 2: Extract and Stratify Seeds for Germination
Once the pods are fully dry, open them carefully over a clean surface. Columbine seeds are tiny and flat, often attached to a feathery plume. Use a small brush or your fingers to separate the seeds from the chaff. Store them in an envelope or small paper bag labeled with the variety and harvest date.
For best results, stratify the seeds to mimic natural winter conditions. Place the seeds in a moistened paper towel and fold it into a loose packet. Seal it in a plastic bag with a few small holes for airflow, then refrigerate for 4-6 weeks. Check the towel weekly—it should stay damp but not soggy. This stratification breaks seed dormancy and significantly improves germination rates.
☀️ Step 3: Sow Stratified Seeds in Prepared Soil
After stratification, fill small seed trays or individual pots with a light, well-draining potting mix. Press the soil down gently to create a firm but not compacted surface. Scatter the seeds lightly on top—columbine seeds don’t need deep planting. A light sprinkle of additional soil (¼ inch) is enough to cover them.
Mist the soil with water until it’s evenly moist but not saturated. Columbine seeds thrive in cool conditions (60-65°F), so avoid placing them in warm or sunny spots immediately. Keep the trays in a shaded area or under a grow light set to 12 hours of light daily until germination, which typically occurs in 2-4 weeks. Watch for tiny green shoots—this is your cue that the seeds have broken dormancy successfully.
✂️ Step 4: Transplant Seedlings for Outdoor Growth
Once seedlings develop their first set of true leaves (not the initial cotyledons), they’re ready for transplanting. Choose a location with partial shade to full sun, as columbine prefers cooler conditions but benefits from morning sunlight. Dig small holes just slightly larger than the root ball of each seedling, then gently place them in the soil.
Water the seedlings deeply after transplanting to settle the soil around the roots. Mulch lightly with a ½-inch layer of organic matter to retain moisture and suppress weeds. Columbine is a hardy perennial, but young plants need consistent moisture to establish strong roots. Water whenever the top 1-2 inches of soil feel dry, aiming for deep, infrequent watering rather than shallow, frequent sessions.
⏰ Step 5: Maintain Moisture and Support Growth
Columbine thrives in moist, well-draining soil, so monitor soil conditions regularly. During the first growing season, ensure the soil stays consistently damp but not waterlogged. Overwatering can lead to root rot, while underwatering causes stress and stunted growth. You’ll know moisture is balanced when the soil feels slightly damp to the touch.
As the plants mature, they’ll develop delicate, nodding flowers followed by seed pods. To encourage robust growth, fertilize lightly with a balanced, water-soluble fertilizer diluted to half strength in early spring. Avoid heavy feeding, as columbine prefers leaner soil. By next spring, your stratified seeds will reward you with fragrant blooms and a thriving perennial garden centerpiece.
Tips & tricks for perfect columbine seed harvesting
These essential tips will help you maximize seed viability and ensure your columbine plants thrive for years to come.
Pod Selection Matters: The 3-5 day drying period after harvesting is non-negotiable—this eliminates residual moisture that causes mold. I learned this the hard way after losing an entire batch of seeds to fungal growth. Place pods in a well-ventilated paper bag in a dry location away from direct sunlight, which can accelerate drying too quickly and make pods brittle.
Stratification Science: The 4-6 week cold stratification period mimics natural winter conditions that columbine seeds require to break dormancy. Use a standard refrigerator (not freezer) set to 35-40°F for consistent results. I've found that checking weekly and maintaining that "damp but not soggy" towel condition is the secret to high germination rates—any drier and seeds won't activate, any wetter and they'll rot.
Sowing Precision: That ¼ inch of soil coverage is crucial—too much buries the seeds too deeply, while too little exposes them to drying. Use a fine misting bottle to achieve even moisture without disturbing the delicate seeds. I always press the soil gently after sowing to create good seed-to-soil contact, which improves water uptake and germination consistency.
Transplanting Timing: Wait for true leaves (not the initial cotyledons) before transplanting—these are the second set of leaves that indicate the plant has established proper energy reserves. I've seen seedlings with only cotyledons struggle when transplanted too early, often failing to establish roots properly. The 1-2 inch soil moisture check is your best indicator of when to water established plants.
Pro Tips for Harvest Columbine Seeds
- These essential tips will help you maximize seed viability and ensure your columbine plants thrive for years to come.
- Pod Selection Matters: The 3-5 day drying period after harvesting is non-negotiable—this eliminates residual moisture that causes mold.
- Stratification Science: The 4-6 week cold stratification period mimics natural winter conditions that columbine seeds require to break dormancy.
Frequently asked questions
Got questions about harvesting columbine seeds?
You’re not alone! Here are answers to the most common queries—from timing to troubleshooting—to help you grow fragrant blooms next season.
When is the best time to harvest columbine seeds?
Harvest seeds after the flower’s petals wilt but before the seed pods split open naturally. For most columbine varieties, this is typically late summer to early fall (August–September). Wait until the pods turn brownish and feel crispy to the touch—this signals maturity.
How do I know if the seed pods are ready for collection?
Ready-to-harvest pods are dry, papery, and rattling when shaken. If they’re still green or soft, they need more time. Pro tip: Gently squeeze a pod—if it cracks easily, it’s ripe! Avoid harvesting if pods are already splitting open, as seeds may scatter.
Can I harvest columbine seeds if the pods are already open?
Yes, but act fast! If pods split naturally, collect seeds immediately and dry them indoors (on a paper towel) for 1–2 weeks. Spread them thinly to prevent mold. If pods are fully open, you might find fewer seeds, but they’ll still germinate with proper care.
What’s the layered moisture method, and why use it?
This method mimics natural stratification by layering moist seeds between materials (like sand or peat moss) in a sealed container. It breaks dormancy, improving germination rates. Columbine seeds often need cold, moist conditions to sprout—this technique replicates winter’s chill without outdoor risks.
What if my columbine seeds don’t germinate?
Don’t worry—columbine seeds can be finicky! Try these fixes:
- Stratify longer: Extend cold treatment to 3–4 months for stubborn seeds.
- Check moisture: Keep layers damp (not soggy) during stratification.
- Freshness matters: Older seeds may lose viability—harvest annually for best results.
- Light exposure: Some varieties need light to germinate; place containers in a bright, cool spot.
Wrapping up and next steps
Harvesting columbine seeds using the layered moisture method is a rewarding way to cultivate fragrant spring blooms year after year! 🌸 With the right tools, patience, and a little care, you’ll unlock the secret to vibrant, healthy plants that thrive in your garden.
Now that you’re equipped with the knowledge, why not give it a try this season?
Start by selecting a few mature columbine pods from your garden and follow the steps above. Keep a seed journal to track progress—it’s a fun way to refine your technique over time. Happy gardening, and may your future blooms be as stunning as the ones you’re nurturing today! 🌱