
Picking
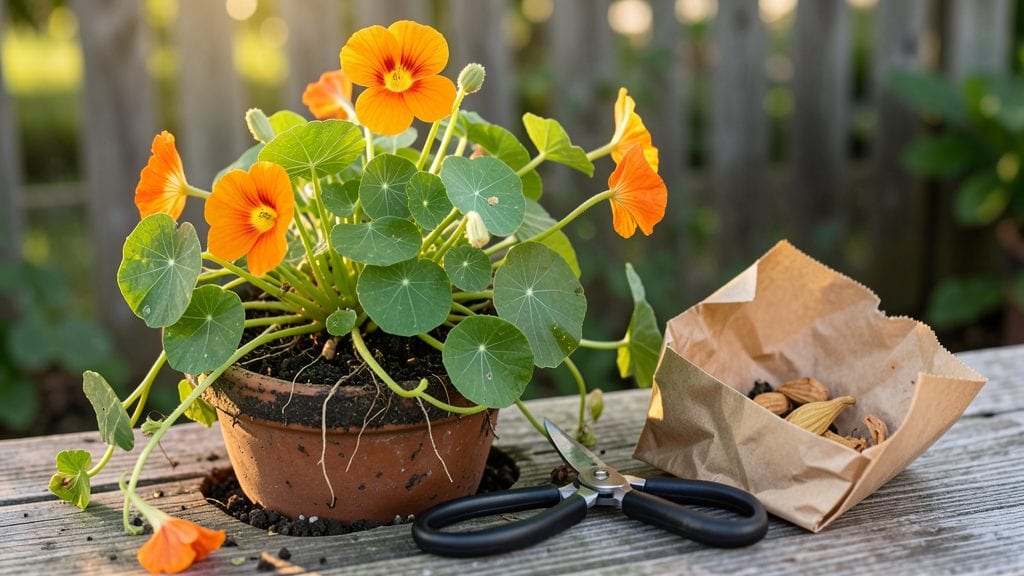
Harvesting nasturtium seeds at the perfect moment ensures you’ll save next year’s vibrant blooms—just wait for those papery pods to turn crispy and brown before they burst open. ✨ scattering seeds everywhere.
My first attempt ended with half my harvest lost to squirrels, but once I mastered the timing, I’ve never bought nasturtium seeds again.
You’ll need just three things: a pair of sharp scissors, a brown paper bag for drying, and a cool, dark spot for storage. The pods turn from green to dry and papery, splitting open on their own—this is your cue to act.
Cut them carefully when they’re fully dry but before they release seeds naturally. Nasturtium seeds stay viable for up to five years if stored properly, making this a true long-term investment.
Once dried, simply crush the pods to release the seeds, then spread them on the paper bag to finish drying completely. Store them in an airtight container in a cool place, and you’ll have fresh, organic seeds ready for planting come spring.
The payoff? A garden bursting with the same cheerful orange and red blooms year after year, all from seeds you saved yourself.
This method works equally well for both edible nasturtium varieties and ornamental types, adapting to any garden size or climate. Whether you’re a beginner or a seasoned gardener, saving seeds this way cuts costs and ensures you’ll always have your favorite varieties on hand.
📚 In This Guide
- What you need
- Instructions
- Tips and common mistakes
- Wrapping up and next steps
What you need
- ● Mature nasturtium pods: Wait until the seed pods turn papery and brown (they’ll pop open on their own or with a gentle touch). Aim for 5–10 healthy pods per variety for a reliable harvest.
- ● Paper bags or envelopes: 1–2 per pod (brown kraft paper works best—it’s breathable and acid-free). Label each with the variety name and harvest date using a pencil or marker (ink can fade over time).
- ○ Small tweezers or fingers: For delicately plucking seeds from pods (optional but helpful for fussy seed handlers!).
- ● Dry, well-ventilated space: A cool (60–70°F), dark area like a pantry, basement, or shed. Humidity is the enemy—aim for 30–50% relative humidity.
- ● Fine-mesh sieve or sifter: A #40–60 mesh (0.25–0.012 mm openings) to separate seeds from chaff. A colander in a pinch!
- ● Seed drying tray: A wire mesh screen or baking sheet lined with parchment paper to spread pods/seeds for even drying.
- ● Desiccant packets: Silica gel or uncooked rice in a small jar to absorb excess moisture if storing in humid climates.
- ● Digital scale: For weighing seeds (aim for 0.1–0.5 oz per envelope for optimal germination).
- ● Seed catalog or notebook: To log germination rates, planting dates, and variety notes for future reference.
Step-by-Step instructions for harvesting nasturtium seeds
Here’s how I save seeds from my nasturtiums—simple, foolproof, and ready for next spring.
🌱 Step 1: Select and Monitor Mature Seed Pods
Wait until the seed pods turn from green to a papery brown color—this means they’re fully mature and ready for harvest. I usually check mine in late summer or early fall, depending on when they bloomed. Pick pods that feel dry and brittle to the touch; if they’re still slightly green, give them another week or two.
Gently twist the pods off the stem—they should come away easily. Avoid pulling too hard, or you might damage the plant. Place them in a paper bag or envelope to catch any seeds that might fall out during transport. This is the moment that matters: harvesting too early means seeds won’t store well, but waiting too long risks them popping open on their own.
💧 Step 2: Dry the Seeds Completely
Spread the seed pods on a clean, dry surface in a warm, well-ventilated area. I use a baking sheet lined with parchment paper or an old window sill where they can dry undisturbed. Keep them out of direct sunlight—this prevents overheating and preserves seed viability. It usually takes about 1-2 weeks for the pods to fully dry and split open on their own.
Once the pods have cracked open, shake them gently over a bowl or piece of paper to release the seeds. Nasturtium seeds are large and flat, with a distinctive orange or brown color. Discard any pods that don’t open or contain moldy seeds. This ensures you’re only saving the best-quality seeds for next year’s garden.
☀️ Step 3: Store Seeds in a Cool, Dry Place
Transfer the dried seeds into a small envelope or airtight container. I label mine with the variety name and the year harvested—trust me, you’ll forget by spring! Store them in a cool, dark place, like a pantry or seed drawer. The key here is consistent dryness; even slight moisture can cause seeds to spoil.
Nasturtium seeds stay viable for 3-4 years if stored properly, but they’re best used within the first year for maximum germination. Check on them occasionally to make sure no moisture has crept in. If you notice condensation or mold, transfer them to a new container immediately.
⏰ Step 4: Test Germination Before Planting
Before you plant next spring, do a quick germination test to ensure your seeds are still good. Moisten a paper towel, place 5-10 seeds on it, and fold it over. Store the towel in a sealed plastic bag in a warm spot, like on top of the fridge. Check daily for sprouts—you should see them in 5-7 days if the seeds are viable.
If fewer than half sprout, your seeds may have lost potency, and you might want to order fresh ones. But if most of them germinate, you’re ready to plant! This step saves you from wasting time and effort on seeds that won’t grow. I always do this test—it’s a small effort that pays off big in the garden.
Tips & tricks for perfectly harvested nasturtium seeds
Saving nasturtium seeds is simpler than you think—here’s how to avoid common mistakes and maximize your yield.
Timing is Everything: In Step 1, when harvesting those papery brown pods, don’t rush! If pods are still green, wait another week—they won’t dry properly, and seeds may not store well. I’ve learned this the hard way: harvesting too early means seeds lose viability faster. Look for pods that feel dry and brittle when you gently squeeze them. This ensures you’re collecting seeds at peak freshness for next year’s garden.
Drying Strategy: For Step 2, the drying process is where most people go wrong. Spread pods on a baking sheet in a warm, well-ventilated spot—never in direct sunlight, which can overheat them. I use an old window sill during cool mornings for consistent airflow. If you’re impatient, you might be tempted to speed up drying with heat, but that risks killing the seeds. Trust the 1-2 week timeline—it’s the only way to guarantee viability.
Storage Wisdom: In Step 3, labeling your containers might seem trivial, but I can’t tell you how many times I’ve forgotten what variety I saved! Use a permanent marker to write the variety name and harvest year directly on the envelope or container. Store in a cool, dark place like a pantry or seed drawer. The key is consistent dryness—even a little moisture can cause mold. I check my seeds every few months to make sure no condensation has formed.
Germination Test: Don’t skip the 5-7 day germination test in Step 4! This simple test saves you from planting seeds that might not grow. Use a warm spot like top of the fridge for consistent temperature. If fewer than half sprout, your seeds may have lost potency. I’ve planted untested seeds before and wasted weeks waiting for germination that never came—this test is your insurance policy for spring planting success.
Pro Tips for Harvesting Nasturtium Seeds
- Saving nasturtium seeds is simpler than you think—here’s how to avoid common mistakes and maximize your yield.
- Timing is Everything: In Step 1, when harvesting those papery brown pods, don’t rush!
- Drying Strategy: For Step 2, the drying process is where most people go wrong.
Frequently asked questions
Got questions about harvesting nasturtium seeds? You’re not alone! Here are some of the most common ones—plus quick, actionable answers to keep your gardening game strong.
When is the best time to harvest nasturtium seeds?
The ideal time is late summer to early fall, once the seed pods turn papery brown and start splitting open. If you wait too long, they’ll scatter seeds everywhere—so check them weekly! Harvest on a dry day to prevent mold during drying.
What if my nasturtium pods don’t open naturally?
No worries! If pods stay closed, gently squeeze them or use clean scissors to snip them open. Spread seeds on a tray to dry—they’ll still germinate just fine. Overripe pods may shatter, so act fast to avoid seed loss.
How long do harvested nasturtium seeds stay viable?
Stored properly in a cool, dry place (like a sealed envelope or jar), nasturtium seeds last 2–3 years. Label them with the harvest date to track freshness. For best results, use seeds within 1 year for peak germination.
Can I harvest seeds from store-bought nasturtium flowers?
Technically yes, but hybrid varieties (like ‘Alaska Mix’) may not grow true to type. For reliable seeds, choose heirloom or open-pollinated cultivars (e.g., ‘Empress of India’). Save seeds from organic, untreated plants for best results.
What should I do if my seeds mold during drying?
Mold means high humidity—your drying spot is too damp. Fix it by:
- Moving seeds to a dry, well-ventilated area (like a sunny windowsill).
- Using a fan on low to circulate air.
- Discarding moldy seeds and sterilizing your workspace with rubbing alcohol.
Pro Tip: Test germination before planting!
Sprinkle a few seeds on damp paper towels in a sealed bag. Check for sprouts in 5–7 days. If 80%+ germinate, your batch is ready to sow. Low germination? Try stratifying (chilling seeds for 2 weeks) to mimic winter conditions.
Wrapping up and next steps
Harvesting nasturtium seeds is a simple yet rewarding way to ensure a vibrant garden next season! With just a few tools and a little patience, you can preserve these easy-to-grow seeds for free, homegrown blooms.
Whether you’re a seasoned gardener or a beginner, this dry-storage method makes seed-saving effortless—so grab those pods, let them dry, and get ready to plant with confidence.
Now that you’re equipped with the know-how, why not share your success? Try swapping seeds with fellow gardeners or experimenting with different nasturtium varieties. Happy growing! 🌱✨