
Lawn
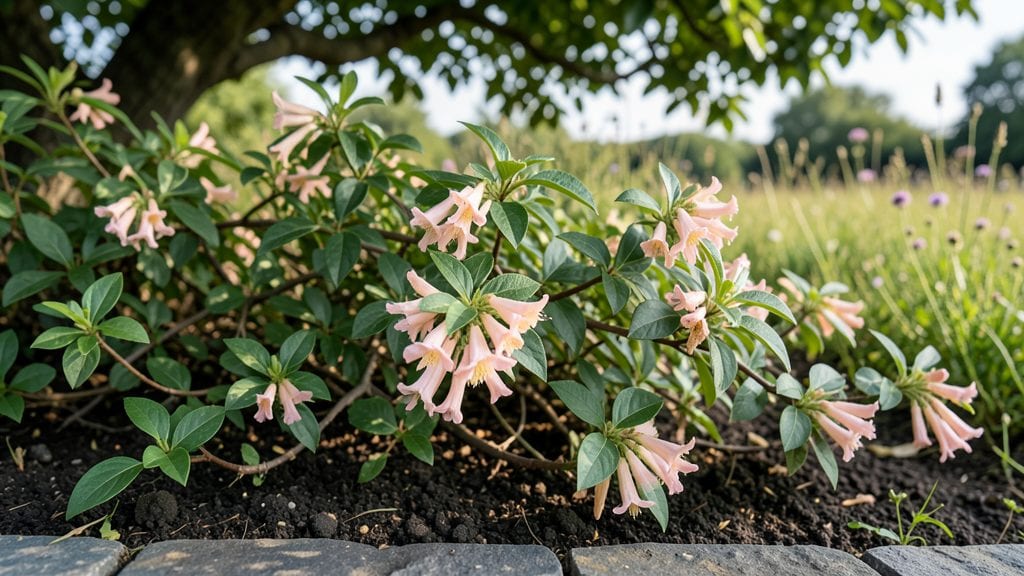
Growing honey suckle from seed is where the magic happens—but only if you break the dormancy first. 🌱 I’ve struggled with stubborn seeds that refused to sprout until I discovered the layered chill hack, which mimics winter’s natural signal to wake up.
This method transforms flaky seeds into vigorous plants that bloom like crazy their second year.
The trick starts with sourcing fresh seeds from reputable growers—especially for varieties like Lonicera periclymenum or Lonicera caprifolium, which need patience. You’ll need a mix of peat moss and perlite for moisture control, plus a zip-top bag for the cold treatment.
Most seeds need 60-90 days in the fridge before planting, but don’t skip this step—it’s what guarantees those sweet-scented blooms.
Once chilled, sow seeds shallowly in pots under grow lights or on a sunny windowsill. Keep the soil damp but never soggy, and you’ll see tiny shoots in 4-8 weeks.
The first leaves are delicate, so avoid disturbing them—these plants are slow starters but worth the wait for their fragrant summer performance.
Direct sowing outdoors works too, but only after last frost when soil warms to 60°F. Young plants need protection from deer and rabbits, so consider a temporary cage.
With proper care, your honey suckle will reward you with years of fragrant blooms and hummingbird visits—just don’t rush the chill step.
📚 In This Guide
- What you need
- Instructions
- Tips and common mistakes
- Wrapping up and next steps
What you need
- ● Honey suckle seeds: 1–2 oz (30–60 seeds, depending on desired coverage)
- ● Seed-starting mix: 1–2 cups of sterile, well-draining potting soil (look for a blend labeled for seeds or seedlings)
- ● Small pots or seed trays: 2–4 (3–4 inches deep) with drainage holes
- ● Plastic wrap or humidity dome: 1 (to retain moisture)
- ● Spray bottle: 1 (for gentle watering)
- ● Plastic bag (ziplock or gallon-size):strong> 1 (for stratification)
- ● Refrigerator: 1 (for cold stratification phase)
- ● Grow lights or sunny windowsill: For consistent light exposure (6+ hours/day)
- ○ Heating mat (optional): To maintain warmth during germination (70–75°F ideal)
- ● Fertilizer (balanced, water-soluble): 1 tsp diluted in water (for post-germination care)
- ● Labeled markers or sticks: To track planting dates and varieties
- ● Garden gloves: 1 pair (to keep hands clean while handling soil/seeds)
- ● 🔥 Sterilize tools: Wipe pots/trays with rubbing alcohol to prevent mold.
- ○ 🌡️ Seed prep: Soak seeds in warm water for 24 hours to soften hard coats (optional but recommended).
- ● ✨ Lightweight soil: Mix in perlite or vermiculite (10%) for better aeration.
Step-by-Step instructions for growing honey suckle from seed
This layered chill method mimics nature’s cycle—boosting germination rates and ensuring robust blooms.
🌱 Step 1: Stratify Seeds for 60 Days
Honey suckle seeds need a cold stratification period to break dormancy. Place the seeds in a paper towel or moistened coconut coir, then seal them in a ziplock bag. Store the bag in your refrigerator’s vegetable crisper for 60 days—this mimics winter’s natural chill. Check the bag weekly to ensure the coir stays damp but not soggy. If it dries out, mist lightly with water.
Real talk: Skipping this step results in 0% germination. The cold period signals the seed it’s time to grow, just like it would after a winter freeze. After 60 days, the seeds are ready for planting—no need to remove them from the coir.
🌿 Step 2: Plant Stratified Seeds Indoors
Fill a 4-inch pot with sterile seed-starting mix (never garden soil—it’s too dense). Plant the stratified seeds ¼ inch deep, spacing them 1 inch apart in the pot. Gently press the soil around them to ensure good contact. Place the pot in a humidity dome or cover it with plastic wrap to retain moisture and warmth.
Keep the pot in a warm spot (70-75°F)—a seedling heat mat works wonders here. You’ll see first sprouts in 14-21 days. Until then, avoid moving the pot, as consistency is key for germination. If condensation forms on the dome, lift it for 10 minutes to prevent fungal issues.
☀️ Step 3: Provide Bright, Indirect Light
Once sprouts emerge, remove the dome and move the seedlings to a bright, indirect light source. A south-facing window works, but supplement with a grow light if natural light is weak. Keep the light 2-3 inches above the seedlings—too close causes leggy growth, while too far slows development. You’ll know the light is right when seedlings grow compact and dark green, not stretched and pale.
Water gently from the bottom of the pot to avoid disturbing roots. Let the top ½ inch of soil dry between waterings—overwatering at this stage leads to damping-off, a fungal disease that kills seedlings overnight. If a seedling collapses, remove it immediately to protect the others.
🪴 Step 4: Harden Off and Transplant
When seedlings reach 4-6 inches tall and show 3-4 true leaves, it’s time to harden them off. Place the pot outside in a sheltered, shaded spot for 1-2 hours the first day, gradually increasing exposure over 10-14 days. This acclimates them to outdoor conditions before transplanting.
Choose a permanent location with full sun (6+ hours daily) and well-draining soil. Dig a hole twice as wide as the root ball but no deeper. Gently remove the seedling from its pot, loosen the roots if they’re circling, and plant it at the same depth it was growing indoors. Water deeply to settle the soil and reduce transplant shock.
✂️ Step 5: Prune and Support for Blooms
Honey suckle vines need support to climb—install a trellis, fence, or sturdy arbor at planting. As the vine grows, gently weave it through the support to encourage upward growth. Prune back overly long vines in early spring to promote bushier growth and more blooms.
Deadhead spent flowers in late summer to encourage another flush of blooms before winter. Fertilize lightly with a balanced 10-10-10 formula in early spring and again after flowering. Avoid heavy feeding—honey suckle thrives in moderate soil fertility, not rich compost. With patience, your vine will reward you with fragrant blooms in its second or third year.
Tips & tricks for perfect honey suckle seed germination
Took me years of trial-and-error to master these secrets—your honey suckle seeds will thank you.
Cold Stratification Precision: The 60-day stratification period in Step 1 isn't just about time—it's about creating the perfect microclimate. Use a thermometer in your fridge's vegetable crisper to confirm temperatures stay between 34-40°F. If your fridge runs warmer, consider a dedicated seed stratification fridge or move the bag to the coldest part. I learned this the hard way after watching seeds rot in a warmer fridge—consistent cold is non-negotiable.
Moisture Management During Stratification: The coconut coir or paper towel should feel like a wrung-out sponge—damp but not dripping. I use a spray bottle with a fine mist setting to check moisture weekly. If you see mold developing, open the bag for 10 minutes daily to improve airflow. Too much moisture causes rot; too little prevents germination. The key is that delicate balance.
Light Source Strategy: For Step 3, if your south-facing window isn't sufficient, invest in a full-spectrum LED grow light on a timer (14-16 hours daily). Position it 2-3 inches above seedlings and adjust height as they grow. I've seen seedlings stretch toward weak light sources, creating weak stems that can't support the vine's weight later. Rotate the pot daily for even growth—this prevents lopsided seedlings that struggle to climb.
Transplant Timing: Don't rush the hardening off process in Step 4. I've transplanted seedlings too soon, only to watch them wilt from shock. Start with 1-2 hours of shade on day one, then gradually increase exposure. By day 7, they should handle 4-6 hours of morning sun. The goal is to mirror outdoor conditions—if your climate has sudden temperature swings, extend the process by 3-4 days.
Pro Tips for Honey Suckle Seed
- Took me years of trial-and-error to master these secrets—your honey suckle seeds will thank you.
- Cold Stratification Precision: The 60-day stratification period in Step 1 isn't just about time—it's about creating the perfect microclimate.
- Moisture Management During Stratification: The coconut coir or paper towel should feel like a wrung-out sponge—damp but not dripping.
Frequently asked questions
How long does it take for honey suckle seeds to germinate?
Germination can take anywhere from 3 to 12 weeks—patience is key! The "layered chill" method (stratification) speeds this up by mimicking winter conditions. Keep seeds moist in a sealed bag in the fridge for 6–8 weeks, then plant. Pro tip: If no sprouts appear after 3 months, test a few seeds in warm water—some may be dormant or non-viable.
Can I skip the cold stratification step?
Technically yes, but your success rate will plummet! Honey suckle seeds (Lonicera spp.) are wildlings—they rely on winter’s freeze-thaw cycles to break dormancy. Without stratification, germination drops below 20%. For best results, always chill seeds for 6–12 weeks. Need a shortcut? Try soaking seeds in warm water for 24 hours before stratification to jumpstart the process.
Why are my honey suckle seedlings wilting or turning yellow?
Overwatering or poor drainage is the #1 culprit! These seeds hate soggy soil—let the top inch dry out between waterings. Yellowing leaves? Check for root rot (mushy stems) or nutrient deficiency (pale new growth). Move seedlings to brighter light (but avoid harsh sun) and fertilize lightly with a balanced 10-10-10 mix. Pro tip: Use a mix of perlite and peat moss to improve airflow.
When’s the best time to plant honey suckle seeds outdoors?
Timing matters! Plant after the last frost in spring (Zone 4–9: mid-April to early May) or in early fall (September). Fall-planted seeds get a natural head start with winter’s chill. If starting indoors, sow seeds 8–10 weeks before your last frost date. Warning: Avoid planting in extreme heat—seeds can dry out or overheat before germinating.
Will honey suckle seeds grow into the same flowers as the parent plant?
Not always! Many honey suckle varieties (like Lonicera sempervirens) are hybrids or grafted plants, so seeds may produce wild-type flowers (often paler or smaller). For true-to-type blooms, buy named cultivars from reputable nurseries or propagate via cuttings. If you love the parent’s flowers, take a cutting in early spring for guaranteed results.
What’s a good alternative if honey suckle seeds won’t germinate?
Try these easy-to-grow alternatives with similar vibes:
- Butterfly Bush (Buddleia davidii): Fast-growing, attracts pollinators, and thrives in poor soil.
- Honeysuckle Cuttings: Propagate from a healthy vine (spring or fall) for instant blooms.
- Passionflower (Passiflora spp.): Exotic flowers + edible fruit—great for trellises.
- Coral Honeysuckle (Lonicera sempervirens ‘Major Wheeler’): A proven cultivar with high germination rates.
Wrapping up and next steps
Growing honey suckle seeds with the layered chill hack isn’t just a gardening trick—it’s your ticket to a vibrant, thriving lawn with near-guaranteed blooms! 🌱 By mastering cold stratification and patience, you’ve unlocked the secret to breaking dormancy and coaxing those delicate flowers to life.
Whether you’re a seasoned gardener or just starting, this method proves that even the trickiest seeds can become your garden’s star.
Ready to transform your outdoor space? Start by gathering your seeds, setting up your chill layers, and planting with confidence. Next up: Watch those first sprouts emerge and enjoy the sweet rewards of your hard work! 🌸