Size
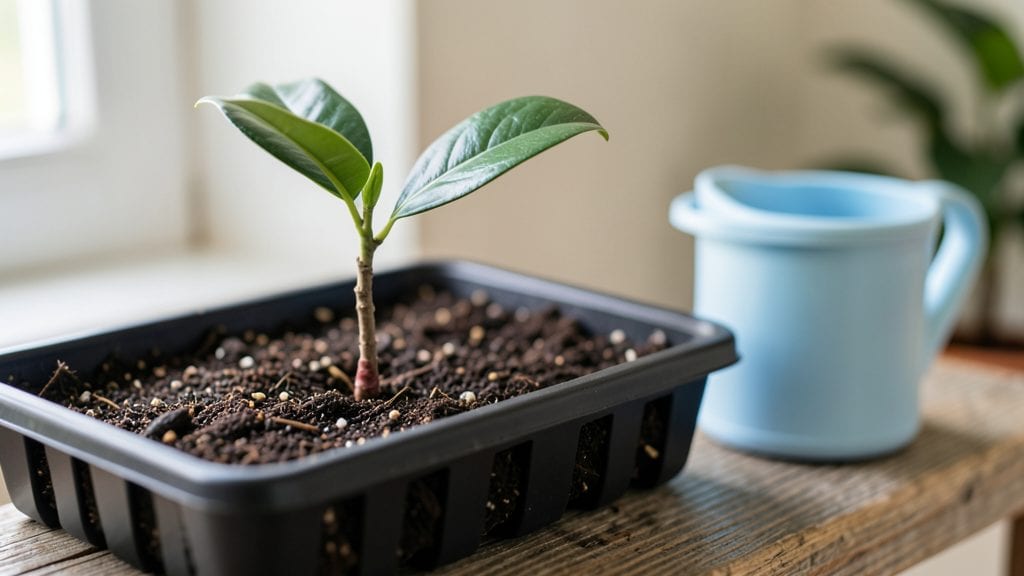
Growing a magnolia seed from scratch is a marathon, not a sprint—those first green shoots can take months to appear. 🌱 I’ve wrestled with impatient germination myself, but cold stratification is the secret weapon that tricks seeds into thinking winter’s passed.
The process mimics nature’s timing, breaking dormancy so you don’t waste years waiting for a seed that might never sprout.
You’ll need a few simple supplies: fresh magnolia seeds (collected in late fall), damp sand or peat moss, a plastic bag, and a refrigerator. The key is patience—stratify seeds for 90-120 days before planting, checking monthly for mold or drying.
Once planted, keep soil consistently moist and light levels bright but indirect until those first leaves push through.
When germination finally happens, expect slow growth—magnolias take their time. Your sapling might only grow a few inches its first year, but with proper care, it’ll develop into a sturdy tree with glossy leaves and that iconic magnolia scent.
The payoff? A tree that could live for centuries, all from a seed you nurtured.
This method works best for Southern magnolia (Magnolia grandiflora) and sweetbay magnolia (Magnolia virginiana), though other species may need adjusted stratification times. Fair warning: not every seed will sprout, but the ones that do reward you with decades of shade and beauty. Ready to start?
📚 In This Guide
- What you need
- Instructions
- Tips and common mistakes
- Wrapping up and next steps
What you need
- ● Magnolia seeds: Fresh, viable seeds (harvested in fall or purchased from a reputable supplier). Aim for 3–5 seeds per attempt for better success rates.
- ● Cold stratification setup: A ziplock bag or paper towel (moistened, not soaking wet).
- ● A plastic container (like a Tupperware) with a lid for sealing.
- ● Refrigerator space (34–40°F / 1–4°C) for 60–90 days.
- ● Potting mix: Well-draining, peat-based or seed-starting mix (avoid garden soil—it’s too dense!). A 4-inch pot per seedling works well.
- ● Small pots or seed trays: With drainage holes (or repurpose yogurt cups with holes poked in the bottom).
- ● Spray bottle: For gentle watering to avoid disturbing seeds.
- ● Humidity dome or plastic wrap: To create a mini greenhouse effect while germinating.
- ● Grow lights or sunny windowsill: Magnolia seeds need bright, indirect light (6–8 hours/day) post-stratification.
- ● Patience! 🐢: Germination can take 3–6 months—sometimes even longer.
- ● Seed scarification tools: Sandpaper (fine-grit) or a knife to nick the seed coat if stratification fails.
- ● Heating mat: For faster germination (keep soil at 70–75°F / 21–24°C).
- ● Fertilizer: A balanced, water-soluble fertilizer (diluted to half-strength) once seedlings sprout true leaves.
- ● Label markers: To track seed varieties and planting dates.
- ● Mulch or bark chips: For outdoor transplants (once seedlings are sturdy).
Step-by-Step instructions for growing magnolia seeds
Here's the foolproof method I use to break through magnolia's stubborn germination barriers.
🌱 Step 1: Harvest and Prepare the Seeds
Collect mature magnolia seeds in late fall after the cones open naturally. The seeds should be plump and brown inside. Remove any remaining fleshy cone material—it can rot during stratification. I soak the seeds in lukewarm water for 24 hours to soften the hard outer shell, which helps speed up the cold treatment process.
After soaking, let them dry completely on a paper towel for 2-3 days in a warm, dry place. This prevents mold when you store them for stratification. You'll know they're ready when the shells feel slightly papery to the touch. Store them in a labeled paper envelope—plastic traps too much moisture.
⏰ Step 2: Perform Cold Stratification
Place the dried seeds in a sealed plastic bag with a small amount of damp peat moss (just enough to keep it slightly moist, not soggy). Seal the bag and refrigerate for 90-120 days at 35-45°F. This mimics winter conditions and breaks the seed's dormancy.
Check the bag monthly—if you see mold or a sour smell, discard those seeds and start fresh. The goal is consistent moisture, not wet conditions. After 3 months, remove the bag and let the seeds sit at room temperature for 1 week to acclimate before planting.
🪴 Step 3: Plant the Stratified Seeds
Fill small pots with a mix of 50% peat moss and 50% perlite—this ensures excellent drainage while retaining enough moisture. Plant each seed ½ inch deep, spacing them 2 inches apart in the pot. Magnolia seeds germinate slowly, so don't be impatient with spacing.
Water gently until moisture seeps from the drainage holes, then place the pots in a shady location with indirect light. Keep the soil consistently moist but never waterlogged—magnolia seedlings hate soggy roots. Germination can take 4-8 weeks, so be patient. You'll see tiny sprouts first, then the first true leaves.
☀️ Step 4: Provide Care for Young Saplings
Once seedlings emerge, move them to a location with bright, indirect light (like a north-facing window). Direct sun at this stage can scorch tender leaves. I use a grow light on a 12-hour cycle if natural light is insufficient—magnolias need consistent light to develop strong stems.
Water when the top inch of soil feels dry, but avoid overhead watering to prevent fungal diseases. Fertilize lightly with a balanced 10-10-10 formula diluted to half strength after 3 months of growth. You'll notice healthy seedlings have thick stems and glossy leaves—anything leggy or pale needs more light.
✂️ Step 5: Transplant and Harden Off
After 1 year of growth, when seedlings reach 12-18 inches tall, transplant them to individual 5-gallon pots with well-draining soil. Choose a spot with partial shade for the first summer—young magnolias burn easily in full sun. Water deeply after transplanting to settle the roots.
Begin hardening off by placing the pots outside in morning sun only for 2 hours daily, gradually increasing exposure over 2 weeks. Watch for wilting or leaf drop—this means they're not ready for longer sun yet. Once they tolerate 6 hours of sun without stress, they're ready for permanent outdoor planting.
Tips & tricks for perfect magnolia seed germination
These game-changing strategies will help you break through magnolia's stubborn germination barriers and grow strong, healthy saplings.
Soaking Secret: That 24-hour lukewarm water soak in Step 1 is your first critical step. Use water that's warm to the touch (around 90°F) but not hot—hot water can damage the delicate seed structure. I like to use a thermometer to check the temperature. After soaking, give those seeds a thorough rinse to remove any residual cone material that might harbor mold. The goal is to soften the hard shell just enough to let moisture penetrate without weakening the seed's natural defenses.
Stratification Strategy: The 90-120 day cold treatment in Step 2 is non-negotiable for magnolias, but here's what nobody tells you—consistency is everything. Place your sealed bag on a refrigerator shelf that stays between 35-45°F (never the crisper drawer, which can get too cold). I like to label my bags with the start date so I don't forget about them. Check monthly by opening the bag in a well-ventilated area—if you smell anything funky or see mold, discard those seeds immediately and start fresh with new ones. The key is maintaining that delicate balance of moisture without creating a breeding ground for mold.
Planting Precision: In Step 3, those ½-inch planting depths and 2-inch spacing might seem generous, but trust me on this—magnolia seeds need room to stretch their roots. I use a small ruler to measure both depth and spacing for consistency. The peat moss/perlite mix is crucial too: if your mix drains too quickly, add a bit more peat moss; if it stays soggy, add more perlite. You'll know you've got it right when water runs through the drainage holes within 10-15 minutes after watering. The slow germination (4-8 weeks) is normal—don't be tempted to water more frequently just because you're impatient!
Lighting Insight: That transition from shady to bright indirect light in Steps 3-4 is where many growers go wrong. Start seedlings in the shadiest spot you have (like under a shelf or in a north-facing window), then gradually move them to brighter light over 2-3 weeks. I've seen seedlings get sunburnt when moved too quickly—look for pale yellow leaves as your first warning sign. For indoor grow lights, position them 6-12 inches above the seedlings and adjust as they grow. The 12-hour cycle is ideal because it mimics natural daylight changes that magnolias experience in their native habitats.
Pro Tips for Grow A Magnolia Seed
- These game-changing strategies will help you break through magnolia's stubborn germination barriers and grow strong, healthy saplings.
- Soaking Secret: That 24-hour lukewarm water soak in Step 1 is your first critical step.
- Stratification Strategy: The 90-120 day cold treatment in Step 2 is non-negotiable for magnolias, but here's what nobody tells you—consistency is everything.
Frequently asked questions
Got questions about growing magnolia seeds? You’re not alone—this process can feel tricky, but we’ve got answers! Here are some of the most common concerns to help you navigate your magnolia-growing journey with confidence.
How long does cold stratification need to last for magnolia seeds?
Cold stratification for magnolia seeds typically takes 60–90 days in the fridge (33–41°F). Some varieties may need up to 120 days, so check your seed packet or research your specific magnolia type. Patience pays off—this step mimics winter and breaks dormancy for better germination!
When will my magnolia seed sprout after stratification?
Germination can take anywhere from 2 weeks to 6 months after stratification. Don’t rush it! Keep the soil moist and warm (around 70°F), and place the pot in bright, indirect light. If nothing happens after 6 months, the seed may not be viable—try again with fresh seeds.
Can I grow a magnolia from a seed I found in my yard?
Wild magnolia seeds are fair game, but verify the species first—some may not thrive in your climate. Clean the seed thoroughly, remove the fleshy coating, and follow the same stratification process. Just be patient; wild seeds can be finicky but often yield hardy saplings!
Why aren’t my magnolia seeds germinating?
Common culprits include insufficient stratification, dry soil, or poor seed viability. Double-check your fridge temps, keep the soil consistently moist (not soggy), and ensure seeds are fresh. If mold appears, toss the batch and start over—fresh seeds are your best bet!
How long until a magnolia seedling is big enough to plant outdoors?
Seedlings typically need 2–3 years of indoor care before transplanting outdoors. Aim for a height of at least 1–2 feet and a sturdy root system. Harden them off gradually by exposing them to outdoor conditions for a few hours daily before the final move. Choose a spot with full sun to partial shade and well-draining soil.
Wrapping up and next steps
Growing a magnolia from seed is a rewarding journey that blends patience with nature’s beauty! 🌱 By mastering cold stratification, providing the right soil mix, and nurturing your sapling with care, you’ll unlock the potential for a stunning, long-lived tree.
Remember, consistency is key—whether it’s monitoring moisture, protecting from pests, or giving your seedling the ideal growing conditions.
Ready to take the next step? Start small: plant your first magnolia seed this season and watch your green thumb grow! For even more success, explore local gardening forums or connect with fellow plant enthusiasts to share tips and celebrate your progress. Happy growing! ✨