
Picking
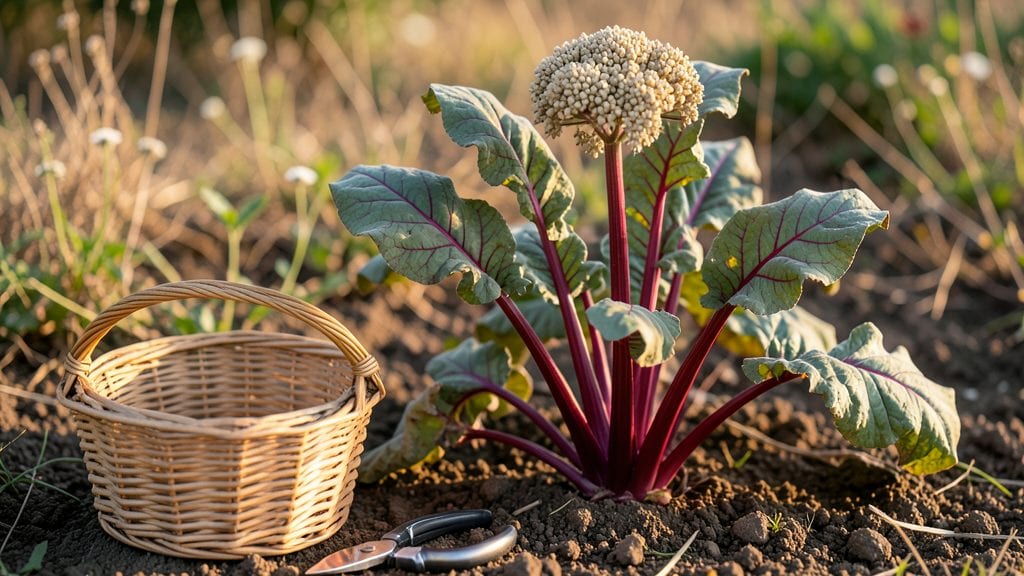
Harvesting beet seeds from your garden saves money and secures heirloom varieties for years to come. 🌱 I learned the hard way that waiting too long means brittle pods and wasted effort—but timing it right gives you a stash of seeds that’ll last for seasons.
The key is letting your beets bolt naturally, then knowing exactly when those seed pods are ready to pick.
You’ll need just a few simple tools: sharp scissors or pruners, brown paper bags for drying, and a dry, dark spot to store them. Most gardeners overlook the bolting stage, but patience here pays off—skipping it means no seeds.
Once your beets send up those tall flower stalks, watch for the pods to turn from green to papery brown, about 60-90 days after bolting starts.
When you harvest at the right moment, you’ll end up with plump, viable seeds that germinate like crazy next spring. The dried pods should rattle when shaken, signaling they’re ready.
Store them in an airtight container in a cool, dry place, and they’ll keep for up to five years—though I’ve never made it that far before replanting!
Common mistakes like harvesting too early or storing seeds in damp conditions can ruin your whole batch. If your seeds don’t sprout well, it’s often because they weren’t fully mature when picked.
With the right timing and care, you’ll have a steady supply of homegrown beets for years to come—no store-bought seeds needed.
📚 In This Guide
- What you need
- Instructions
- Tips and common mistakes
- Wrapping up and next steps
What you need
- ● Mature beet plants: Choose healthy, disease-free beets that have bolted (produced flower stalks) and developed seed pods. Aim for at least 3-5 plants to ensure a good seed yield.
- ● Pruning shears or sharp scissors: For cleanly cutting seed stalks without damaging the pods.
- ● Brown paper bags or breathable mesh sacks: 2-3 medium-sized bags (12"x15") to collect and dry seeds. Avoid plastic—it traps moisture!
- ● Labeling tags or masking tape + marker: To label varieties (e.g., "Detroit Dark Red," "Golden Beet") and harvest dates.
- ● Drying rack or clean, dry surface: A screen, wire rack, or even a cardboard box with holes to allow airflow while seeds dry.
- ● Fine-mesh strainer or sieve: For separating seeds from chaff and debris after drying.
- ● Small envelopes or airtight containers: 2-4 oz size for long-term storage (e.g., glass jars with tight lids or seed-saving envelopes).
- ● Patience and a dry, dark space: A cool (50–70°F), low-humidity area (like a pantry or basement) for seed maturation.
- ● Hand lens or magnifying glass: To inspect seeds for viability before storage.
- ● Hydrometer or seed viability test kit: For checking germination rates if you’re serious about seed-saving.
- ● Desiccant packets: To absorb excess moisture in storage containers and extend seed life.
- ● Notebook or seed-tracking app: To log varieties, harvest dates, and germination notes for future reference.
- ● Gloves: If you’re sensitive to beet sap or handling large quantities of seeds.
Step-by-Step instructions for harvesting beet seeds
Here’s how to save seeds from your best beet varieties—no fancy tools needed.
🌿 Step 1: Let Beets Bolt Naturally
Start by growing your beets in full sun and well-drained soil. When they reach harvest size, leave 4-6 of the largest, healthiest beets in the ground instead of pulling them. These will send up flower stalks (bolting) in late summer to early fall—this is how you get seeds.
Don’t rush this step. Beets need 60-90 days of warm weather to bolt properly. If your summers are short, plant an extra row early to extend the season. Watch for thin, tall stems with yellow flowers—this is your signal to stop watering heavily. Let the soil dry slightly to encourage flowering.
🌱 Step 2: Identify and Isolate Flowering Beets
Once your chosen beets bolt, remove all other beets from the garden to prevent cross-pollination. Beets are biennials, meaning they flower in their second year, but saving seeds from the same year’s crop works too—just keep them isolated. If you’re growing multiple varieties, space them at least 50 feet apart or use row covers to block pollen transfer.
Let the flower stalks mature fully. You’ll know they’re ready when the flowers fade and seed pods form—small, round, and green at first, then turning brown and papery. This usually takes 4-6 weeks after bolting. Avoid harvesting too early; immature seeds won’t germinate well.
⏰ Step 3: Harvest and Dry the Seed Pods
When the seed pods turn brown and crispy, it’s time to harvest. Cut the entire flower stalk (about 12-18 inches tall) with clean shears or scissors. Shake the pods gently over a paper bag—this releases the seeds inside. Store the stalks in a dry, well-ventilated spot (like a mesh bag hung in a garage) for 2-3 weeks to dry completely.
Don’t rush drying—moisture inside the pods causes mold. If you live in a humid climate, spread the stalks on a screen or paper towels in a dry area. Once fully dry, the pods will rattle when shaken. Remove any remaining seeds from the stalks by hand and combine them with the seeds you’ve already collected.
🪴 Step 4: Clean and Store the Seeds
Separate the seeds from chaff by rubbing them between your fingers over a clean sheet of paper or by winnowing them in a gentle breeze. Store the clean seeds in a paper envelope or glass jar labeled with the variety name and harvest year. Keep them in a cool, dark, dry place (like a fridge or seed vault) where they’ll stay viable for 3-5 years.
Test a few seeds the following spring to confirm they’re still good. If they sprout within 7-14 days, your storage method worked! If not, try again—sometimes humidity sneaks in even with the best precautions.
Tips & tricks for perfect beet seed harvesting
Here's what I've learned after saving beet seeds for years—these tricks make all the difference between viable seeds and wasted effort.
Timing Secret: The 60-90 days of warm weather in Step 1 is your golden window. I've found that planting an extra row of beets 3-4 weeks earlier than your main crop gives you that extra time to reach bolting, especially in cooler climates. Watch for those telltale yellow flowers—they're your signal to start cutting back on water.
Isolation Matters: Don't skip the isolation in Step 2! I've seen beautiful beet flowers cross-pollinate with wild beets or other varieties, which can ruin your seed purity. If you're short on space, use row covers instead of spacing 50 feet apart—they work just as well to keep pollen contained. Just remember to remove them during flowering to allow pollination.
Drying Strategy: The 2-3 week drying period in Step 3 is non-negotiable, but here's my pro move: I hang my stalks in a mesh laundry bag inside my garage during the day and bring them in at night if humidity is high. This creates a natural airflow system that speeds up drying without risking mold. I test for readiness by shaking the pods—if they rattle, they're ready!
Storage Wisdom: For long-term storage, I double up on protection by placing my labeled paper envelopes inside a sealed glass jar with a packet of silica gel. This keeps moisture out completely, which is especially important if you're storing in a basement or garage that might get damp. Test those seeds in spring—they'll either reward you with strong sprouts or teach you what to adjust for next time.
Pro Tips for Harvest Beet Seeds
- Here's what I've learned after saving beet seeds for years—these tricks make all the difference between viable seeds and wasted effort.
- Timing Secret: The 60-90 days of warm weather in Step 1 is your golden window.
- Isolation Matters: Don't skip the isolation in Step 2!
Frequently asked questions
Got questions about harvesting beet seeds? You’re not alone! Here are some common queries—and their answers—to help you master the process like a pro.
How do I know when beet seeds are ready to harvest?
Beet seeds are ready when the seed heads turn tan or light brown and the outer bracts (leafy parts) dry out and crumble easily. If the seeds rattle inside the pod when shaken, they’re prime for harvesting. Wait too long, and they’ll scatter on their own!
Can I harvest beet seeds from store-bought beets?
Unfortunately, no! Store-bought beets are often hybrid varieties that won’t produce viable seeds. For seed-saving success, grow open-pollinated or heirloom beet varieties labeled for seed production. Check seed packets for “seed-saving” notes.
What’s the best way to dry beet seeds at home?
Spread seeds in a single layer on a screen, paper towel, or mesh bag in a cool, dry, well-ventilated spot (like a garage or basement). Avoid direct sunlight or heat—it can reduce viability. Stir them daily for 2–3 weeks until completely dry and brittle.
Do I need to worry about cross-pollination with other beets?
Yes! Beets are open-pollinated, so nearby varieties (even different colors) can cross-pollinate, altering seed traits. To maintain purity, isolate plants by at least 500 feet or grow only one variety. If space is tight, use row covers during flowering to prevent accidental mixing.
How long can I store harvested beet seeds?
Properly dried and stored beet seeds last 3–5 years in a cool (50–60°F), dark, and humidity-controlled environment. Use airtight containers (like glass jars with silica packets) to prevent moisture. Test viability yearly by planting a few seeds—if germination drops below 80%, refresh your stock!
Wrapping up and next steps
Harvesting beet seeds is a rewarding way to ensure a fresh supply of vibrant, homegrown beets year after year!
By following these steps—selecting healthy plants, allowing seed pods to mature, drying them properly, and storing them correctly—you’ll unlock a sustainable source of organic seeds. Your patience and care today will pay off with a bountiful harvest tomorrow!
Ready to take the next step? Plant those saved seeds in early spring and watch your garden thrive with homegrown beets that are sweeter than ever. Happy gardening! 🌱✨