How To
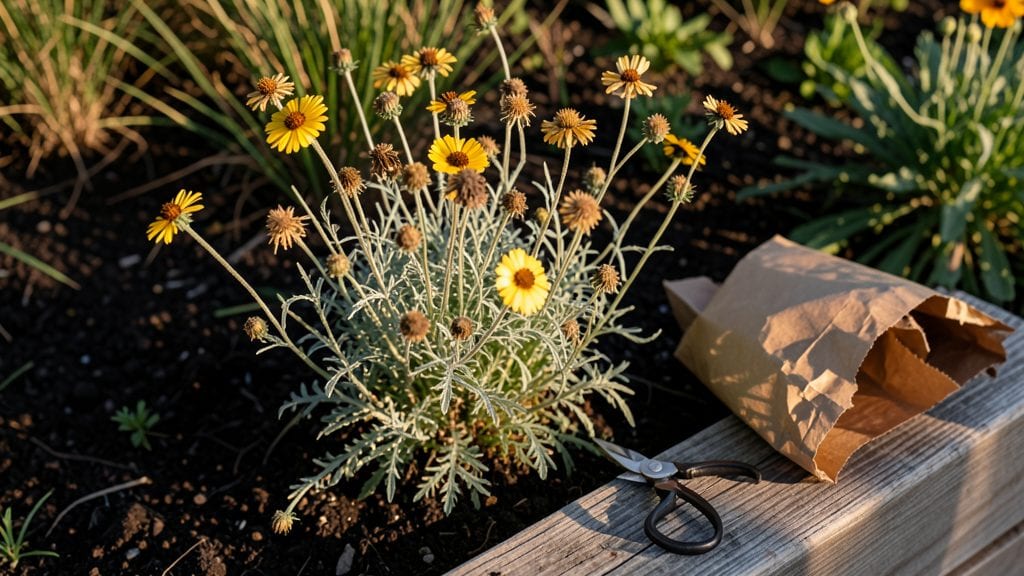
Harvesting Coreopsis seeds preserves their vibrant blooms year after year, giving you a head start on next season’s garden.
Coreopsis plants reward patient gardeners with bright, cheerful blooms 🌼, but did you know you can extend their beauty by saving seeds? The key is timing—wait until late summer or early fall when the flower heads turn brown and crispy, signaling they’re ready for collection.
If you harvest too early, the seeds won’t be viable, and if you wait too long, they’ll scatter on their own. Below, I’ll walk you through the exact steps to collect, dry, and store Coreopsis seeds so you can grow a fresh batch of these sun-loving flowers next spring.
You’ll learn how to spot mature seed heads, avoid common mistakes, and keep your seeds fresh for up to three years—so you can enjoy more Coreopsis blooms without buying new plants.
When to harvest Coreopsis seeds: best timing for optimal viability
Harvesting Coreopsis seeds at the right time ensures high germination rates and healthy new plants. The critical window spans from late summer to early fall, typically between August and October, depending on your USDA hardiness zone.
Missing this window can lead to premature seed loss or poor viability, so timing is everything.
Look for dried seed heads that have turned brown and papery—a clear sign the seeds are ready. The flower petals will have fallen away naturally, leaving behind a crisp, hollow center.
If you harvest too early, the seeds won’t be fully developed, reducing your chances of successful next-season blooms.
Weather plays a critical role in seed viability. Dry, warm conditions are ideal for harvesting, as they prevent mold growth and ensure seeds dry properly. If rain is forecasted, collect seeds sooner to avoid moisture damage.
Humid conditions can cause seeds to sprout prematurely or develop fungal infections, compromising their quality.
Here’s a quick reference to help you identify the perfect harvest moment and avoid common mistakes:
| Stage | Visual Cues | Action |
|---|---|---|
| Early Summer | Bright yellow or pink blooms | Allow flowers to fully bloom and fade |
| Late Summer | Brown, dried seed heads with no petals | Check for rattling seeds inside heads |
| Early Fall | Papery, crisp seed pods that split open | Harvest before seeds scatter on soil |
| Post-Frost | Seed heads turn black or moldy | Avoid harvesting—seeds are non-viable |
Once you’ve identified ready seed heads, act quickly. Use clean, sharp pruners or scissors to cut the entire seed head from the stem, leaving about 1 inch of stem attached.
This helps with drying and storage later. Place the harvested heads in a paper bag or brown envelope to allow air circulation while preventing seeds from scattering or getting damp.
If you’re unsure whether a seed head is ready, perform the "shake test". Hold the head over a white surface and give it a gentle shake.
If seeds rain down, it’s time to harvest. If not, wait a few more days—the seeds need more time to mature and dry.
Extreme weather can disrupt seed development. For example, unseasonably hot temperatures may cause seeds to dry too quickly, while prolonged rain can lead to rot or mold. In Zone 6a or colder, prioritize harvesting before the first frost, which typically arrives in late October.
If frost hits early, collect seeds as soon as they’re dry and brown, even if they’re not fully crisp.
Avoid harvesting seeds from overcrowded plants or those showing signs of pests or disease. Weak or stressed plants produce seeds with lower viability. Instead, focus on healthy, vigorous coreopsis with plenty of sunlight and well-draining soil. These plants yield the best-quality seeds for propagation.
Timing your harvest correctly is the foundation of successful seed saving. By paying attention to seed head color, weather conditions, and plant health, you’ll ensure a reliable supply of seeds for years to come.
Once harvested, store them in a cool, dry place to maintain their germination potential for up to 3 years.
With the right harvest timing, you’ll enjoy coreopsis blooms in your garden for seasons to come—all from seeds you saved yourself! 🌾✂️
Step-by-step guide to collecting and storing Coreopsis seeds
Harvesting Coreopsis seeds is a rewarding way to propagate your favorite varieties while ensuring next year’s garden stays vibrant. The key lies in timing and proper handling—once you master these, you’ll have seeds ready for 3-year storage with high germination rates.
Let’s walk through the hands-on process to collect and store these seeds like a pro.
Before you begin, gather your tools: a pair of clean pruning shears, paper bags for drying, and airtight containers for storage. The goal is to preserve seed viability while preventing mold or pests.
Start by identifying mature seed heads—they’ll be completely brown and dry, often with petals fallen away naturally. Avoid harvesting seeds that are still green or moist, as these won’t store well.
How to Harvest Coreopsis Seeds
-
Step 1: Identify Ready Seed Heads
Look for dry, brown flower heads where petals have fallen off. Gently shake the head—if seeds rattle inside, they’re ready. -
Step 2: Cut Seed Heads
Use clean pruning shears to snip the stem just above the seed head. Place heads in a paper bag to catch any loose seeds. -
Step 3: Dry the Seed Heads
Hang bags upside down in a dry, well-ventilated area for 1-2 weeks. Avoid direct sunlight to prevent overheating. -
Step 4: Remove Seeds
Once fully dry, rub the seed heads between your fingers or use a fork to extract seeds. Discard any debris or chaff. -
Step 5: Store Properly
Place seeds in airtight containers with a desiccant packet to absorb moisture. Label with the harvest date and store in a cool, dark place.
Proper drying is critical—moisture is the enemy of seed viability. If you notice mold or musty smells during storage, your seeds are too damp. To prevent this, ensure seed heads are completely dry before storing. A dehumidifier or silica gel packets can help maintain ideal conditions.
Seeds stored correctly can remain viable for up to 3 years, though germination rates may decline slightly over time. Test a few seeds annually to check viability by placing them in a moist paper towel and monitoring for sprouts within 7-10 days.
If germination drops below 50%, it’s time to harvest fresh seeds.
Once your seeds are stored, you’re ready to propagate Coreopsis for next season. Direct sow seeds outdoors in spring after the last frost, or start them indoors 6-8 weeks before the last frost date. With patience and care, you’ll enjoy generations of Coreopsis blooms in your garden! 🌼