
Vegetables
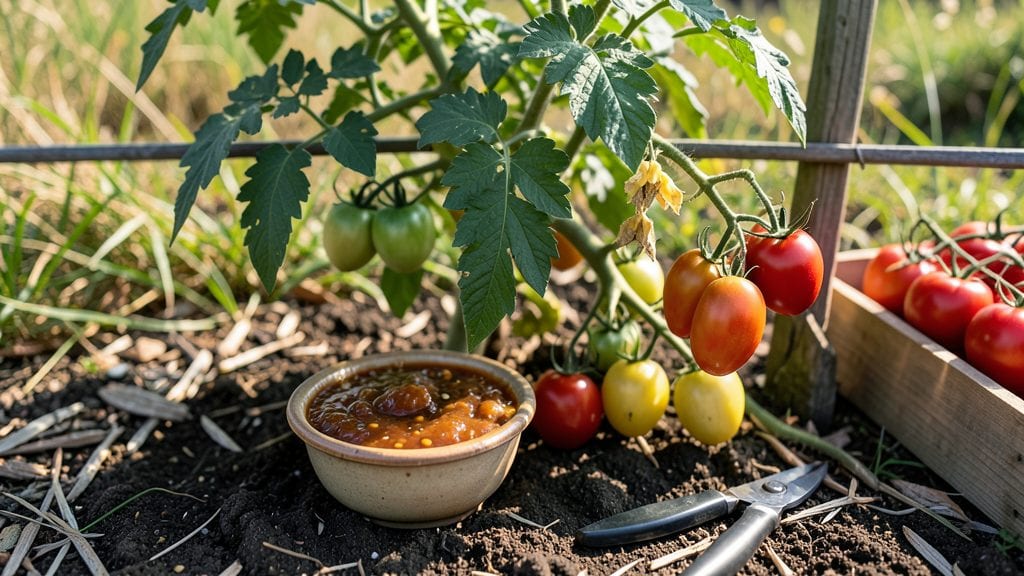
Saving heirloom tomato seeds isn’t just a gardening skill—it’s a way to preserve flavors and stories from season to season. 🌱 I’ve saved seeds from my favorite beefsteak varieties for years, and the fermentation trick is what makes the difference between viable seeds and a sad pile of mush.
The best time to start is when your tomatoes are overripe and starting to split—nature’s signal that the seeds are ready. You’ll need a jar, water, and a little patience, but the process takes less than a week.
The fermentation step removes the gel that coats the seeds, ensuring they’ll germinate strong next spring.
What you end up with is a jar of dried seeds that’ll produce plants just like their parents—maybe even better. The first time you taste a tomato grown from your own saved seeds, you’ll understand why gardeners go to this trouble.
It’s not just about saving money; it’s about keeping flavors alive that grocery stores can’t replicate.
Even if you’ve had moldy batches before, this method works—just follow the steps carefully. You’ll troubleshoot common issues like slimy water or slow drying, and soon you’ll have a seed stash ready for next year’s garden. Here’s how to do it right the first time.
📚 In This Guide
- What you need
- Instructions
- Tips and common mistakes
- Wrapping up and next steps
What you need
- ● Mature heirloom tomatoes: Choose fully ripe, disease-free tomatoes (at least 10-15 for a good seed yield).
- ● Knife or scissors: For slicing open the tomatoes (a sharp, clean blade works best).
- ● Small bowl or jar: A 16-32 oz glass container (like a mason jar) to hold the tomato pulp and juice.
- ● Fine-mesh strainer or cheesecloth: A strainer with holes smaller than 0.01 inches (250 microns) or cheesecloth to separate seeds from gel.
- ● Water: Distilled or dechlorinated water (tap water can be used if left out overnight to evaporate chlorine).
- ● Paper towels or coffee filters: For drying seeds (avoid plastic—it traps moisture!).
- ● Small envelopes or seed packets: Labeled with the tomato variety and date (e.g., kraft paper or reusable seed saver bags).
- ● Permanent marker: For labeling your seeds clearly.
- ○ Blender or food processor: Speeds up breaking down tomato flesh (optional but handy!).
- ● Hydrogen peroxide (3% solution): 1 tsp per cup of water to disinfect seeds (reduces mold risk).
- ● Seed drying tray or screen: Improves airflow for faster drying.
- ● Humidity dome or plastic bag: Creates a mini greenhouse for germination testing (if you want to check viability).
- ● Notebook or seed-saving journal: To track varieties, harvest dates, and germination rates.
Step-by-step instructions for saving heirloom tomato seeds
Here's the foolproof fermentation method I use every year to save seeds from my best heirloom varieties.
🌱 Step 1: Select and Extract Ripe Tomato Seeds
Choose tomatoes that are fully ripe and slightly overripe—these contain the most developed seeds. Cut the tomato open and scoop out the gel-like pulp containing seeds into a small bowl. I like to use a spoon with a deep well to catch every last bit of that sticky seed gel.
Add 1/2 cup of water to the bowl and stir vigorously to break up the pulp. Let it sit for 3-5 minutes while the gel dissolves and the heavier seeds sink to the bottom. The good seeds will settle, while empty seed coats and debris float to the surface.
💧 Step 2: Ferment the Seeds for 3-5 Days
Pour the seed-water mixture into a clean 8-ounce glass jar, leaving about 1 inch of headspace at the top. Cover loosely with a lid or cloth—you want airflow but to keep out pests. Place the jar in a warm spot, ideally between 70-85°F, like near a sunny window or on top of the fridge.
Stir the mixture daily to prevent mold from forming on the surface. After 2-3 days, you'll notice a frothy scum layer develop—this is normal and part of the fermentation process. By day 3-5, the seeds will smell strongly of vinegar, which signals they're ready for the next step.
✂️ Step 3: Rinse and Dry the Seeds
Pour the seed mixture through a fine-mesh strainer to separate the seeds from the remaining gel. Rinse the seeds thoroughly under running water until the water runs clear—this removes any remaining pulp and fermentation byproducts. Gently pat them dry with a clean paper towel or cloth.
Spread the seeds in a single layer on a paper towel or seed drying screen, ensuring they don't overlap. Place them in a warm, dry, and well-ventilated spot, away from direct sunlight. They should dry completely in 3-5 days, becoming hard and dark in color.
🪴 Step 4: Store Seeds Properly for Next Year
Once fully dry, transfer the seeds to a small envelope or airtight container. Label it with the tomato variety and the date—this is crucial, as seed viability decreases over time. Store the seeds in a cool, dark place, like a pantry or seed vault, where the temperature stays between 32-50°F.
Under these conditions, heirloom tomato seeds remain viable for 4-6 years, though I always test a few each year to ensure they still germinate well. The key is keeping them dry and protected from light and moisture.
Tips & tricks for perfect heirloom tomato seed preservation
Here's what I've learned after saving seeds from my garden for over a decade—these little tricks make all the difference in seed viability.
Timing Secret in Step 1: Those 3-5 minutes of resting your seed mixture are crucial. The heavier, viable seeds sink quickly, but don't rush it—wait until you see clear separation between the settled seeds and floating debris. I've found that 4 minutes is my sweet spot for most heirloom varieties, giving enough time for the good seeds to fully settle while preventing over-soaking.
Temperature Control: The 70-85°F range for fermentation isn't just arbitrary—it's the perfect balance for beneficial bacteria to work while preventing mold. If your kitchen runs cooler, place the jar on top of your fridge or near a sunny window. I've had success using a small heating pad on low under the jar in winter, but never exceed 85°F or you risk killing the fermentation process.
Drying Strategy: For Step 3, I've found that using a seed drying screen (available from garden stores) speeds up drying to about 2-3 days instead of the full 3-5 days on paper towels. Just make sure to place it in a spot with good airflow—like a fan on low setting—to prevent any lingering moisture that could cause mold. The seeds are ready when they're hard to the touch and dark in color, almost like tiny black beans.
Storage Wisdom: The 32-50°F storage range might seem broad, but it's intentional to accommodate different pantry conditions. I store mine in the back of my fridge (around 40°F) in a small glass jar with a tight seal. The key is consistency—fluctuations in temperature and humidity are the biggest enemies of long-term seed viability. I always test a few seeds every year to ensure they're still good!
Pro Tips for Save Heirloom Tomato Seeds
- Here's what I've learned after saving seeds from my garden for over a decade—these little tricks make all the difference in seed viability.
- Timing Secret in Step 1: Those 3-5 minutes of resting your seed mixture are crucial.
- Temperature Control: The 70-85°F range for fermentation isn't just arbitrary—it's the perfect balance for beneficial bacteria to work while preventing mold.
Frequently asked questions
Got questions about saving heirloom tomato seeds? You’re not alone—this process can feel tricky at first! Below, we’ve answered the most common questions to help you troubleshoot, time your harvests, and avoid pitfalls. Whether you’re a first-timer or a seasoned gardener, these tips will keep your seeds thriving.
How do I know when my tomatoes are ready to harvest seeds?
Pick tomatoes that are fully ripe (often overripe is better!) and show signs of softening or cracking. Look for deep color, wrinkled skin, or a mushy texture—these are your cues. Avoid green or underripe tomatoes, as their seeds won’t germinate well. Pro tip: Let them sit on the counter for a day or two after picking to encourage fermentation.
Why does fermentation take so long? Can I speed it up?
Fermentation typically takes 3–5 days at room temperature (70–80°F). To speed it up, place your seed slurry in a warm spot (like near a sunny window) or use a seed fermentation kit with a thermometer. Avoid heat sources like ovens—consistent warmth is key. If mold appears (fuzzy spots), discard it immediately and start fresh.
What if my seeds don’t dry properly? Will they still work?
If seeds feel damp or clump together after drying, they may not germinate. Spread them on a paper towel in a single layer and let them air-dry for 1–2 weeks in a dark, dry place. Store them in a sealed envelope with a desiccant packet to prevent moisture. Test a few seeds in soil before planting your entire batch to check viability.
Can I save seeds from hybrid tomatoes?
No—hybrid tomatoes (like ‘Early Girl’ or ‘Better Boy’) produce sterile seeds that won’t grow true to type. Stick to heirloom varieties (e.g., ‘Brandywine,’ ‘Sungold’) for reliable seed-saving. Heirlooms are open-pollinated, meaning their seeds will produce plants identical to the parent. Always label your seeds to track varieties!
How long can I store saved tomato seeds?
Properly dried and stored seeds stay viable for 2–4 years in cool, dark conditions (below 40°F). Use airtight containers or vacuum-sealed bags with silica gel. Test germination rates every year by planting a small sample. Write the harvest year on the envelope to avoid confusion—old seeds lose vigor over time!
Wrapping up and next steps
Saving heirloom tomato seeds is a rewarding way to preserve biodiversity and ensure next year’s garden thrives with the same delicious flavors! By mastering the fermentation trick, you’ll unlock a simple, natural method to separate viable seeds from pulp—no fancy tools required.
Whether you’re a seasoned gardener or a curious beginner, this process connects you to generations of growers who cherished heirloom varieties.
Ready to take the next step? Start small—try saving seeds from just one or two of your favorite heirloom tomatoes this season! Once you’ve perfected your technique, expand your seed-saving adventures to other vegetables or share your newfound knowledge with fellow gardeners. Happy growing! 🌱✨