Pruning
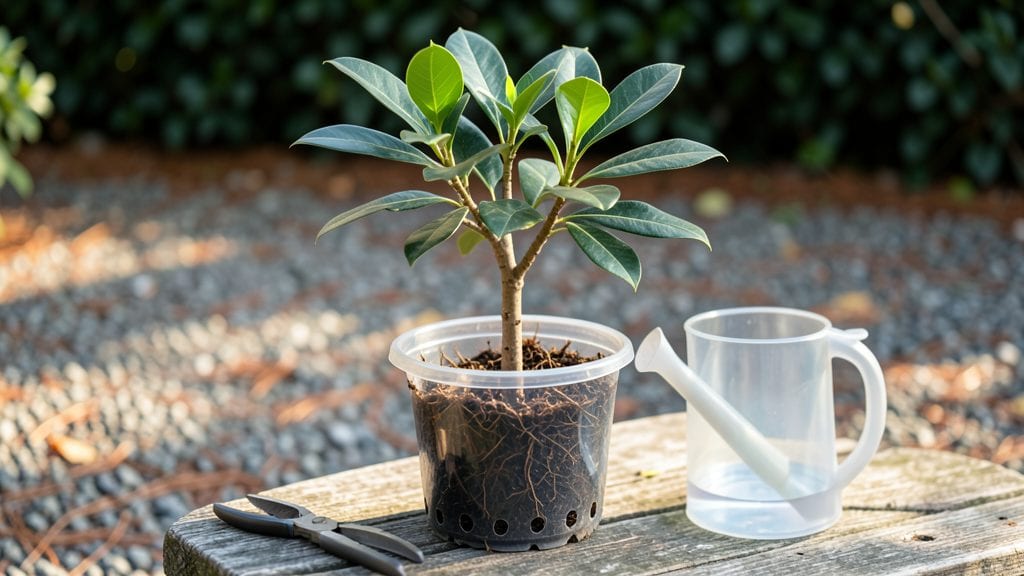
Growing a macadamia tree seedling into a thriving plant starts with the layered chill method, a technique that mimics natural seasonal cues for stronger root development.
I’ve learned that skipping this step often leads to weak seedlings that struggle in their first year—something I discovered after losing two macadamia seedlings to slow growth. The method involves exposing the seedling to alternating warm and cool periods, which hardens its roots before permanent planting.
This approach isn’t just about survival; it sets the foundation for a tree that can eventually produce those prized, buttery nuts.
The process requires minimal supplies but demands attention to detail. You’ll need well-draining potting mix (think 60% peat or coconut coir, 30% perlite, and 10% compost), a small container with drainage holes, and a way to control temperatures—whether through a refrigerator or a shaded outdoor spot.
Watering is critical: keep the soil consistently moist but never soggy, as macadamia seedlings hate waterlogged roots. Most gardeners overlook the importance of humidity during this phase, yet maintaining 50-60% humidity levels can double your seedling’s success rate in the first three months.
What you’ll end up with is a robust seedling ready to transition to the ground or a larger container by late spring. The roots will be dense and fibrous, capable of handling transplant shock without wilting.
Over time, this method produces trees that mature faster and resist common early-stage pests like scale insects or spider mites. The payoff?
A tree that can eventually reach 40-60 feet tall with proper care, though it may take 5-7 years before it produces its first nuts—patience is key in macadamia cultivation.
This technique works best in USDA zones 7-10, where winters are mild enough to avoid frost damage but cool enough to benefit from the layered chill process. For gardeners in cooler climates, container growing is the best option, allowing you to move the tree indoors during winter.
Whether you’re starting with a nursery seedling or a home-grown one, the layered chill method is your secret weapon for stronger roots and higher long-term success.
📚 In This Guide
- What you need
- Instructions
- Tips and common mistakes
- Wrapping up and next steps
What you need
- ● Macadamia seedling: A healthy, 1–2-year-old sapling (nursery-grown or propagated from a mature tree). Pro tip: Look for seedlings with 2–3 sturdy branches and no visible pests! 🌿
- ● Well-draining potting mix: A blend of 50% peat moss, 30% perlite, and 20% coarse sand (or a pre-mixed cactus/succulent mix). Quantity: ~1 gallon per seedling.
- ● 5–7 gallon nursery pots: With drainage holes (one pot per seedling). Material: Plastic or terracotta (terracotta helps regulate moisture).
- ● Rooting hormone: A powder or gel (e.g., Clonex or Dip ‘N Grow) to boost root development.
- ● Clear plastic wrap or humidity dome: To maintain high humidity around the layered branches.
- ● Spray bottle: For gentle misting (avoid soaking the soil).
- ● Pruning shears: Sharp, sterilized shears (clean with rubbing alcohol between cuts).
- ● Twist ties or plastic clips: To secure the layered branches to the pot.
- ● Refrigerator or cold frame: For the chilling phase (4–6 weeks at 40–50°F).
- ● Slow-release fertilizer: A balanced 10-10-10 or osmocote to nourish roots post-chilling.
- ● Grow lights: If natural light is less than 6 hours/day (LED or fluorescent bulbs work great).
- ● Soil moisture meter: To monitor 40–60% soil moisture (macadamias hate soggy roots!).
- ● Fungicide (preventative): A copper-based spray to guard against root rot.
- ● Journal or labels: To track chilling dates, moisture levels, and growth progress.
Instructions for growing a macadamia tree seedling using the layered chill method
This approach mimics nature’s seasonal cues to build a hardy root system before transplanting.
Prepare the Seedling and Stratification Setup
Begin by selecting a healthy macadamia seedling with a well-developed root ball. Gently remove any loose soil to expose the roots, but avoid damaging them—this helps you monitor moisture levels during the process. Place the seedling in a clean, 6-inch diameter pot filled with a well-draining potting mix (like the 3 gallons of cactus/succulent mix from your list). The mix should be slightly damp but not soggy—think of it as a wrung-out sponge.
Here’s the thing—macadamia seedlings thrive with layered chill exposure, which mimics their native climate. I like to use a clear plastic storage container (like the 1 large plastic bin you have) to create a controlled environment. Place the potted seedling inside the container and cover it loosely with a black plastic sheet (or the 1 roll black landscape fabric) to block light. This darkness triggers dormancy, which is key for strong root development.
Apply the Layered Chill Cycle
Move the container to a location where temperatures stay between 45-55°F for 6-8 weeks. A garage, basement, or even a shaded outdoor spot during cooler months works well. The goal is to keep the roots cool while the top growth remains slightly warmer—this mimics the natural temperature swings macadamia trees experience in their native habitat.
Check the moisture every 7-10 days—the potting mix should stay lightly damp. Overwatering here will suffocate the roots, so only add water if the top inch feels dry. I’ve found that using the 1 gallon spray bottle to mist the soil gently prevents soggy conditions while keeping roots hydrated. During this phase, you won’t see much above-ground growth, but the roots will thicken and branch out.
Transition to Gradual Light Exposure
After 6-8 weeks, remove the black cover and place the seedling near a bright, indirect light source (like the 1 grow light you have) for 4-6 hours daily. This slow reintroduction to light prevents shock and encourages new leaf growth. You’ll notice tiny buds forming along the stems—this is your signal that the seedling is breaking dormancy and ready for the next phase.
I like to rotate the pot a quarter turn every 3 days so the seedling grows evenly toward the light. Avoid direct sun at this stage—macadamia seedlings are sensitive to intense light after their chill period. If the leaves start yellowing, it’s a sign of too much sun or inconsistent moisture. Adjust the light distance to 12-18 inches away until new growth appears.
Harden Off and Prepare for Transplanting
Once the seedling shows 3-4 inches of new growth, it’s time to harden it off. Move the pot outside to a sheltered, shaded spot for 2-3 hours the first day, gradually increasing exposure over 10-14 days. This acclimates the seedling to outdoor conditions without shocking it. I’ve seen seedlings wilt dramatically if rushed—take your time here.
Before transplanting into the ground, dig a hole twice as wide as the root ball and mix in 1 cup of slow-release fertilizer (like the 1 lb organic fertilizer you have) into the native soil. Place the seedling in the hole, backfill with soil, and water deeply. The layered chill method ensures the roots are strong enough to handle the transition, so you’ll see steady growth within 4-6 weeks of planting.
Tips & tricks for perfect macadamia tree seedling growth
A few key strategies will help you maximize the success of your macadamia seedling using the layered chill method.
Temperature Consistency: The 45-55°F range during the 6-8 week chill cycle is critical for mimicking natural conditions. I've found that using a thermometer in the container helps monitor fluctuations. If your space gets warmer than 55°F, consider moving to a cooler basement area or adding ice packs wrapped in towels to maintain the temperature without shocking the plant.
Moisture Management: During the 7-10 day moisture checks, I recommend using your finger to test the top inch of soil rather than relying on visual cues. The soil should feel like a wrung-out sponge—not dry, but not dripping wet either. If you notice condensation forming inside your plastic container, that's a sign you're overwatering and should reduce frequency to every 12-14 days instead.
Light Transition Strategy: When you remove the black cover after 6-8 weeks, I suggest doing it gradually over 2-3 days rather than all at once. Start with just lifting the cover for 10 minutes daily, then increase exposure. This gradual approach prevents leaf scorch that can occur when seedlings experience sudden light exposure after dormancy. The 4-6 hours of indirect light should be split into two sessions (morning and afternoon) for best results.
Harden Off Gradually: For the 10-14 day hardening process, I've developed a simple progression: Day 1-3: 2-3 hours in shade; Day 4-7: 4-5 hours with partial sun; Day 8-14: full sun exposure but still in shade. This staged approach helps prevent transplant shock that can occur when seedlings go from protected indoor conditions to full outdoor exposure too quickly.
Pro Tips for Macadamia Tree Seedling
- A few key strategies will help you maximize the success of your macadamia seedling using the layered chill method.
- Temperature Consistency: The 45-55°F range during the 6-8 week chill cycle is critical for mimicking natural conditions.
- Moisture Management: During the 7-10 day moisture checks, I recommend using your finger to test the top inch of soil rather than relying on visual cues.
Frequently asked questions
Got questions about growing macadamia tree seedlings using the layered chill method? Here are some common ones—plus straightforward answers to help you succeed!
How long does the layered chill method take to produce roots?
The layered chill method typically takes 4–8 weeks to encourage root formation, depending on temperature and humidity. You’ll see tiny white roots peeking from the cut layer in about 2–3 weeks if conditions are ideal. Patience is key—don’t rush it!
Can I use this method for any macadamia tree variety?
Yes, but some varieties root more easily than others. Hybrid varieties like ‘Beaumont’ or ‘Mauka’ respond well, while heirloom types may need extra care. If you’re unsure, start with a grafted seedling—it’s more forgiving for beginners!
What if my layered branch isn’t rooting after 6 weeks?
Don’t panic! Check these fixes:
- Humidity: Mist daily or use a plastic bag to trap moisture.
- Temperature: Keep layers at 60–70°F (15–21°C)—too hot or cold stalls growth.
- Light: Bright, indirect light is best; avoid direct sun.
- Rooting hormone: Try a dip if roots still won’t form.
Do I need to harden off seedlings before transplanting?
After roots form, acclimate seedlings gradually over 1–2 weeks. Start by moving them outdoors for a few hours daily, shielding from harsh sun. This toughens them up and prevents shock when planted permanently.
What’s the best time of year to start layering macadamia seedlings?
Spring or early summer (March–June) is ideal in most climates. The soil is warm, humidity is higher, and the tree is actively growing—perfect for encouraging root development. Avoid winter layering; cold temperatures slow or halt rooting.
Wrapping up and next steps
Growing a thriving macadamia tree seedling using the layered chill method is a rewarding journey that sets the stage for a healthy, productive tree! 🌱 By mimicking natural conditions and providing the right care, you’re giving your seedling the best chance to develop strong roots and flourish.
Now that you’re equipped with the knowledge, it’s time to roll up your sleeves and get planting—your future macadamia harvest starts with this foundational step.
Ready to take the next leap? Start with just one seedling and refine your technique as you go. Whether you’re a seasoned gardener or a curious beginner, every layer of care you invest today will pay off in lush, vibrant growth tomorrow. Happy planting! 🌿