
Diseases
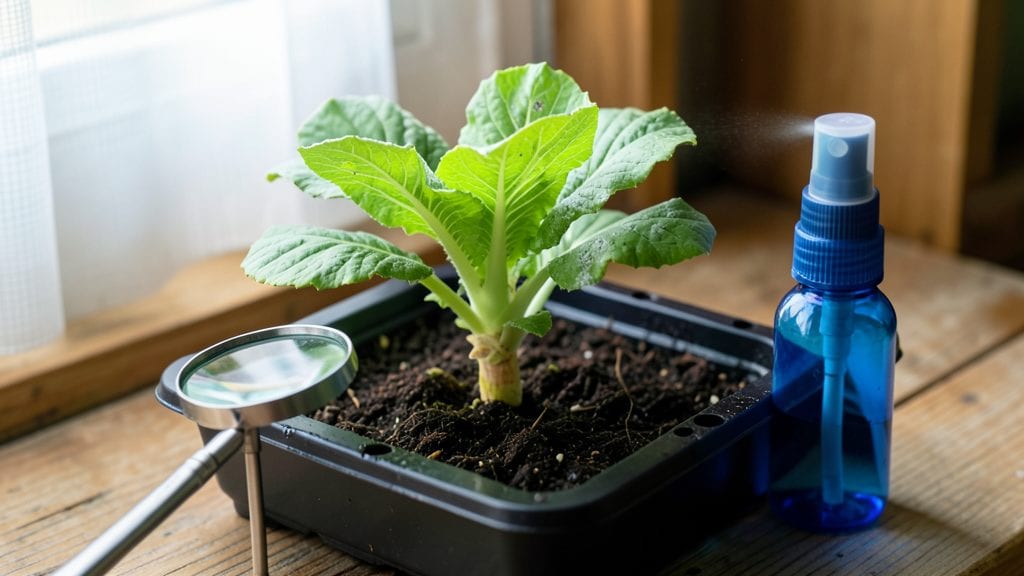
Mold on seedlings can turn your hopeful green shoots into a sad, slimy mess in days—unless you act fast. 🌱 I’ve lost entire trays to fuzzy gray mold, but these three steps saved my next batch, and they’ll work for you too.
The key is catching it early and fixing the root causes before your seedlings follow.
That fuzzy white or gray mold at the soil line? That’s damping-off, and it’s usually caused by too much moisture, poor airflow, or contaminated soil. Overwatering is the biggest culprit, but even well-meaning gardeners accidentally smother seedlings by keeping them too crowded or using unsterilized soil.
The good news? You can stop it in its tracks with simple adjustments.
Start by removing affected seedlings immediately—don’t wait. Then, repot the healthy ones in fresh, sterilized soil and space them wider for airflow. A light spray of neem oil or hydrogen peroxide (1 part to 10 parts water) can help kill lingering spores.
Within days, your seedlings will bounce back, and you’ll break the mold cycle for good.
This fix works for any seedling stage, from tiny sprouts to sturdy transplants. The real secret? Preventing recurrence by watering from below, using well-draining soil, and keeping your growing area clean. Your future harvests will thank you.
Why it happens
Mold on seedlings isn’t just an unsightly nuisance—it’s a silent threat that can wipe out your garden before it even begins. Understanding the root causes of this problem is the first step to preventing it.
Below, we break down the key factors that turn your cozy seed-starting environment into a fungal buffet.
🌡️ Overly Warm and Humid Conditions
Fungi like Botrytis and Pythium thrive in warm, moist environments. When seedlings are kept in trays or containers with poor airflow, excess heat from grow lights or ambient warmth creates the perfect storm. Here’s why:
- Condensation buildup: Warm air holds more moisture, and when it cools (e.g., at night), water droplets form on soil and leaves—ideal for spore germination.
- Slow evaporation: Dense seedling setups (like crowded trays) trap humidity, preventing water from evaporating quickly.
- Soil saturation: Overwatering or poorly draining mixes keep roots waterlogged, suffocating seedlings and inviting fungal growth.
Actionable fix: Aim for 60–70% humidity during germination, then reduce to 40–50% once sprouts emerge. Use a fan on low to circulate air and prevent stagnant moisture.
💧 Poor Watering Practices
Seedlings need moisture, but excess or inconsistent watering drowns roots and creates fungal hotspots. Here’s how it happens:
- Surface crusting: Water pooling on top of soil (from overhead sprinkling) blocks oxygen and traps spores against leaves.
- Inconsistent moisture: Alternating between drought and soggy conditions stresses seedlings, weakening their defenses against pathogens.
- Contaminated water: Tap water with chlorine or outdoor water harboring spores can introduce mold directly to your seedlings.
Actionable fix: Water from below using trays filled with ¼-inch of water (let seedlings wick up moisture). Use sterilized water (boiled and cooled or filtered) and avoid wetting foliage.
🌱 Contaminated Soil or Tools
Even the freshest soil mix can harbor dormant fungal spores if not properly sterilized. Here’s how contamination spreads:
- Old or unsterilized potting mix: Reused soil retains spores from past infections. Organic matter (like compost) can also introduce pathogens.
- Dirty hands or tools: Pruners, tweezers, or fingers contaminated with mold can transfer spores to healthy seedlings.
- Cross-contamination: Using the same tray or pot for infected and healthy seedlings spreads mold like wildfire.
Actionable fix: Use pasteurized or sterilized seed-starting mix (bake soil at 180°F for 30 minutes or use hydrogen peroxide solution: 1 part 3% H₂O₂ to 10 parts water). Sanitize tools with rubbing alcohol (70% isopropyl) between uses.
🌿 Crowded or Stressed Seedlings
Seedlings packed too closely or struggling from poor nutrition become easy targets for mold. Why?
- Limited airflow: Dense planting reduces circulation, trapping humidity and spores against leaves.
- Nutrient deficiency: Weak seedlings (from poor light or weak starter mix) have less energy to fight infections.
- Physical damage: Overhandling or rough transplanting creates wounds where fungi can enter.
Actionable fix: Space seedlings 1–2 inches apart and thin them early if needed. Use a balanced seed-starting fertilizer (5-5-5 or 10-10-10 at half-strength) to boost resilience. Avoid touching seedlings—use tweezers for delicate tasks.
🌧️ External Stressors: Light and Temperature Swings
Fluctuations in light and temperature weaken seedlings’ immune systems, making them vulnerable to mold. Key triggers include:
- Insufficient light: Leggy, pale seedlings (from weak grow lights) have thin cell walls, making them prone to fungal penetration.
- Cold drafts: Near windows or doors, seedlings experience temperature shocks that slow growth and reduce disease resistance.
- Heat stress: Overhead heaters or direct sunlight can scorch leaves, creating entry points for spores.
Actionable fix: Provide 12–16 hours of light daily (LED grow lights are ideal). Keep seedlings in a stable 65–75°F environment and avoid drafts. Use reflective surfaces to maximize light efficiency.
Fixing Fungal Foes on Seedlings
Mold on your seedlings doesn’t have to mean game over—with the right approach, you can save your plants and prevent future outbreaks. Below are practical, step-by-step solutions tailored to common causes, from overwatering to poor airflow.
Each fix is designed to be easy to implement and gentle on young plants.
If your seedlings are sitting in soggy soil, excess moisture creates the perfect moldy playground. Act fast to dry things out and adjust your watering habits.
How to Fix It:
- 🌱 Remove Affected Seedlings – Gently pull any seedlings with moldy stems or leaves and discard them (don’t compost them—the spores will spread).
- 💦 Let the Soil Dry – Stop watering for 24–48 hours to allow excess moisture to evaporate. If the tray has drainage holes, tip it to let water escape.
- 🔄 Repot Healthy Seedlings – Transfer unaffected seedlings to fresh, sterile potting mix in clean containers. Use a mix with perlite or vermiculite (20–30%) to improve drainage.
- 📏 Water Smarter – From now on, water only when the top inch of soil feels dry. Use a spray bottle for gentle misting instead of drowning them.
💡 Prevention Tip:
- Use saucers with drainage holes to catch excess water.
- Avoid bottom-watering (soaking trays) if your mix stays damp too long.
Mold thrives in stagnant, humid air, especially under plastic domes or in crowded trays. Break up the moisture with better ventilation.
How to Fix It:
- 🚪 Remove Plastic Covers – If you’re using a humidity dome, prop it open or remove it entirely for a few hours daily to let air circulate.
- 🌬️ Fan It Out – Place a small oscillating fan on low speed near the seedlings (but not too close—avoid leaf burn). This mimics natural breezes and reduces humidity.
- 🪴 Space Them Out – If seedlings are packed tightly, thin them so they’re 1–2 inches apart for better airflow.
- 🌞 Increase Light (Indirectly) – Weak light slows drying. Move seedlings to a brighter spot (but avoid direct sun, which can scorch).
💡 Prevention Tip:
- Mist seedlings in the morning so they have time to dry before nighttime humidity sets in.
- Use a dehumidifier in your grow space if indoor humidity stays above 60%.
If mold keeps returning, your soil or gardening tools might be harboring spores. Clean everything to break the cycle.
How to Fix It:
- 🧼 Sterilize Tools – Wash scissors, tweezers, and trays with 1 part bleach to 9 parts water, then rinse and dry.
- 🔥 Heat-Treat Soil (Optional) – For severe cases, microwave your potting mix for 1–2 minutes (test a small batch first—some mixes can get too hot). Alternatively, bake at 200°F (93°C) for 30 minutes.
- 🛒 Switch to Fresh Mix – If mold persists, ditch the old soil and repot in a sterilized, fungus-free blend (look for "seed-starting mix" labeled for disease resistance).
- 🍄 Add a Fungicide (Natural or Store-Bought) –
- DIY: Mix 1 tsp baking soda + 1 quart water + a few drops of dish soap. Spray lightly on seedlings (avoid oversaturating).
- Store-Bought: Use a copper-based fungicide (like Cupric Hydroxide) following package instructions.
💡 Prevention Tip:
- Store tools in rubbing alcohol between uses to prevent contamination.
- Rotate soil brands—some mixes harbor hidden pathogens.
If mold is paired with soft, mushy stems or tiny insects, you’re dealing with secondary rot or pests that worsen fungal growth.
How to Fix It:
- 🪒 Trim Damaged Areas – Use sterilized scissors to cut away moldy leaves or stems below the affected spot (but don’t remove more than 1/3 of the plant).
- 🐜 Check for Pests – Look for slugs, fungus gnats, or aphids. Treat with:
- Neem oil spray (1 tsp neem oil + 1 tsp mild soap + 1 quart water).
- Sticky traps for gnats.
- 🛡️ Boost Plant Immunity – Spritz seedlings with a weak compost tea (1:10 ratio) for 1–2 weeks to strengthen their defenses.
💡 Prevention Tip:
- Avoid overhead watering—it spreads pests and spores. Water at the base instead.
- Use row covers if outdoor pests are an issue.
If your seedlings are severely moldy or stunted, they may not recover. Start fresh with these steps: 1. 🌱 Save Healthy Seedlings – Only keep those with no visible mold or wilting.
- 🛒 Buy New Trays & Soil – Old containers and mix can’t be fully sterilized.
- 🔄 Replant with Care – Follow the drainage, airflow, and sterilization tips above.
Final Thought: Mold on seedlings is fixable—but the key is acting fast and preventing recurrence. With these steps, your next batch will grow strong, mold-free, and thriving! 🌱✨
Frequently asked questions
Why does mold appear at the soil line on seedlings?
Mold at the soil line is usually damping-off, caused by excess moisture trapping fungal spores. Poor airflow, overwatering, or contaminated soil create the perfect conditions for Pythium or Rhizoctonia to attack tender stems at the base. This is where seedlings are most vulnerable—right where soil meets stem.
Can I save seedlings with mold, or should I throw them away?
If only the leaves have light mold, you can trim affected areas with sterilized scissors and treat with neem oil. But if stems are mushy or seedlings wilt, remove them immediately—mold spreads fast, and saving them risks infecting healthy plants. Always discard severely affected seedlings in sealed bags, not compost.
Is hydrogen peroxide safe to use on moldy seedlings?
Yes! A 1-part 3% hydrogen peroxide to 10-parts water solution is a gentle, effective fungicide. Spray lightly on seedlings (avoid oversaturating) to kill spores without harming plants. Reapply every 3–5 days until mold disappears. It’s also great for sterilizing soil—just mix 1 cup per gallon of soil before planting.
How can I prevent mold in my seed-starting setup?
Focus on three key fixes:
- Airflow—use a small fan on low or prop open humidity domes.
- Drainage—choose pots with holes and a well-draining mix (add perlite or vermiculite).
- Sterilization—bake soil at 180°F for 30 minutes or use a 3% hydrogen peroxide solution on tools and trays.
Will my seedlings recover if I fix the mold now?
Healthy seedlings can bounce back within 3–7 days if you act fast: remove moldy plants, improve airflow, and adjust watering. Weak or severely infected seedlings may not recover, but healthy ones will strengthen once the fungal environment is gone. Monitor closely for new growth—it’s your sign they’re healing!