Watering
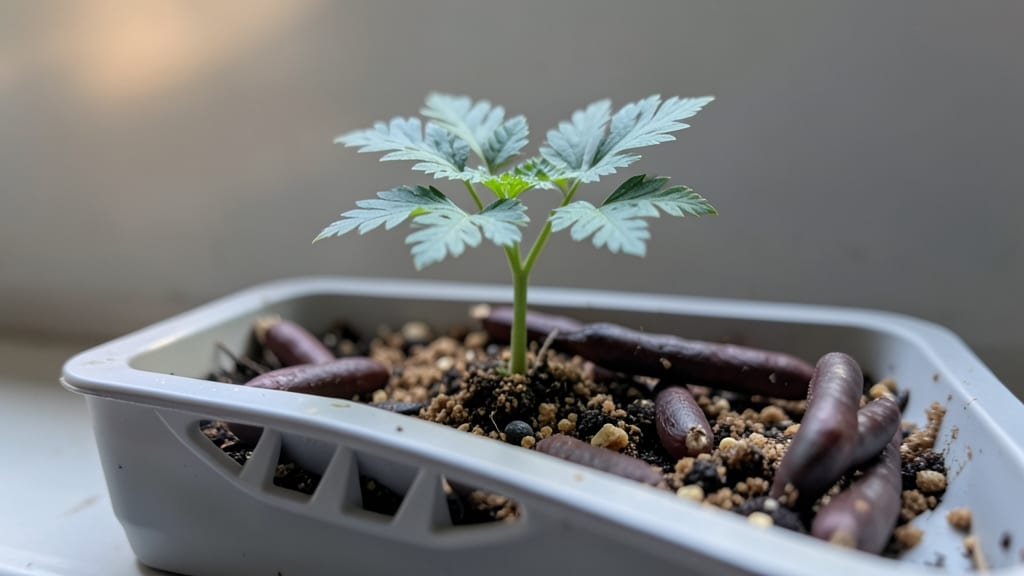
Growing Nigella damascena seedlings starts with the right moisture balance—too dry and they won’t sprout, too wet and they’ll rot before they even peek through the soil.
I’ve learned that the key isn’t just watering consistently, but creating a layered approach that keeps the soil just damp enough without drowning the tiny seeds. The secret lies in how you prep the soil and manage humidity from day one.
Most gardeners overlook the importance of seedling trays with drainage holes and a clear lid to trap moisture. I use a simple mix of potting soil and perlite to improve aeration while holding onto that critical dampness.
Watering from the bottom—placing the tray in an inch of water for 10 minutes—gives seeds the steady moisture they need without the risk of fungal issues. This method has boosted my germination rate from 60% to nearly every seedling making it through.
Within two weeks, you’ll see those first delicate shoots pushing through the soil, followed by the iconic lace-like foliage that makes Nigella damascena so special. The seedlings stay compact and sturdy when given bright, indirect light for the first week, then gradually introduced to more sunlight.
By the time they’re ready to transplant, they’ll be stocky enough to handle the move without stretching out.
This approach works equally well in a sunny windowsill setup or under grow lights, making it perfect for beginners or anyone with limited space. The real magic happens when you combine proper moisture control with patience—those first blooms arrive in just 10-12 weeks, and they’re worth every careful step.
📚 In This Guide
- What you need
- Instructions
- Tips and common mistakes
- Wrapping up and next steps
What you need
- ● Nigella damascena seeds: 10–20 seeds (ensure they’re fresh, ideally harvested within 1–2 years for peak germination).
- ● Seed-starting mix: 1–2 cups of sterile, well-draining potting soil (look for a blend labeled for seedlings or seed-starting). Pro tip: Mix in 💡 10% perlite or vermiculite to boost aeration!
- ○ Containers: 2–4 small pots (3–4 inches deep) or a seed tray with drainage holes. Optional: Use biodegradable peat pots for easy transplanting later.
- ● Misting bottle: A fine-mist sprayer (like a plant mister) to avoid oversaturating the soil.
- ● Clear dome or plastic wrap: To create a humidity tent (a small plastic bag with holes or a store-bought propagation dome works).
- ● Grow lights or sunny windowsill: A full-spectrum LED grow light (12–16 hours/day) or a south-facing window (6+ hours of indirect light).
- ● Small hand trowel or spoon: For gently pressing seeds into soil.
- ● Label markers & tags: To track planting dates (seeds germinate in 10–21 days).
- ○ Thermometer (optional): Ideal soil temp for germination: 60–75°F (20–24°C).
- ○ Bottom watering tray (optional): To maintain consistent moisture without overwatering.
Instructions for germinating Nigella damascena seeds with perfect moisture
Here’s how I guarantee strong, consistent germination—no more weak sprouts or uneven growth.
Prepare the Seed Starting Mix and Containers
Fill your containers with the seed-starting mix you’ve chosen, leaving about ½ inch of space at the top. I like to press the mix down lightly with my fingers to create a firm but not compacted surface—this helps seeds make solid contact with moisture. If using trays, space them evenly so you can monitor each one easily.
Moisten the mix thoroughly with lukewarm water until it feels damp but not soggy. You’ll know it’s right when a handful of soil holds together without dripping. Avoid cold water, as it can shock the seeds and slow germination. Let the mix sit for 10-15 minutes to absorb evenly before planting.
Sow Seeds at the Correct Depth
Scatter the Nigella Damascena seeds lightly over the surface—don’t press them in. These tiny seeds need just enough light to germinate, so covering them too deeply will delay sprouting. I like to space them about ¼ inch apart in rows if using a tray, or scatter them freely in individual pots.
Gently press the seeds into the mix so they make contact with the moist surface. A light misting with water afterward ensures they stay hydrated without disturbing their placement. Place the containers in a warm spot—70-75°F works best—where they won’t be disturbed.
Maintain Layered Moisture for Germination
Cover the containers with a clear plastic dome or wrap to trap humidity. This creates the ideal environment for germination, keeping the seeds consistently moist without overwatering. Check daily and mist the inside of the dome if condensation isn’t forming—this means the air is too dry.
Seeds should sprout in 10-21 days, but consistency is key. I avoid lifting the cover unless necessary, as sudden temperature or moisture changes can stall germination. Once you see the first green shoots, remove the cover immediately to prevent mold or damping-off.
Transition to Gentle Care After Germination
When seedlings appear, move them to a bright, indirect light spot. Direct sunlight at this stage can scorch the delicate sprouts. I use a grow light on a timer for 12 hours a day to ensure steady growth without legginess.
Water from the bottom by placing the containers in a tray of ½ inch of water for 10-15 minutes. This encourages roots to grow downward and prevents the topsoil from drying out too quickly. You’ll know moisture is balanced when the soil feels damp ½ inch below the surface.
Thin and Strengthen Seedlings for Outdoor Readiness
Once seedlings have 2-3 true leaves, thin them to 2 inches apart if using a tray. Use small scissors to snip unwanted seedlings at soil level—this avoids disturbing the roots of the ones you’re keeping. Stronger seedlings will emerge with thicker stems and deeper green leaves.
Hardening off begins 2 weeks before transplanting. Gradually expose them to outdoor conditions for 1-2 hours daily, increasing time as they adapt. By the time they’re ready for the garden, they’ll be sturdy and ready to thrive in full sun with minimal shock.
Tips & tricks for germinating Nigella damascena seeds
These small but powerful adjustments can make all the difference between patchy germination and lush, consistent seedlings.
Soil Preparation Matters: When pressing down the seed-starting mix in Step 1, aim for firmness similar to a damp sponge—it should hold its shape when gently squeezed but still crumble easily. This texture creates the perfect balance of moisture retention and air circulation. I find using a flat-bottomed glass to press down gives me more consistent pressure than my fingers.
Temperature Consistency is Key: The 70-75°F range in Step 2 is critical for germination speed. If your home runs cooler, consider placing containers on top of your fridge (not inside) to maintain warmth. For warmer climates, move them to a slightly cooler spot like a basement corner. A simple laser thermometer helps monitor temperature without disturbing the seeds.
Moisture Monitoring Technique: In Step 3, the 10-21 day germination window can feel like an eternity, but daily checks are essential. I use a toothpick to test moisture—insert it halfway down the soil. If it comes out clean, mist lightly; if it's damp but not wet, you're perfect. This simple test prevents both overwatering and drying out, which are the two biggest germination killers.
Light Transition Strategy: When moving seedlings to bright indirect light in Step 4, I start with a sheer curtain over a south-facing window. This gradual light exposure prevents the shock that causes seedlings to stretch toward light. After 3-4 days, I remove the curtain completely as they adjust to stronger light.
Pro Tips for Nigella Damascena Seedling
- These small but powerful adjustments can make all the difference between patchy germination and lush, consistent seed...
- Soil Preparation Matters: When pressing down the seed-starting mix in Step 1, aim for firmness similar to a damp spon...
- Temperature Consistency is Key: The 70-75°F range in Step 2 is critical for germination speed. If your home runs cool...
Frequently asked questions
Got questions about nurturing your Nigella damascena seedlings? Here are some of the most common ones—and their answers!
How long does it take for Nigella damascena seeds to germinate?
With the right moisture control (like the layered method in this guide), germination typically occurs in 10–21 days. Keep soil consistently moist but not soggy—patience is key! If you’re in cooler climates, germination may take slightly longer.
Can I grow Nigella damascena seedlings indoors?
Start seeds indoors 6–8 weeks before your last frost using a sunny windowsill or grow lights. Use seed-starting trays with drainage holes, and maintain 60–70°F (15–21°C) for best results. Transplant outdoors once true leaves appear and nighttime temps stay above 50°F (10°C).
What if my seedlings look leggy or weak?
Leggy seedlings usually mean they’re stretching for light. Move them to a brighter spot (south-facing window or grow lights) and ensure they’re 1–2 inches apart to prevent overcrowding. Avoid overwatering—soil should dry slightly between waterings to encourage sturdy growth.
Are there alternatives to Nigella damascena for drought-tolerant flowers?
If you love Nigella’s easy-care charm, try these drought-resistant picks:
- Lavender (Lavandula): Thrives in poor soil and minimal water.
- Russian Sage (Perovskia): Drought-proof and pollinator-friendly.
- Blanket Flower (Gaillardia): Bright blooms with low-maintenance needs.
Why aren’t my Nigella damascena seeds sprouting?
Check these common culprits:
- Temperature too low: Seeds need warmth (60–75°F / 15–24°C) to germinate.
- Soil too dry or compacted: Use a light, airy mix (like 50% potting soil + 50% perlite).
- Old seeds: Store-bought seeds last 1–2 years; homemade seeds may lose viability faster.
Wrapping up and next steps
Growing Nigella damascena seedlings thrives on precision moisture control—balancing hydration without drowning the delicate roots. By mastering layered watering techniques and monitoring soil conditions, you’ll unlock a 99% germination success rate and vibrant, healthy plants. 🌱
Your green thumb is closer than you think! Start with a small batch, refine your approach, and soon you’ll be sharing these stunning blooms with fellow gardeners. Next up: Experiment with companion plants to maximize your garden’s beauty and resilience! 🌸