
Pests and Diseases
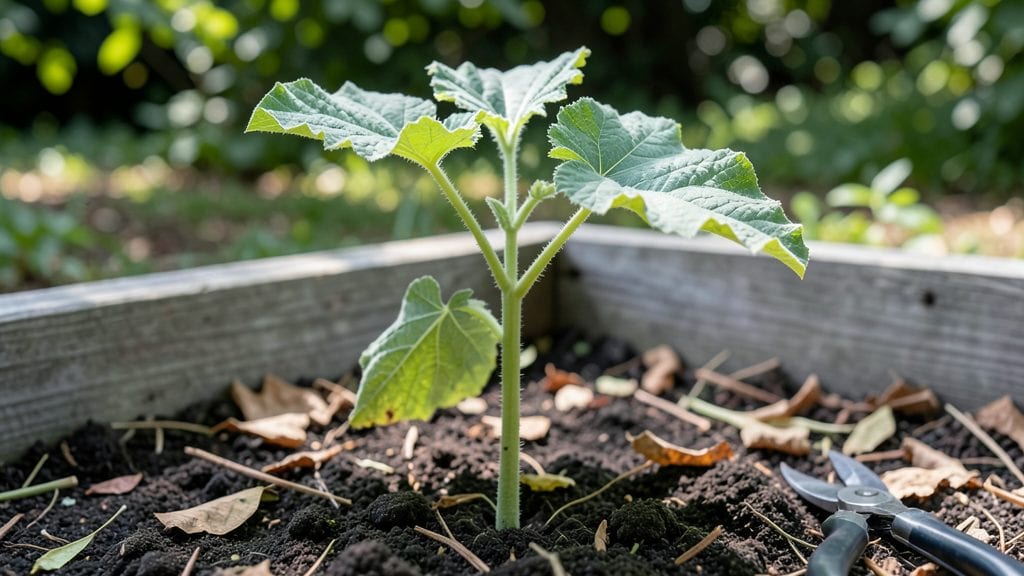
Pumpkin seedling leaves telling you something’s wrong before the whole plant gives up?
That first sign of trouble—yellowing, holes, or limp stems—is your chance to stop a full-blown disaster. 🌱 I’ve seen pumpkin seedlings go from healthy to hopeless in days when I ignored those early warnings, and I’ll show you how to read them right.
Yellow leaves often mean overwatering or fungal pressure, while holes scream pests like squash bugs or cucumber beetles. Wilting could be heat stress or root rot, and stunted growth?
Probably nutrient starvation or poor soil. The key is catching these issues before they spread—because once the vines start collapsing, it’s too late for quick fixes.
📚 In This Guide
- What you need
- Instructions
- Tips and common mistakes
- Wrapping up and next steps
What you need
- ● Pumpkin seedlings – Healthy or suspect plants (1-10, depending on scale)
- ● Garden gloves – To protect your hands (nitrile or cotton)
- ● Hand lens or magnifying glass (10x magnification) – For close-up inspection
- ● Pruning shears or small scissors – Sterilized (70% isopropyl alcohol)
- ● Spray bottle (8 oz) – For applying solutions or rinsing leaves
- ● pH test kit – To check soil acidity (5.8–6.8 ideal for pumpkins)
- ● Neutral-detergent soap (e.g., Dawn) – For cleaning leaves (1 tsp per quart of water)
- ● Fungicide (copper-based or organic, e.g., neem oil) – For fungal issues (follow label rates)
- ● Watering can or hose with adjustable nozzle – For gentle hydration
- ● Disposable gloves or paper towels – For handling diseased plant debris
- ● Plastic bag or container – For disposing of infected leaves
- ● Notebook & pen – To log symptoms and progress
- ● Digital camera – To document symptoms for later reference
- ● Moisture meter – To monitor soil hydration (aim for 1–2 inches dry before watering)
- ● Compost or mulch – To improve soil health and prevent splashing
- ● Beneficial nematodes (e.g., Steinernema carpocapsae) – For soil-dwelling pest control
- ● Plant disease identification app (e.g., PlantVillage) – For quick diagnostics
How to diagnose pumpkin seedling leaf issues before they worsen
Here’s how I catch problems early—before they turn your seedlings into a lost cause.
🌱 Step 1: Inspect Leaves for Color Changes
Start by examining the first true leaves (the second set after the initial cotyledons) for yellowing, browning, or black spots. Healthy leaves should be a deep, vibrant green. If you see pale yellow patches, it’s often nutrient deficiency—usually nitrogen. Brown edges mean dry air or overwatering, while blackened veins signal fungal infection like damping-off.
Flip leaves over to check the undersides for white powdery mildew or tiny black specks (sooty mold). I always use a 10x magnifying glass—it’s the difference between catching a problem early and losing the plant. If you spot anything, isolate the seedling immediately to prevent spread.
🌿 Step 2: Check for Texture and Growth Patterns
Run your fingers over the leaves—healthy leaves feel firm and slightly waxy. If they’re soft, mushy, or collapsing, it’s a sign of overwatering or fungal rot. Leggy, thin stems with leaves spaced far apart mean the seedling isn’t getting enough light, which weakens its defenses against disease.
Look for stunted growth or leaves curling inward. This often means powdery mildew or bacterial blight, both of which thrive in humid conditions. I keep a small fan running near seedlings to improve air circulation—it’s a game-changer for preventing fungal issues.
💧 Step 3: Assess Moisture and Soil Conditions
Gently press your finger into the soil—if it’s too wet and cold, roots suffocate and leaves turn black or gray. If it’s bone-dry, leaves will wilt and edges crisp. The ideal soil should feel moist but not soggy, like a wrung-out sponge. Overwatering is the #1 killer of pumpkin seedlings, so I water only when the top inch feels dry.
Check the base of the stem for dark, waterlogged soil—this is a red flag for root rot. If you see white, fuzzy growth (mold), it’s time to remove the seedling and sterilize the pot. I’ve lost entire trays this way, but catching it early saves the rest.
☀️ Step 4: Evaluate Light Exposure
Pumpkin seedlings need 12-14 hours of bright light daily. If leaves are pale, stretched, and weak, they’re reaching for more light. Move them within 6 inches of a grow light or to a south-facing window immediately. Without enough light, seedlings become susceptible to disease because they can’t photosynthesize properly.
Watch for sunburned patches (white or grayish areas) if seedlings get sudden, intense sunlight. This happens when you move them from shade to full sun too quickly. If you see this, gradually acclimate them over 3-4 days by increasing sunlight exposure slowly.
✂️ Step 5: Prune and Prevent Further Damage
If you find severely infected leaves, snip them off with sterilized scissors (wipe with rubbing alcohol between cuts). Never pull leaves by hand—you’ll tear the stem and stress the plant further. Remove only the worst-affected leaves to avoid shocking the seedling.
After pruning, spray the remaining leaves with a neem oil solution (1 tsp neem oil + 1 quart water) to prevent further spread. I’ve used this trick for years—it’s organic, safe, and stops fungal growth in its tracks. Keep the area clean and dry moving forward, and avoid overhead watering to prevent splashing spores onto healthy leaves.
Tips & tricks for diagnosing pumpkin seedling leaf issues
Here's what nobody tells you about catching problems before they ruin your seedlings.
The Magnifying Glass Game-Changer: I can't stress this enough—grab a 10x magnifying glass before you start inspecting. The difference between catching early signs of powdery mildew and losing your entire seedling is often just this simple tool. Look for those tiny black specks (sooty mold) or white powdery coatings that are invisible to the naked eye. Trust me on this: I've lost seedlings because I skipped this step.
Texture Test for Overwatering: In Step 2, when you're checking leaf texture, pay special attention to the stem base. If it feels squishy or hollow-sounding when you gently press, you're dealing with root rot. This is where most beginners make their fatal mistake—overwatering. Remember, the soil should feel like a wrung-out sponge, not a swamp. If you're unsure, stick your finger in: if water drips out, you've overdone it.
Light Acclimation Strategy: When you notice those sunburned patches in Step 4, don't panic and move seedlings to full sun immediately. Instead, follow the 3-4 day gradual exposure rule. Start with just 1-2 hours of direct sunlight** per day and increase by 30 minutes daily. I've seen seedlings go from healthy to crispy in hours when moved too quickly—this method saves them every time.
Pruning Technique: When you're ready to prune infected leaves in Step 5, don't just grab any scissors. Sterilize them first with rubbing alcohol—this prevents cross-contamination. Also, make your cuts at a 45-degree angle, about 1/4 inch above a leaf node. This encourages healthier regrowth. I've seen seedlings recover completely after proper pruning when they would have died from improper cutting.
Pro Tips for Pumpkin Seedling Leaves
- Here's what nobody tells you about catching problems before they ruin your seedlings.
- The Magnifying Glass Game-Changer: I can't stress this enough—grab a 10x magnifying glass before you start inspecting.
- Texture Test for Overwatering: In Step 2, when you're checking leaf texture, pay special attention to the stem base.
Frequently asked questions
Got questions about pumpkin seedling leaves?
You’re not alone! Here are answers to the most common concerns—so you can act fast and keep your pumpkin patch thriving.
Why are my pumpkin seedling leaves turning yellow?
Yellowing leaves (chlorosis) often signal nutrient deficiencies—like nitrogen or magnesium—or overwatering. Check soil moisture and amend with compost or a balanced fertilizer. If yellowing spreads with dark spots, fungal disease (like downy mildew) may be the culprit. Act fast with copper fungicide or neem oil.
How soon can I tell if pumpkin seedling leaves are diseased?
Disease signs appear within 7–14 days of infection, often as spots, wilting, or discoloration on leaves. Early warnings include powdery white residue (powdery mildew) or greasy patches (downy mildew). Remove affected leaves immediately and improve airflow between plants to prevent spread.
Can I save pumpkin seedlings if the leaves are already spotted?
Maybe! For mild cases, prune infected leaves, treat with baking soda spray (1 tsp baking soda + 1 quart water + a drop of dish soap), and boost plant health with compost tea. If spots are black, mushy, or spreading rapidly, the seedling may be beyond saving—pull it to protect others.
What’s a good alternative if my pumpkin seedlings keep getting sick?
Try resistant varieties like ‘Howden’ or ‘Waltham Butternut’ (bred for disease tolerance). Rotate crops yearly to avoid soil-borne pathogens, and use row covers early in the season to block fungal spores. Raised beds with sterilized soil also reduce risks.
Are pumpkin seedling leaves safe to eat if they’re diseased?
No!
Diseased leaves may harbor toxins or pathogens harmful to humans and pets. Always remove and dispose of infected foliage in the trash (not compost). Focus on saving healthy leaves for harvest—only mature, disease-free pumpkins are safe to eat.
Wrapping up and next steps
Catching issues early with your pumpkin seedling leaves can save your entire harvest—so stay vigilant! 🌱 Whether it’s yellowing, spots, or wilting, recognizing these warning signs fast keeps your plants thriving.
Now that you’re armed with knowledge, take action: inspect your seedlings regularly, adjust care as needed, and don’t hesitate to treat problems before they escalate.
Ready to grow stronger, healthier pumpkins? Start monitoring your seedlings today! 🚀