Pruning
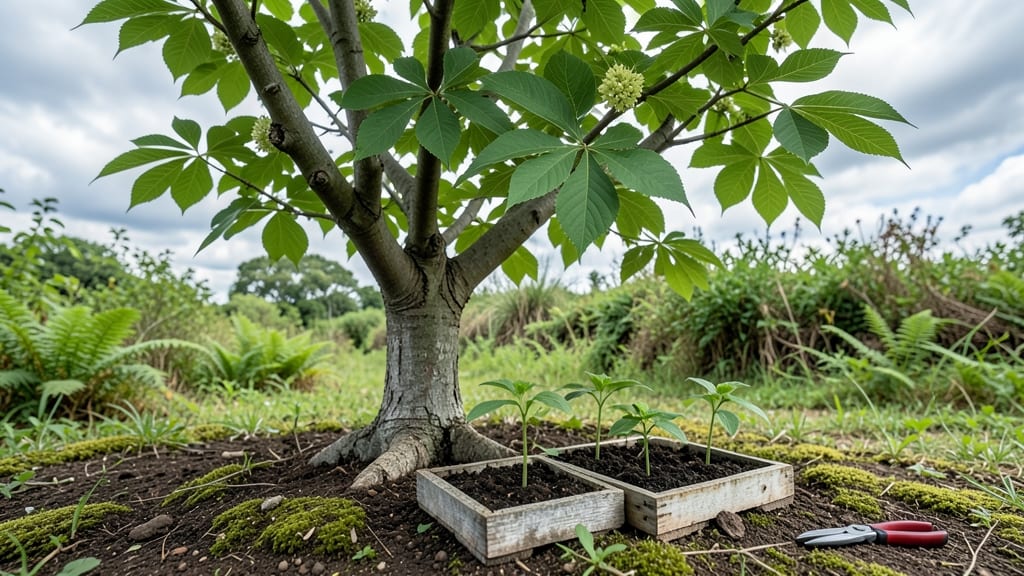
Sassafras tree seeds hold the promise of a fragrant forest right in your yard. 🌿 I’ve grown them from wild-harvested seed, and the key to success starts with knowing when and how to collect, prepare, and plant them for the best chance at strong, aromatic saplings.
The trickiest part is patience—sassafras seeds need cold stratification to break dormancy, mimicking their native forest cycle. You’ll need a mix of well-draining, slightly acidic soil (think leaf mold or compost) and a spot with partial shade to full sun, depending on your climate.
Most seeds sprout within 4-8 weeks if stored properly, but some take months.
Once they germinate, you’ll watch those first leaves unfurl with a faint anise-like scent—proof you’re on the right track.
By year three, your seedlings will be ready to transplant, and in 10-15 years, you’ll have a mature tree with roots prized for root beer, medicinal teas, or just the joy of rustling leaves in a homegrown forest.
Fair warning: These seeds don’t play by strict timelines, so don’t rush the process. The payoff—fragrant foliage, wildlife magnet, and edible roots—makes every wait worthwhile. Here’s how to set it up right the first time.
📚 In This Guide
- What you need
- Instructions
- Tips and common mistakes
- Wrapping up and next steps
What you need
- ● Sassafras seeds: Freshly harvested from ripe, green sassafras berries (typically in late summer to early fall). Aim for at least 50–100 seeds for a small garden patch.
- ● Pruning shears or sharp knife: For harvesting berries without damaging the tree. Opt for bypass pruners for clean cuts.
- ● Gloves: Heavy-duty gardening gloves to protect hands from thorns and sap.
- ● Paper towels or newspaper: For drying and storing seeds (1–2 sheets per batch).
- ● Small mesh bags or breathable containers: For seed storage (e.g., paper bags or fabric sacks).
- ● Garden soil or seed-starting mix: Well-draining, sandy-loam soil (or a mix with 30% perlite for better aeration).
- ● Small pots or seed trays: 3–4 inch containers with drainage holes (or a seed tray with individual cells).
- ● Watering can or spray bottle: For gentle hydration (fine mist setting preferred).
- ● Marker pens or labels: To tag seed pots with harvest date and variety (if applicable).
- ● Seed stratification kit: If cold-moist stratification is needed (e.g., refrigerator with damp paper towels for 30–60 days).
- ● Grow lights or sunny windowsill: For seedlings needing 12+ hours of light/day.
- ● Mulch (pine needles or straw): To retain moisture around young saplings.
- ● Field guide or sassafras ID app: To double-check seed/berry authenticity (e.g., iNaturalist or "Southeastern Trees" app).
- ● Compost or organic fertilizer: Balanced 10-10-10 for transplanting seedlings.
Step-by-Step guide to germinating sassafras tree seeds
Here’s how I transform wild-harvested sassafras seeds into sturdy saplings for your woodland garden.
🌱 Step 1: Stratify Seeds for Successful Germination
Sassafras seeds need cold stratification to break dormancy—nature’s way of timing germination with spring. Place the seeds in a paper towel or moistened peat moss, then seal them in a ziplock bag. Store the bag in your refrigerator’s crisper drawer for 90-120 days. Check monthly to ensure the medium stays damp but not soggy.
This mimics winter conditions and tricks the seed into thinking it’s time to sprout. If you skip stratification, germination rates drop dramatically—sometimes to near zero. I’ve tried planting fresh seeds without cold treatment, and after months, only one or two might crack open while the rest remain stubbornly dormant.
💧 Step 2: Prepare Containers and Planting Medium
Fill 4-inch diameter pots with a sterile seed-starting mix (never garden soil—it’s too dense and may harbor pathogens). Sassafras thrives in well-draining conditions, so I mix in 20% perlite to prevent root rot. Moisten the mix until it holds together when squeezed but doesn’t drip water.
Press the soil down lightly so the surface is firm but not compacted. The goal is a loose, airy medium that allows tender roots to push through easily. Tap the pot gently on the table once or twice to settle everything evenly. This ensures the seeds won’t sink too deep when planted.
🌿 Step 3: Sow Stratified Seeds and Maintain Moisture
Plant 1-2 seeds per pot at a depth of ¼ inch—roughly the diameter of the seed itself. Sowing too deep delays germination because the seedling exhausts its energy before reaching light. Cover lightly with a sprinkle of additional mix and mist the surface gently with a spray bottle until evenly moist.
Place the pots in a humidity dome or cover them loosely with plastic wrap to retain moisture. Keep them in a warm, dark location (like a seedling heat mat set to 70-75°F) until germination. Check daily but resist the urge to water again—condensation from the dome should keep the soil evenly damp. Germination typically takes 4-8 weeks, but patience is key.
☀️ Step 4: Provide Light and Gradually Acclimate Seedlings
Once seedlings emerge with first true leaves (not the initial cotyledons), move them to bright, indirect light for 1-2 weeks. Sassafras tolerates shade but grows best with 4-6 hours of filtered sunlight daily. After two weeks, introduce direct morning sun to harden them off.
You’ll notice leggy growth if light is insufficient—thin, pale stems with leaves spaced far apart. Strong seedlings have thick stems, deep green color, and compact spacing between leaves. Rotate pots weekly to prevent leaning toward the light source.
⏰ Step 5: Transplant Outdoors After Frost Danger Passes
Wait until spring’s last frost date has passed and soil temperatures reach 60°F before transplanting. Choose a partially shaded to sunny location with well-draining soil—sassafras hates soggy roots. Dig a hole twice as wide as the root ball but no deeper, then gently remove the seedling and place it in the hole.
Backfill with native soil, firm lightly around the base, and water deeply. Mulch with 2-3 inches of organic matter (like wood chips) to retain moisture and suppress weeds. Sassafras grows slowly at first but rewards patience with fragrant foliage and edible roots in just a few years.
Tips & tricks for germinating sassafras tree seeds
Mastering sassafras germination takes patience and precision—here's how to maximize your success with these fragrant woodland seeds.
Cold Stratification Timing: The 90-120 day cold stratification period is non-negotiable for sassafras seeds. I've found that starting in late fall (around November) gives you the perfect window to complete stratification by early spring. Place a small label in your refrigerator with the start date so you can track progress. If you begin stratification too early, seeds may dry out before germination season arrives.
Medium Moisture Balance: In Step 1, when storing seeds in the refrigerator, maintain that delicate balance between damp and soggy. I like to use a spray bottle to mist the paper towel or peat moss every 2-3 weeks—just enough to keep it slightly moist to the touch, like a wrung-out sponge. Overly wet medium can lead to mold, while too dry conditions prevent proper stratification. The key is consistency.
Container Preparation Insight: When preparing your 4-inch pots in Step 2, focus on creating that ideal loose, airy medium. I recommend mixing your sterile seed-starting mix with perlite in a separate container first—this ensures even distribution. The goal is a medium that feels like damp, crumbly sand when squeezed. This texture prevents compaction and allows those delicate roots to establish quickly.
Light Transition Strategy: The gradual light acclimation in Step 4 is where many growers go wrong. Start with bright indirect light for those first 1-2 weeks to prevent shock. I use a simple grow light positioned 6-8 inches above the seedlings. After two weeks, I gradually introduce direct morning sun by moving the pots to an east-facing windowsill. This slow transition prevents sunburn and helps seedlings develop stronger cell walls.
Pro Tips for Sassafras Tree Seeds
- Mastering sassafras germination takes patience and precision—here's how to maximize your success with these fragrant ...
- Cold Stratification Timing: The 90-120 day cold stratification period is non-negotiable for sassafras seeds. I've fou...
- Medium Moisture Balance: In Step 1, when storing seeds in the refrigerator, maintain that delicate balance between da...
Frequently asked questions
How long does it take for sassafras tree seeds to germinate?
Sassafras seeds can take anywhere from 2 to 6 months to germinate, depending on conditions. They often need a period of stratification (cold treatment) to break dormancy. Plant them in fall or winter for best results—patience is key!
Can I grow sassafras from store-bought seeds, or do I need wild-harvested ones?
Store-bought seeds can work, but wild-harvested seeds are often more resilient and adapted to your local climate. If you’re sourcing commercially, check for organic, non-GMO labels to avoid hybrid varieties that may not produce true sassafras flavor or root stock.
What’s the best way to prepare sassafras seeds for planting?
Start by soaking seeds in water for 24 hours to soften the outer shell. Then, mix them with damp sand or peat moss and refrigerate for 2–3 months (stratification). Plant them 1/4 inch deep in well-draining soil after cold treatment. Pro tip: Use a clear container to monitor moisture—keep it damp, not soggy!
Why aren’t my sassafras seedlings sprouting, even after stratification?
If seeds aren’t germinating, check for these common issues:
- Improper stratification: Ensure they’ve been cold and moist for long enough.
- Poor soil drainage: Sassafras hates soggy roots—amend soil with sand or perlite.
- Old seeds: Freshness matters! Wild seeds lose viability after 1–2 years.
- Pests or mold: Inspect for damage or fungal growth.
Are there faster alternatives to growing sassafras from seed?
Yes! If you’re eager for roots, consider:
- Root cuttings: Dig up healthy roots from a mature sassafras (with permission!) and propagate them in spring.
- Layering: Bend a low branch to the ground, cover it with soil, and wait for roots to form.
- Nursery saplings: Buy young trees (3–5 ft tall) for instant growth—just ensure they’re labeled as true sassafras.
Wrapping up and next steps
From gathering sassafras tree seeds to nurturing your fragrant forest garden, you’ve now unlocked the secrets of wildcrafting this versatile root stock! 🌱 Whether you’re drawn to its aromatic roots, medicinal properties, or culinary potential, these seeds are your gateway to a thriving, self-sustaining garden. Now’s your chance to take action—plant those seeds, tend to your saplings, and let the magic of the sassafras tree unfold in your own backyard!
🔹 Next Steps:
- Start small—plant a few seeds in pots or directly in your garden.
- Join local gardening groups to share tips and troubleshoot together.
- Experiment with recipes or remedies using your homegrown harvest!