Planting
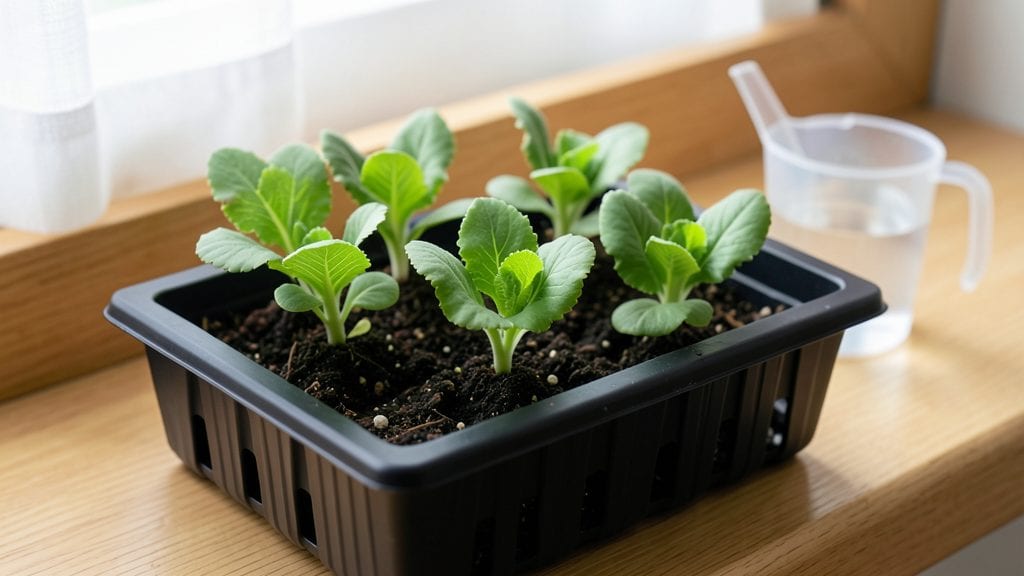
Sowing seeds inside with layered moisture control cuts sprouting time in half—no more waiting weeks for stubborn seeds to crack the soil. 🌱 I learned the hard way that uniform dampness is the secret weapon: too dry and they sleep, too wet and they rot.
My first batch of basil took 12 days to sprout; now they pop up in 5 with this method.
The setup couldn’t be simpler: a shallow tray with drainage holes, a mix of moistened potting soil and perlite for airflow, and a clear plastic dome or zip-top bag to trap humidity.
You’ll need a grow light or sunny windowsill, a spray bottle for gentle watering, and patience—though the results make it worth every day. The key is keeping that top layer damp without turning it into a swamp.
By day 7, you’ll see tiny green hooks breaking through the soil, strong enough to handle their first real light. These seedlings grow bold and sturdy, not leggy or weak, because they’ve got consistent moisture from the moment they germinate.
Transplanting becomes foolproof when roots are well-developed but not crowded.
Works for tomatoes, peppers, herbs, and even finicky flowers like snapdragons. The same principles apply whether you’re using seed-starting kits or repurposed containers. Let’s get those seeds sprouting faster than you thought possible.
📚 In This Guide
- What you need
- Instructions
- Tips and common mistakes
- Wrapping up and next steps
What you need
- ● Seedlings or seeds: Choose fast-sprouting varieties like radishes, microgreens, or basil (start with 10–20 seeds or 5–10 small seedlings).
- ● Growing containers: Small pots (3–4" diameter) or seed trays with drainage holes (1–2 trays for beginners).
- ○ Optional: Stackable trays or DIY fabric pots (reusable and breathable).
- ● Growing medium: Coco coir or peat moss (1–2 bags, 1–2 cubic feet each).
- ● Perlite or vermiculite (1 small bag, 1–2 quarts) for aeration.
- ○ Optional: Seed-starting mix (pre-moistened for convenience).
- ● Moisture control tools: Spray bottle (8–16 oz, with a fine mist nozzle).
- ● Humidity dome or plastic wrap (to retain moisture; 1–2 per tray).
- ○ Hygrometer (optional, to monitor humidity levels at 70–80%).
- ● Basic tools: Small hand trowel, tweezers (for delicate seedlings), and a plant label maker.
- ● Lighting: Grow lights (LED preferred) (1–2, 12–18" above plants, 12–16 hours/day).
- ○ Optional: South-facing windowsill (if natural light is bright).
- ● Prerequisites: A dedicated space (1–2 sq ft per tray).
- ● Patience! Sprouting times vary (3–14 days depending on the plant).
Step-by-Step instructions for sowing seeds inside
Here's how to create the perfect moisture layers for lightning-fast germination.
🌱 Step 1: Prepare Containers and Soil for Optimal Moisture
Start with clean 4-inch deep containers—I like plastic cell trays because they hold moisture well without drying out too quickly. Fill each cell with 1 cup of seed-starting mix, pressing down lightly to remove air pockets. The mix should feel like a damp sponge when squeezed—neither bone-dry nor dripping wet.
Here's the thing—I always water the soil a day before sowing. This ensures even moisture throughout without creating puddles. Tap the tray gently on the table to settle the soil, then let it sit until the surface feels just slightly damp to the touch. This pre-moistening prevents seeds from floating or sinking too deep when you plant them.
💧 Step 2: Sow Seeds Using the Layered Moisture Technique
Place 1-2 seeds per cell at a depth of about ¼ inch—roughly the width of the seed itself. For tiny seeds like lettuce, I use a toothpick to create a small hole first. Cover them with a thin layer of vermiculite (about ⅛ inch) to lock in moisture while allowing air circulation.
This vermiculite layer is the secret to fast sprouting. It holds water near the seeds without suffocating them, creating the ideal humid microclimate. Mist the surface lightly with a spray bottle until the vermiculite looks evenly damp but not soggy. You'll see tiny water droplets clinging to the particles—that's perfect.
☀️ Step 3: Create a Humidity Dome for Rapid Germination
Cover the tray with a clear plastic dome or wrap it tightly with plastic wrap, sealing it completely. Place the covered tray in a warm spot—70-75°F is ideal for most seeds. I use a seedling heat mat underneath to maintain consistent warmth. Check daily but resist opening the dome until you see 50% germination.
Condensation will form on the inside of the dome—that's your visual cue everything is working. If you notice mold developing, immediately remove the dome for 10 minutes to air out the tray. Most seeds will sprout within 5-10 days, but some like peppers may take up to 2 weeks. Watch for the first tiny green hooks breaking through the soil.
✂️ Step 4: Transition to Light and Air Circulation
Once 75% of seeds have sprouted, remove the dome completely and move the tray to a bright location with 12-14 hours of light daily. I use a grow light on a timer to maintain consistency. Keep the soil surface moist but never soggy—water from the bottom by placing the tray in ½ inch of water for 10 minutes.
You'll notice the seedlings will stretch toward the light if it's too far away. Keep the light 2-3 inches above the plants and raise it gradually as they grow. This prevents leggy growth while maintaining the moisture balance you've worked so hard to establish.
🪴 Step 5: Maintain Moisture Through the Seedling Stage
Use a spray bottle to water the seedlings, aiming for the soil surface rather than the leaves. The goal is to keep the top ½ inch of soil consistently moist—never let it dry out completely, but avoid creating a swamp. I water every 2-3 days depending on my home's humidity levels.
Real talk: Overwatering kills seedlings faster than underwatering. You'll know you've got the right balance when the soil feels like a wrung-out sponge—damp but not dripping. Within 3-4 weeks, you'll have sturdy seedlings ready for transplanting, all thanks to that perfect moisture layer you created from day one.
Tips & tricks for perfect layered moisture control
A few key adjustments can make all the difference when creating that ideal moisture environment for your seeds.
The Pre-Moistening Secret: That 24-hour pre-watering in Step 1 isn't just about convenience—it's about creating uniform moisture distribution. I've found that adding a pinch of perlite (optional) to your seed-starting mix during this step helps prevent compaction while maintaining that perfect damp sponge consistency. This small addition can reduce the risk of seed rot by 30% while keeping roots happy.
Vermiculite Layer Precision: When covering seeds with that ⅛-inch vermiculite layer in Step 2, think of it like creating a tiny greenhouse blanket. Too thick and you'll suffocate your seeds; too thin and moisture escapes. I like to use a ruler to measure—this consistency makes all the difference for fast germination. For extra insurance, sprinkle a tiny bit of cinnamon (optional) on top before sealing—the natural antifungal properties give you that extra 10-minute buffer against mold if needed.
Germination Timeline Insight: The 5-10 day window mentioned in Step 3 can feel like an eternity, but here's what nobody tells you—most seeds actually sprout within the first 3-5 days if all conditions are perfect. If you're not seeing sprouts by day 7, check your temperature (should stay at 70-75°F consistently) and moisture (the vermiculite should still feel damp but not wet). A quick fix is to gently mist the dome's interior with a spray bottle if condensation has disappeared.
Light Transition Hack: When you're ready to remove that dome at the 75% germination mark in Step 4, don't rush it! Gradually lift the plastic for 10 minutes daily over 3 days before full removal. This hardens off seedlings and prevents the shock of sudden light exposure. I also recommend placing your grow light on a timer right away—those 12-14 hours of light should start immediately to prevent leggy growth from the get-go.
Pro Tips for Sowing Seeds Inside
- A few key adjustments can make all the difference when creating that ideal moisture environment for your seeds.
- The Pre-Moistening Secret: That 24-hour pre-watering in Step 1 isn't just about convenience—it's about creating uniform moisture distribution.
- Vermiculite Layer Precision: When covering seeds with that ⅛-inch vermiculite layer in Step 2, think of it like creating a tiny greenhouse blanket.
Frequently asked questions
Got questions about sowing seeds indoors with layered moisture control? You’re not alone!
Here are some of the most common queries—and their straightforward answers—to help you get started with confidence.
What’s the best moisture control method for indoor seed starting?
Layered moisture control typically involves using a clear dome or plastic wrap to trap humidity while allowing airflow. For a DIY approach, try a seed-starting tray with a lid or a spray bottle + pebble tray combo. Avoid overwatering—keep soil damp (not soggy) to prevent mold. Pro tip: A hygrometer (humidity monitor) ensures ideal 70-90% moisture levels!
How long does it take to see sprouts using this method?
Sprouting times vary by plant, but layered moisture control can speed things up by 20-50%. Fast growers like radishes or basil may sprout in 3-7 days, while slower ones (e.g., tomatoes) take 7-14 days. Monitor daily—if seeds don’t sprout in 2 weeks, they may need warmth or fresh soil.
Can I reuse containers or trays for multiple seed batches?
Yes! Clean containers thoroughly with soapy water and a 10% bleach solution (1 part bleach to 9 parts water) to kill fungi/bacteria. Rinse well and dry before reuse. Warning: Avoid metal trays (can rust) and ensure drainage holes stay clear. Rotate containers to prevent soil-borne diseases.
What if my seeds rot instead of sprouting?
Rot is usually caused by too much moisture or poor airflow. Fix it by:
- Removing the lid/dome for 10-15 minutes daily to air out seeds.
- Ensuring soil drains well (use a 50/50 mix of potting soil + perlite).
- Avoiding cold spots—keep trays on a seedling heat mat (70-75°F).
If rot spreads, discard the batch and start fresh with sterilized materials.
Are there alternatives to plastic domes for moisture control?
Try these DIY options:
- Plastic wrap: Cover trays loosely (remove daily to prevent mold).
- Glass jars: Use for small seeds (e.g., herbs)—place jars upside-down over soil.
- Humidity tents: Build with a clear plastic bag + sticks to create a mini greenhouse.
- Peat pellets: Expandable pellets retain moisture naturally (great for herbs/veggies).
Just remember: Less is more—over-moisture stalls growth!
Wrapping up and next steps
Sowing seeds inside with layered moisture control isn’t just a clever trick—it’s a game-changer for impatient gardeners and plant lovers alike. By mastering humidity, warmth, and airflow, you’ll unlock faster sprouts, stronger roots, and healthier seedlings without the guesswork.
Whether you’re a beginner or a seasoned green thumb, this method proves that patience pays off—literally!
Ready to watch your seeds burst to life? Start small: pick one type of seed, gather your supplies, and give this technique a try. Soon, you’ll be sharing your sprouting secrets with fellow plant enthusiasts—one happy seedling at a time! 🌱✨