
Picking
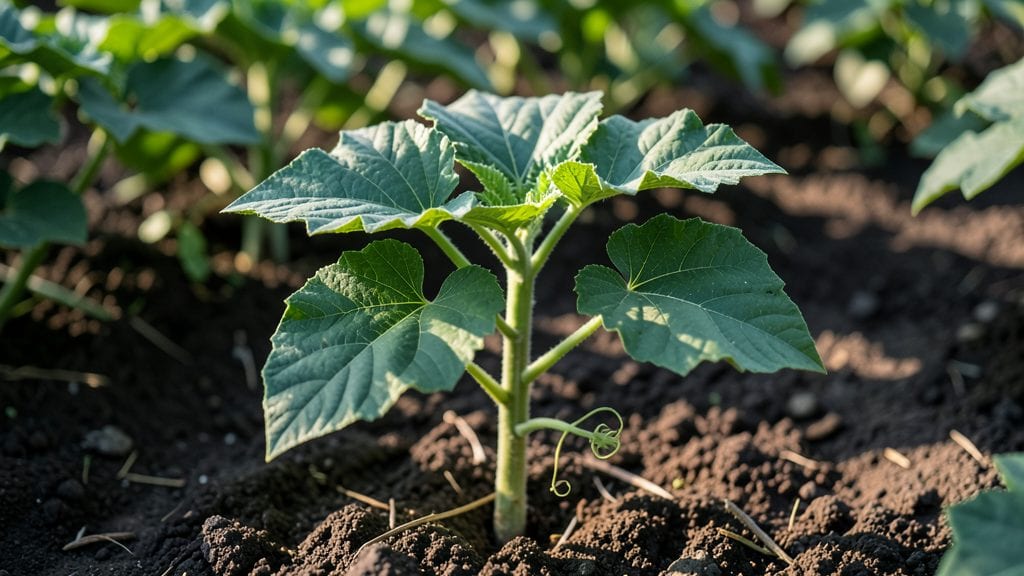
Summer squash seedlings can pop up in just 3-5 days with the right tricks—no more waiting weeks for stubborn sprouts. 🌱 I’ve tested everything from soil warmth to seed prep, and these small adjustments cut germination time in half while keeping seedlings sturdy.
The secret isn’t fancy: it’s about moisture, heat, and patience (though not too much of the latter).
Start with seeds soaked overnight in warm water to jumpstart the process, then plant them half an inch deep in well-draining soil kept at 80-85°F. A clear plastic dome or even a black plastic mulch over the tray traps heat and speeds things along.
Overwatering here is the real villain—damp soil without airflow leads to mold, not sprouts. Keep it lightly moist, like a wrung-out sponge.
Once those first leaves unfurl, you’ll notice bold, glossy cotyledons—a sign your seedlings are thriving. They’ll need bright light (12+ hours daily) to stay compact, not leggy.
Thin to 12 inches apart before transplanting, and watch them take off like rockets. The payoff? Bushes heavy with zucchini by mid-summer, not sad, stunted plants.
This method works for both yellow crookneck and green zucchini varieties, and even in cooler zones if you start indoors. The key is consistency—no skipping the warmth step or the thinning. Trust me, your first harvest will make the effort feel like magic.
📚 In This Guide
- What you need
- Instructions
- Tips and common mistakes
- Wrapping up and next steps
What you need
- ● Summer squash seeds: Choose heirloom or hybrid varieties like Zucchini, Yellow Crookneck, or Patio Star. Buy 10–20 seeds (or 1–2 packets) for a small patch.
- ● Seed-starting mix: A sterile, well-draining blend (e.g., Black Gold Seedling Mix)—avoid garden soil! Use 1–2 gallons per 10 seeds.
- ● Containers: Biodegradable pots (2–3 inches deep) or seed trays with cells (1 seed per cell). Aim for 10–20 containers total.
- ● Grow lights or sunny windowsill: A full-spectrum LED grow light (12–16 hours/day) or a south-facing window with 6+ hours of sunlight.
- ● Watering can or spray bottle: With a fine mist setting to avoid disturbing seeds.
- ○ Heat mat (optional but helpful): Keeps soil 80–90°F for faster germination (e.g., Vivosun Heat Mat).
- ● Small hand trowel: For gently pressing seeds into soil.
- ● Plant labels: Wooden or plant markers to track varieties.
- ● Fertilizer: A balanced, water-soluble fertilizer (e.g., 10-10-10) for post-germination growth.
- ● Humidity dome or plastic wrap: Creates a mini greenhouse to retain moisture (remove after germination!).
- ● Pruning shears: For thinning seedlings if overcrowded.
Step-by-Step instructions for growing summer squash seedlings indoors
Here’s how to get your summer squash seedlings off to a flying start—no waiting weeks for germination.
🌱 Step 1: Prep Containers and Seed Starting Mix
Use the 4 biodegradable seedling pots (2.5 inches deep) and fill each with 1 cup of seed-starting mix—this lightweight blend drains perfectly and prevents the compacted soil that stunts squash roots. Press the mix down gently so it’s firm but not packed; you want it to hold moisture without becoming soggy. I like to tap the pots on the table once to settle the soil evenly. Moisten the mix until it feels like a damp sponge—just enough to hold together when squeezed, but no drips.
Here’s the thing—summer squash seeds germinate best in warm soil (80-90°F). If your home runs cooler, pop the pots on a seedling heat mat for 12 hours daily. Without this warmth, germination can drag out for 2+ weeks instead of the 5-7 days you’re aiming for.
🌱 Step 2: Plant Seeds at the Right Depth and Spacing
Drop 1-2 seeds per pot about 1 inch deep—any shallower and they’ll dry out before sprouting. I tap the seed packet gently to release one seed at a time; planting too many in one hole leads to weak, crowded seedlings later. Cover lightly with a sprinkle of additional mix, just enough to hide the seeds but not bury them deeper.
Mist the surface with a spray bottle until the soil looks evenly moist. A heavy watering can will dislodge the seeds or bury them too deep, delaying germination. Label each pot with the variety and date—after a week of identical green sprouts, you’ll forget which is which. Place the pots in a humidity dome or cover them loosely with plastic wrap to trap warmth and moisture.
💧 Step 3: Trigger Fast Germination with Warmth and Moisture
The key to speed here is keeping the soil consistently warm and moist. Check daily but resist the urge to water—condensation inside the dome provides enough humidity. If the soil surface dries out, mist lightly again. You’ll see radicles (tiny white roots) emerge first, followed by the first true leaves in 5-7 days if conditions are perfect.
Once 50% of seeds have sprouted, remove the dome immediately. Trapped humidity around new seedlings invites damping-off disease, which collapses stems overnight. Place the pots under grow lights (14-16 hours daily) or in a south-facing window—summer squash seedlings need bright light to prevent leggy, weak growth. Keep the lights 2-3 inches above the seedlings and raise them as the plants grow.
🌿 Step 4: Thin and Harden Off for Transplant Success
When seedlings show 2-3 true leaves, thin to the strongest plant per pot by snipping the weaker one at the base with scissors. This avoids disturbing roots, which summer squash hate. Water deeply after thinning—1/4 cup per pot—to help the remaining seedling establish. You’ll notice new leaves emerge within a week; that’s your signal everything is working.
Two weeks before your last frost date, start hardening off the seedlings. Place them outside in a sheltered spot for 1-2 hours the first day, gradually increasing outdoor time by 1 hour daily over 10-14 days. Watch for wilting or yellowing—if it happens, they’re not ready yet. Once seedlings tolerate a full day outside without stress, they’re ready for the garden. Transplant on an overcast afternoon to reduce transplant shock.
✂️ Step 5: Maintain Strong Seedlings Until Transplant
Keep the soil evenly moist but not soggy—summer squash roots need oxygen. Water when the top inch feels dry, and fertilize lightly with 1/2 teaspoon of balanced fertilizer dissolved in 1 cup of water every 2 weeks. You’ll see thick stems and deep green leaves—these are your markers for healthy, fast-growing seedlings.
Real talk: If a leaf yellows, don’t panic—it usually just needs more light. But if the stems turn black or collapse, you’ve got damping-off or overwatering. Adjust immediately by letting the soil dry slightly between waterings. With these steps, your seedlings will be ready for the garden in 4-6 weeks—no waiting, no guesswork.
Tips & tricks for perfect summer squash seedlings
Fast germination isn't magic—it's method. These tricks cut waiting time in half while ensuring robust, transplant-ready seedlings.
Soil Temperature Secret: The 80-90°F soil temperature range isn't just ideal—it's non-negotiable for summer squash. I've seen germination times stretch to 3 weeks when soil stays below 70°F. For cooler homes, use a seedling heat mat for those critical 12 hours daily—this maintains consistent warmth without overworking your space. Pro tip: Place a thermometer in the mix to monitor temps accurately.
Humidity Dome Hack: That plastic wrap or humidity dome in Step 2 isn't just decorative—it's a microclimate. I've found seedlings sprout 24-48 hours faster with proper humidity. Remove it immediately when 50% of seeds sprout to prevent damping-off, but don't rush—wait until you see those first radicles peeking through. A quick test: Condensation should form on the inside of the dome when you lift it.
Lighting Strategy: The 14-16 hours of daily light in Step 3 is your golden window for preventing leggy seedlings. Position grow lights 2-3 inches above the pots and adjust as they grow—too high and they'll stretch, too low and they'll burn. I use LED grow lights on a timer to automate this perfectly. For window growers, rotate pots daily so all sides get equal light exposure.
Thinning Technique: When you thin to 2-3 true leaves in Step 4, use clean scissors and cut at soil level—not above it. This prevents disease entry points. I've seen gardeners accidentally uproot the remaining seedling when pulling weak ones, so always thin from the outside in. The 1/4 cup watering afterward helps the remaining plant recover faster by preventing transplant shock.
Pro Tips for Summer Squash Seedling
- Fast germination isn't magic—it's method.
- Soil Temperature Secret: The 80-90°F soil temperature range isn't just ideal—it's non-negotiable for summer squash.
- Humidity Dome Hack: That plastic wrap or humidity dome in Step 2 isn't just decorative—it's a microclimate.
Frequently asked questions
Got questions about growing summer squash seedlings?
You’re not alone! Here are answers to the most common concerns—so you can skip the guesswork and get straight to thriving plants.
How long does it take for summer squash seedlings to germinate?
Most summer squash seeds sprout in 3–10 days when soil stays warm (70–90°F). Keep them moist but not soggy, and place them in a sunny spot or under grow lights. Pro tip: If your home is chilly, try a heat mat to speed up germination!
Can I plant summer squash seedlings directly outside?
Yes! Unlike some veggies, summer squash hates transplant shock, so start them outdoors when soil is at least 60°F and night temps stay above 50°F. Harden off seedlings (acclimate to outdoor conditions) for 3–5 days first. Pro tip: Plant seeds 1 inch deep and 2–3 feet apart for optimal growth.
Why aren’t my summer squash seedlings sprouting?
Check these common culprits:
- Cold soil: Seeds need warmth to germinate—try a seedling heat mat.
- Too wet/dry: Keep soil consistently moist (not drenched or bone-dry).
- Old seeds: Summer squash seeds lose viability after 5–7 years.
- Depth issues: Plant no deeper than 1 inch.
What’s the best alternative if my seedlings get leggy?
Leggy seedlings (long, weak stems) happen from too little light. Fix it by:
- Moving them to a sunnier spot or under grow lights (12–16 hours/day).
- Thinning crowded seedlings to 12–18 inches apart for better airflow.
- Using a reflective surface (like aluminum foil) to bounce light.
When is the best time to harvest summer squash seedlings?
Harvest when squash are 6–8 inches long and skin is shiny/glossy (before seeds get too big). Pick frequently to encourage more production! For seed-saving, let a few squash mature fully (seeds turn hard and dry). Pro tip: Use pruners or a sharp knife to avoid damaging vines.
Wrapping up and next steps
Growing summer squash seedlings can be a rewarding experience with the right techniques! By following these fast-germination tricks—like proper soil prep, ideal moisture, and strategic sunlight—you’ll set your plants up for successful, bountiful harvests in no time. 🌱
Now that you’re armed with the know-how, it’s time to roll up your sleeves and get planting! Start with just a few seedlings, experiment with these tips, and soon you’ll be enjoying homegrown zucchini, yellow squash, and more. Happy gardening—your future meals (and bragging rights) are waiting! 🍆✨