
Transplanting
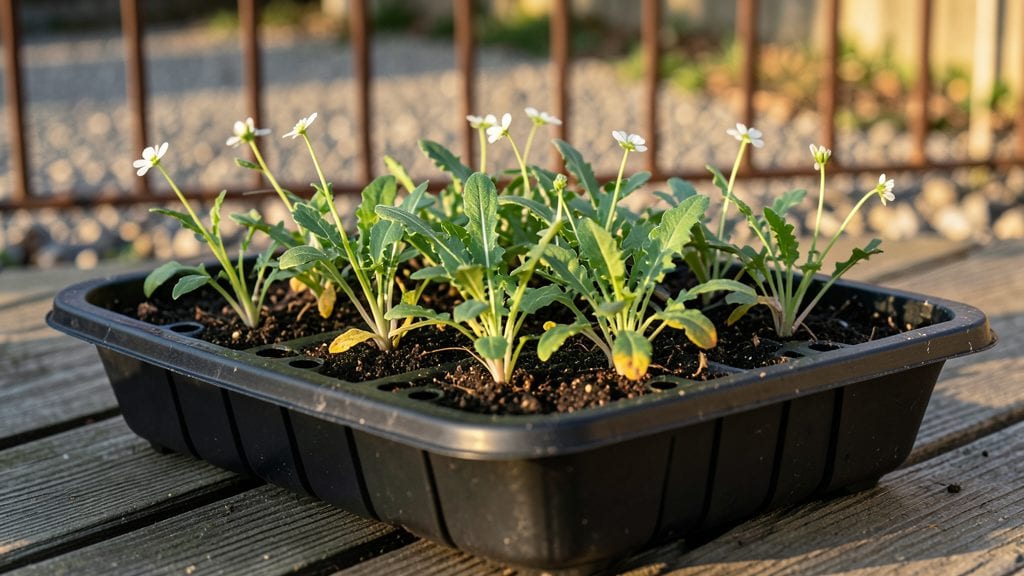
Thinning arugula seedlings isn’t just about making space—it’s about giving each plant the room to grow bold, peppery leaves instead of scrappy, bitter ones. 🌱 I’ve learned the hard way that skipping this step leads to leggy, crowded plants that bolt faster than you can say "pesto."
The key is timing: wait until seedlings have their first true leaves but haven’t yet touched each other.
You’ll need a pair of clean scissors or your fingers (no tools required, just patience), a small container for transplanting extras, and a sunny spot ready for the survivors.
The goal is to leave seedlings about 2 inches apart—close enough to form a dense patch later but spaced enough to stretch toward the light. If you’re worried about wasting plants, the thinnings make great microgreens or salad toppings.
After thinning, water gently to settle the soil and encourage roots to expand into their new space. Within a week, you’ll notice the remaining plants perking up, their leaves turning a deeper green and their flavor intensifying.
The real payoff? Arugula that stays tender and sweet for weeks instead of bolting in a flash.
Pro tip: Thin on a cloudy day to reduce stress on the plants, and always cut at soil level—not yank—to avoid disturbing roots. If you’re transplanting extras, do it quickly so they don’t dry out. Now, let’s get those seedlings standing tall and proud.
📚 In This Guide
- What you need
- Instructions
- Tips and common mistakes
- Wrapping up and next steps
What you need
- ● Sharp scissors or pruning shears – Clean, sterilized scissors (blades should be at least 3-4 inches long for precision).
- ○ Gloves (optional but recommended) – Garden gloves (nitrile or cotton) to protect your hands from soil and sharp blades.
- ● Watering can or hose with a gentle spray nozzle – For post-thinning hydration (avoid overwatering right after cutting).
- ○ Compost or mulch (optional) – To cover the soil after removing seedlings (helps retain moisture and deter weeds).
- ○ Ruler or measuring tape (optional) – For precision spacing (aim for 4-6 inches between mature arugula plants).
- ● Mature seedlings – Arugula should have 2-4 true leaves and be at least 1-2 inches tall.
- ● Sunlight access – Thin on a cloudy day or in early morning/late afternoon to reduce stress on plants.
- ● Patience! – Thinning takes time—go slow to avoid damaging roots.
Step-by-step guide to thinning arugula seedlings
Here’s how to transform crowded, weak seedlings into a thriving, productive arugula patch.
🌱 Step 1: Wait Until Seedlings Have 2-3 True Leaves
Thinning too early stresses delicate seedlings, while waiting too long makes them competitive. Aim to thin when seedlings have 2-3 true leaves—those are the second set of leaves after the initial seed leaves. You’ll spot them as smaller but distinct leaves near the base of the stem.
If you thin too early, you risk pulling out the entire plant. If you wait too long, the seedlings fight for nutrients, leading to leggy, weak growth. A good rule of thumb: 7-10 days after germination is usually the sweet spot for arugula.
💧 Step 2: Water the Soil Before Thinning
Water the seedlings 1-2 hours before thinning to soften the soil. This makes it easier to pull seedlings without disturbing the roots of the ones you’re keeping. The soil should be moist but not soggy—think of it as damp like a wrung-out sponge.
If the soil is dry, the seedlings will snap off at the surface, leaving roots behind. If it’s too wet, you’ll end up with a muddy mess. A light misting the night before helps too—just enough to keep the soil workable.
✂️ Step 3: Use Scissors or Fingers to Thin Gently
Wet your fingers or use clean scissors to snip seedlings at soil level. This prevents disturbing the roots of the plants you’re keeping. Hold the seedlings close to the base and pull firmly but steadily. You’ll know you’re doing it right when the entire seedling comes out with minimal resistance.
Leave 2-3 inches between remaining seedlings—this gives them room to grow without competing for sunlight or nutrients. If you’re unsure, err on the side of spacing them out a bit more. Arugula is forgiving, and you can always add more later.
☀️ Step 4: Monitor and Adjust Light After Thinning
After thinning, arugula seedlings may look sparse, but they’ll fill in quickly. Move the container to a spot with 4-6 hours of sunlight daily—arugula thrives in cooler weather but still needs light to stay vibrant. If your seedlings start looking pale or leggy, they’re stretching for more light.
If you’re growing indoors, supplement with a grow light placed 6-12 inches above the plants. Too close, and you’ll scorch the leaves; too far, and they’ll stretch. Watch for dark green, sturdy leaves—that’s your sign they’re happy and healthy.
🌿 Step 5: Fertilize Lightly After 1-2 Weeks
Once the remaining seedlings have recovered from thinning, give them a light feeding with a balanced, water-soluble fertilizer diluted to half-strength. This boosts growth without overwhelming the young plants. I like to use a 5-5-5 or 10-10-10 mix—just follow the package instructions for dilution.
Avoid over-fertilizing, which can lead to bitter leaves or leggy growth. Instead, focus on consistent moisture and gentle care. Within a few weeks, you’ll have a lush patch of arugula ready for harvesting.
Tips & tricks for perfectly thinned arugula seedlings
These practical tips will help you avoid common mistakes and get the best results from your thinning process.
Timing Secret: The 7-10 day window after germination is critical for thinning arugula. If your seedlings are growing quickly, you might need to thin on the earlier side of that range. Watch for those second set of true leaves—they're smaller but more distinct than the initial seed leaves. Between us, I've thinned too early and lost entire plants, so don't rush this step!
Soil Prep Strategy: That 1-2 hour watering before thinning is your secret weapon. The soil should be moist enough to work with but not so wet it turns to mud. I've found that watering the night before with a light misting often gives me perfect conditions by morning. This makes the pulling process much cleaner and prevents disturbing the roots of your kept plants.
Thinning Technique: When you're ready to thin in Step 3, use your fingers rather than scissors whenever possible. The gentle pressure helps preserve the roots of your remaining seedlings. I learned this the hard way after accidentally nicking the roots of my kept plants with scissors. Hold the seedlings at the base and pull firmly—you'll know you're doing it right when the entire seedling comes out with minimal resistance.
Spacing Wisdom: The 2-3 inch spacing recommendation isn't arbitrary—it gives your arugula room to develop strong stems and leaves without competing. If you're growing in a container, you might need to thin more aggressively to maintain this spacing. Remember, arugula is forgiving, so you can always add more seedlings later if needed. I've found that slightly more space than recommended often leads to healthier, more productive plants.
Pro Tips for Thinning Arugula Seedlings
- These practical tips will help you avoid common mistakes and get the best results from your thinning process.
- Timing Secret: The 7-10 day window after germination is critical for thinning arugula.
- Soil Prep Strategy: That 1-2 hour watering before thinning is your secret weapon.
Frequently asked questions
Got questions about thinning arugula seedlings? You’re not alone—this step can feel tricky, but it’s key to growing healthy greens! Here are answers to the most common concerns, so you can thin with confidence.
How do I know when my arugula seedlings are ready to thin?
Thin when seedlings have 2–3 true leaves (not just cotyledons) and are about 1–2 inches tall. Crowding is the biggest clue—if leaves touch or seedlings look leggy, it’s time. Aim for 8–12 inches of space between mature plants for optimal growth.
Should I thin arugula seedlings in the morning or evening?
Morning is ideal! Cool, damp soil reduces stress on seedlings, and thinning in the evening can leave them vulnerable to pests or temperature swings. If you must thin later, water the area first to help plants recover faster.
What’s the best way to remove seedlings—pull or cut?
Both work, but pinching at soil level (with clean scissors or fingers) is gentler than pulling, which can disturb roots. If pulling, do it slowly and straight up to avoid uprooting nearby seedlings. Use the thinned seedlings in salads or compost them!
Can I transplant thinned arugula seedlings instead of discarding them?
If seedlings are healthy, transplant them to a new spot, pot, or container. Keep soil moist and shield them from direct sun for a day or two to reduce transplant shock. Just avoid overcrowding—they’ll still need space to thrive.
What if my arugula seedlings look sad after thinning?
Don’t worry—it’s normal! Seedlings may wilt temporarily due to root disturbance. Water deeply and avoid thinning on hot days. If leaves yellow or droop for >24 hours, check for pests (like aphids) or overwatering. Most recover within a few days with proper care.
Still unsure? Snap a photo of your seedlings and ask in gardening forums—experts love helping troubleshoot!
Wrapping up and next steps
Thinning arugula seedlings might feel like a bittersweet task—letting go of some of your little greens—but it’s the secret to healthier, happier plants! 🌱 By giving your seedlings room to breathe, you’re setting them up for success, ensuring bigger leaves and a more abundant harvest.
Now that you’ve mastered the technique, take pride in your green thumb and watch your arugula thrive.
Ready for the next step? Plant those thinned seedlings in their final spot or pot them up for a fresh start. Happy growing—and enjoy that crisp, peppery goodness soon! 🥬✨