
Lawn
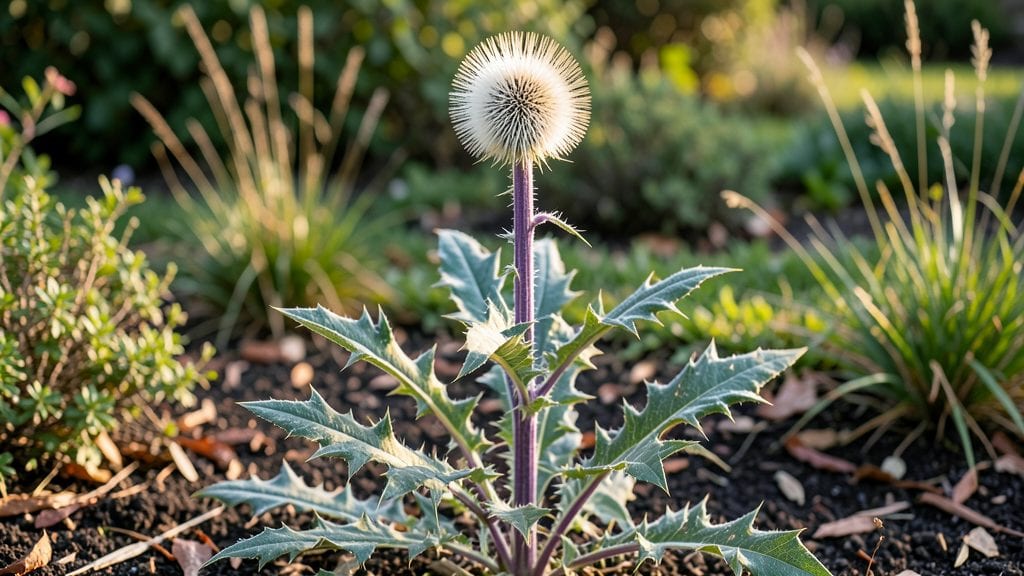
Those spiky thistle seed heads are the unsung stars of late-summer gardens—towering, textured, and impossible to ignore. ✨ I’ve used them to turn dull corners into pollinator magnets, their deep purple and pink plumes drawing bees and butterflies when little else is blooming.
The best part? They’re free, sustainable, and add drama without a single seed packet.
Start by leaving a few thistles in your garden until their seed heads mature—usually by late summer or early fall. Once dry, snip them at the base and hang upside down in a cool, dry spot for a week or two.
The dried stems stay stiff enough to stand on their own or arrange in vases, but light enough to tuck into bouquets without weighing them down.
You’ll create vertical interest that lasts from autumn through winter, long after most flowers have faded. Birds love the seeds, and the architectural shapes make even simple arrangements look like high-end design. Plus, they’re a conversation starter—neighbors will ask what you did to make your garden look so striking.
Works in everything from wildflower meadows to formal borders, and pairs beautifully with grasses, eucalyptus, or other dried botanicals. Here’s how to make the most of them without losing your garden’s natural flow.
📚 In This Guide
- What you need
- Instructions
- Tips and common mistakes
- Wrapping up and next steps
What you need
- ● Thistle seed heads (dried or fresh): 3–5 mature seed heads per plant (e.g., Cirsium or Eryngium species).
- ● Opt for native varieties to support local pollinators.
- ● Potting soil or garden soil: 1–2 cubic feet per plant (well-draining, amended with compost).
- ○ Optional: Perlite or sand (10–20% mix) for sandy soil improvements.
- ● Containers or garden space: Containers: 12–18" diameter pots (1–2 plants per container).
- ● Garden beds: Full sun (6+ hours/day) with no competition from aggressive plants.
- ● Garden trowel or transplant spade (for digging).
- ● Pruning shears (to trim dead foliage or harvest seed heads).
- ● Watering can or hose with gentle spray nozzle (avoid blasting seed heads).
- ○ Mulch (optional): 1–2 inches of shredded bark or straw to retain moisture.
- ○ Stakes or trellis (optional): For taller varieties (e.g., Cirsium altissimum) to prevent flopping.
- ● Know your USDA Hardiness Zone (most thistles thrive in Zones 3–9).
- ● Check local invasive species laws—some thistles (like Carduus) are restricted.
- ● Pro tip: 💡 Plant in clusters of 3+ for maximum visual impact and pollinator appeal!
How to incorporate thistle seed heads for stunning pollinator gardens
These striking vertical accents will transform your garden into a buzzing, fluttering paradise.
🌱 Step 1: Choose the Right Thistle Varieties
Start with native thistle species like the cattle thistle (Tragopogon pratensis) or common milk thistle (Silybum marianum), both of which thrive in USDA zones 3-9. These varieties attract bees, butterflies, and even hummingbirds while providing dramatic seed heads. Avoid invasive species—stick to well-established native plants that won’t disrupt local ecosystems.
Look for plants with tall, sturdy stems (3-5 feet) and distinctive spiky seed heads that catch light beautifully. I like to source them from reputable native plant nurseries, where they’re often labeled as "pollinator-friendly" or "wildlife-supporting."
☀️ Step 2: Select the Perfect Garden Location
Thistle seed heads need full sun—at least 6-8 hours daily—to develop their signature structure and color. A spot with well-draining soil prevents rot, so avoid low-lying areas where water pools. If your garden has heavy clay, amend the soil with 1-2 inches of compost to improve drainage.
I always plant mine near shrubs or perennials to provide windbreaks and create layered visual interest. The seed heads will tower over shorter plants, making them the focal point of any border or meadow-style garden. Just be sure to leave 18-24 inches of space between plants—they spread as they grow.
💧 Step 3: Plant and Water for Establishment
Dig a hole twice as wide as the root ball but only as deep. Gently remove the plant from its container, loosen any circling roots, and place it in the hole. Backfill with soil and water deeply until moisture reaches 6 inches down. This encourages roots to grow deeper right away.
For the first 2-3 weeks, keep the soil consistently moist—water every 2-3 days if rainfall is light. You’ll know it’s enough when the top 1-2 inches of soil feel damp but not soggy. After that, thistles are drought-tolerant, so let nature take over. Overwatering here is the biggest mistake—it leads to weak stems that flop under their own weight.
✂️ Step 4: Maintain for Maximum Impact
Thistles are low-maintenance, but a little care keeps them looking their best. Remove wilted or damaged seed heads in early spring to encourage fresh growth. I also prune back any leggy stems to about 12 inches tall in late winter—this prevents flopping and promotes bushier regrowth.
Fertilize lightly once in early spring with a balanced 10-10-10 formula (use ½ teaspoon per plant). Too much nitrogen makes them grow too fast and weakens the stems. The real magic happens in late summer to fall when the seed heads mature—leave them be! They’re a pollinator buffet and a winter food source for birds.
🪴 Step 5: Extend the Season with Dried Seed Heads
When the seed heads turn tan or brown and the fluff begins to show, it’s time to harvest for dried arrangements. Cut stems early in the morning when moisture levels are highest—this helps them last longer. Bundle 3-5 stems together and hang upside down in a dry, dark place for 2-3 weeks to fully dry.
Once dry, the seed heads will retain their shape for months in vases or dried flower arrangements. I love tucking them into winter wreaths or using them as centerpieces—they add texture and movement even when the garden is dormant. If left in the garden, the seed heads provide seed for birds and shelter for insects through winter.
Tips & tricks for perfect thistle seed head gardens
These simple strategies will help you create a thriving pollinator haven with stunning vertical accents.
Selection Tip: When choosing your thistle varieties in Step 1, look for plants with stems that are at least 3 feet tall when purchased. The taller the stem, the more dramatic the vertical impact in your garden. I've found that plants labeled "pollinator magnet" often have the most robust seed heads, so keep an eye out for those descriptions at the nursery. The extra height makes all the difference when they mature.
Sunlight Strategy: The 6-8 hours of full sun requirement in Step 2 is non-negotiable for those signature seed heads. If your garden only gets partial sun, consider placing thistles near a south-facing wall or fence where they can catch reflected sunlight. I've seen amazing results by positioning them just a few feet from a light-colored wall that reflects additional sunlight onto the plants.
Watering Wisdom: During that critical 2-3 week establishment period in Step 3, I've learned to check soil moisture by pressing my finger about 1 inch down—if it feels dry, it's time to water. The key is keeping the soil consistently moist without creating soggy conditions. Once established, these plants are incredibly drought-tolerant, but that initial period sets the foundation for strong stems that won't flop.
Pruning Technique: When you prune back leggy stems to 12 inches in Step 4, make clean cuts just above a leaf node. This encourages bushier growth while maintaining that vertical structure. I like to do this pruning on a dry morning when the stems are firm, and I've noticed the plants respond better and recover more quickly. The result is denser foliage that supports more seed heads.
Pro Tips for Thistle Seed Heads
- These simple strategies will help you create a thriving pollinator haven with stunning vertical accents.
- Selection Tip: When choosing your thistle varieties in Step 1, look for plants with stems that are at least 3 feet tall when purchased.
- Sunlight Strategy: The 6-8 hours of full sun requirement in Step 2 is non-negotiable for those signature seed heads.
Frequently asked questions
Got questions about thistle seed heads?
You’re not alone! Whether you’re dreaming of a pollinator-friendly garden or troubleshooting a tricky patch, we’ve got answers to the most common queries. Dive in to learn how to work with these striking plants like a pro.
When is the best time to plant thistle seed heads for maximum impact?
Plant thistle seeds in early spring (right after the last frost) or late summer for the best results. This timing ensures they establish roots before winter or bloom in their first season. For container gardening, start seeds indoors 6-8 weeks before the last frost to give them a head start.
Are thistle seed heads invasive? How do I prevent them from spreading?
While thistles aren’t highly invasive like some weeds, they can self-seed aggressively. To control spread, deadhead spent blooms before seeds form or snip seed heads off once they turn brown. Planting them in containers or isolated garden beds also helps keep them contained.
Do thistle seed heads attract pests like aphids or other insects?
Thistles are magnets for pollinators (like bees and butterflies), but they rarely host destructive pests. However, aphids occasionally appear—just hose them off with water! If pests become an issue, introduce ladybugs or use neem oil as a natural deterrent.
Can I dry thistle seed heads for crafts or winter arrangements?
Harvest seed heads when fully brown and dry (late fall/winter), then hang them upside down in a well-ventilated spot for 1-2 weeks. Once crispy, they’re perfect for dried florals, wreaths, or potpourri. Just avoid storing them in humid areas to prevent mold.
What’s a good alternative if I want vertical interest but don’t want thistles?
Try these low-maintenance, pollinator-friendly alternatives:
- Echinacea (Coneflower) – Tough, long-lasting blooms with similar height.
- Rudbeckia (Black-Eyed Susan) – Bold, vertical stems and cheerful flowers.
- Joe Pye Weed – Tall, airy seed heads that thrive in wet soil.
- Russian Sage – Silvery foliage and spiky blooms for a soft contrast.
Will thistle seed heads survive winter in cold climates?
Most thistles are hardy perennials (zones 3-9) and die back to the ground in winter, then regrow in spring. For extra protection, mulch the base with straw or leaves. If growing in containers, move them to a sheltered spot or use frost cloth.
Wrapping up and next steps
Thistle seed heads aren’t just striking—they’re powerful pollinator magnets that bring life and movement to your garden. By incorporating them into your vertical designs, you’re not only enhancing aesthetics but also creating a thriving ecosystem for bees, butterflies, and birds. 🌿
Ready to transform your outdoor space? Start small—plant a few seed heads in a container or along a fence—and watch your garden come alive with color and activity. Your pollinator friends will thank you!