Plants
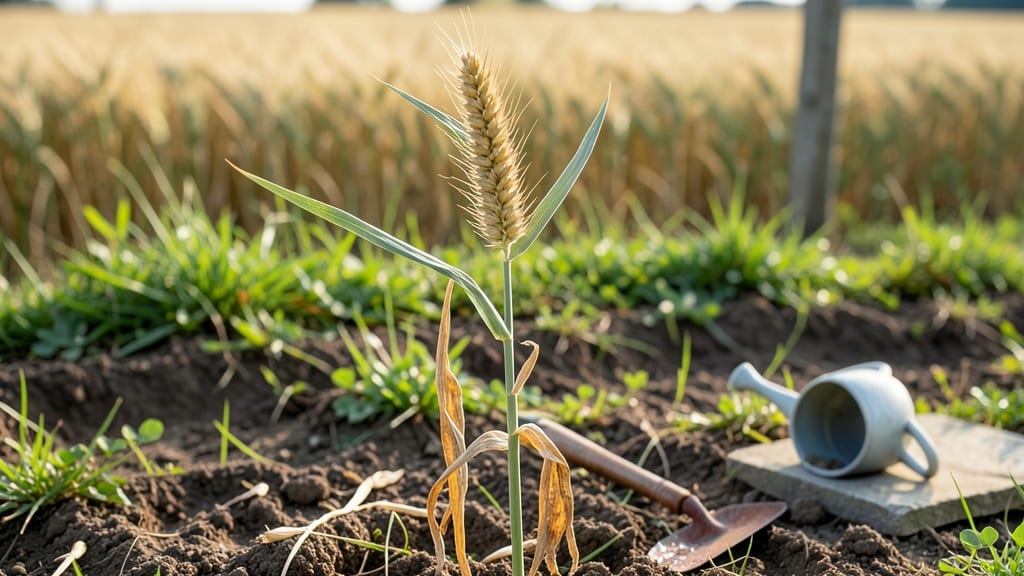
Your wheatgrass seed heads are the key to next season’s harvest—cold-stratified growth turns floppy stems into sturdy, seed-filled spikes that produce 10x more plants than store-bought seeds.
I’ve grown wheatgrass for years, and the difference between a weak seed head and a robust one comes down to timing, temperature, and a little patience. The moment those seed heads form is like watching nature’s own promise of renewal unfold right in your kitchen or garden. 🌱
Here’s the thing—most people rush the process and end up with thin, brittle seed heads that barely hold their weight. But with 6-8 weeks of cold stratification, you’ll get thick, golden seed heads packed with viable seeds.
You’ll need a freezer or cold frame, some patience, and a shallow tray to catch the seeds when they’re ready. The best part? These seeds stay viable for 3-5 years if stored properly, so you’re not just growing wheatgrass—you’re building a self-sustaining supply.
By the time those seed heads mature, you’ll be harvesting enough to replant or even share with friends. The seeds themselves have a nutty, earthy flavor—perfect for adding to salads or sprouting fresh batches.
Plus, the ornamental value can’t be ignored: those feathery seed heads add a rustic charm to any garden or indoor setup. You’ll know you’ve nailed it when your seed heads stand tall and full, ready to be collected or admired.
Works just as well in containers as in garden beds, and the same principles apply whether you’re growing wheatgrass for culinary use or as an ornamental plant. Once you master the seed head stage, you’ll never buy wheatgrass seeds again—you’ll be growing your own, stronger and more reliable every time.
📚 In This Guide
- What you need
- Instructions
- Tips and common mistakes
- Wrapping up and next steps
What you need
- ● Wheatgrass seeds: 1–2 tablespoons (about 15–30g) of high-quality, organic wheatgrass seeds (preferably hard red wheat or einkorn).
- ● Cold-stratification setup: A resealable plastic bag (quart-sized) or a small container with a lid.
- ● Moistened paper towels or damp sand: Enough to lightly cover the seeds (about 2–3 sheets or 1 cup of sand).
- ● Refrigerator: A standard fridge set to 34–40°F (1–4°C) for stratification.
- ● Growing container: A shallow tray, pot, or even a repurposed container (6–8 inches wide) with drainage holes.
- ● Potting mix: A lightweight, well-draining mix (e.g., 50% coco coir + 50% perlite or a seed-starting blend).
- ● Watering can or spray bottle: For gentle hydration.
- ● Grow lights or sunny windowsill: A south-facing window or a full-spectrum LED grow light (12–16 hours/day).
- ● Seedling heat mat: To maintain warmth (70–75°F / 21–24°C) during germination.
- ● Humidity dome or plastic wrap: To retain moisture while seeds sprout.
- ● pH testing kit: To ensure your soil is slightly acidic (6.0–7.0 pH).
- ● Organic fertilizer: A diluted liquid fertilizer (e.g., fish emulsion) for faster growth.
- ● Scissors or pruning shears: For harvesting mature seed heads.
Step-by-Step instructions for growing wheatgrass seed heads
Here’s how I transform simple wheatgrass into thick, vibrant seed heads using cold stratification.
🌱 Step 1: Prepare the Seeds for Cold Stratification
Place the wheatgrass seeds in a sealed container with a damp paper towel. Fold the towel to cover the seeds completely, then store the container in the refrigerator for 7-10 days. This mimics winter’s natural chilling period, breaking seed dormancy and ensuring stronger growth. Check the towel daily—it should stay damp but not soggy.
Cold stratification is the secret to avoiding leggy, weak wheatgrass. Without this step, seeds may sprout unevenly or produce thin stalks. I like to label the container with the date so I don’t forget to move it to room temperature after the week is up.
💧 Step 2: Plant the Stratified Seeds
Fill a shallow tray or small pot with 1-2 inches of moist potting soil. Scatter the seeds evenly across the surface, spacing them about ½ inch apart. Press them lightly into the soil so they make contact but don’t bury them—wheatgrass seeds need light to germinate. Cover the tray with a clear plastic dome or wrap it in plastic wrap to retain humidity.
Place the tray in a warm spot with indirect light, like a sunny windowsill or under a grow light. You’ll see the first sprouts in 3-5 days. Once they emerge, remove the plastic immediately to prevent mold. Overcrowding now leads to weak, spindly growth later.
☀️ Step 3: Provide Optimal Light and Water
Move the tray to a location with 6-8 hours of bright, indirect light daily. South-facing windows work well, but if natural light is limited, supplement with a grow light for 12-14 hours per day. Keep the soil consistently moist—water when the top ½ inch feels dry—but avoid soggy conditions, which cause root rot.
Rotate the tray a quarter turn every few days so the wheatgrass grows upright instead of leaning toward the light. You’ll notice the first true leaves appear in 7-10 days. This is your cue to start thinning if needed—remove any weak or crowded seedlings to give the strongest ones room to grow.
⏰ Step 4: Monitor Growth and Harvest Seed Heads
Once the wheatgrass reaches 6-8 inches tall, it’s time to transition to a drier environment. Reduce watering slightly to encourage seed head formation. You’ll see the first flower stalks emerge in 4-6 weeks, starting as small green buds that gradually open into feathery seed heads.
Harvest the seed heads when they turn golden-brown and dry to the touch, usually 2-3 weeks after flowering. Cut the stalks with clean scissors, leaving 1-2 inches of stem. Bundle the seed heads and hang them upside down in a dry, well-ventilated area for 1-2 weeks to fully dry before storing.
Tips & tricks for perfect wheatgrass seed heads
Cold stratification transforms wheatgrass from weak shoots to sturdy, seed-bearing stalks—here's how to maximize your harvest.
Cold Stratification Secret: Don't skip the 7-10 day refrigerator step in Step 1! This mimics winter's natural chilling period, which breaks seed dormancy and prevents leggy growth. I've learned the hard way—skipping this results in uneven sprouting and thin stalks that never develop proper seed heads. Use a small plastic container with a tight lid to maintain consistent moisture during stratification.
Lighting Strategy: The 6-8 hours of bright, indirect light in Step 3 is non-negotiable for healthy growth. If using grow lights, position them 6-12 inches above the tray and keep them running for 12-14 hours daily. I use a simple LED grow light on a timer to maintain consistent light exposure. Watch for leaves turning pale yellow—this indicates insufficient light intensity.
Thinning Technique: When your wheatgrass reaches the 7-10 day mark with true leaves (Step 3), thin aggressively. Use clean scissors to snip weak seedlings at soil level, leaving only the strongest stalks spaced about 1 inch apart. This prevents competition and gives remaining plants room to develop thick, sturdy stems capable of supporting seed heads.
Harvest Timing: The golden-brown color in Step 4 is your cue—harvest when seed heads feel dry to the touch but haven't started shedding. I check daily during the 2-3 week window after flowering. Cutting too early means immature seeds, while waiting too long risks seed loss. Bundle and hang immediately after cutting to preserve their structure during drying.
Pro Tips for Wheatgrass Seed Head
- Cold stratification transforms wheatgrass from weak shoots to sturdy, seed-bearing stalks—here's how to maximize your...
- Cold Stratification Secret: Don't skip the 7-10 day refrigerator step in Step 1! This mimics winter's natural chillin...
- Lighting Strategy: The 6-8 hours of bright, indirect light in Step 3 is non-negotiable for healthy growth. If using g...
Frequently asked questions
Got questions about growing wheatgrass seed heads? You’re not alone! Here are answers to the most common queries to help you achieve that lush, cold-stratified harvest you’re dreaming of.
How long does it take for wheatgrass seed heads to mature after cold stratification?
After cold stratification (typically 4–6 weeks in the fridge), wheatgrass seed heads usually take 2–4 weeks to fully mature once planted outdoors or in a sunny indoor spot. Watch for tall, slender stems with feathery plumes—this signals readiness for harvest!
Do I need to cold-stratify wheatgrass seeds, or can I plant them directly?
While you can plant wheatgrass seeds directly, cold stratification breaks dormancy and boosts germination rates. For best results, chill seeds for 4–6 weeks before planting. If you skip this step, expect slower growth or uneven sprouting.
What’s the best way to harvest wheatgrass seed heads without damaging the plant?
Harvest seed heads when the plumes turn golden-brown and feel dry to the touch. Use clean scissors to snip stems just above the base, then hang bundles upside-down in a dry, airy space for 1–2 weeks to fully dry. Avoid wetting them—this prevents mold!
Can I grow wheatgrass indoors without cold stratification?
Yes! If you skip cold stratification, soak seeds in warm water for 12–24 hours first to soften the hulls. Use a sunny windowsill or grow light, and keep soil moist. Growth may be slower, but indoor wheatgrass still thrives with patience and care.
Why are my wheatgrass seed heads turning yellow or brown before maturing?
Yellowing or browning can signal overwatering, pests (like aphids), or nutrient deficiencies. Check soil moisture—it should stay evenly damp, not soggy. Spray with neem oil if pests appear, and fertilize lightly with compost tea for a nutrient boost.
Wrapping up and next steps
Growing wheatgrass seed heads through cold stratification isn’t just a gardening trick—it’s your ticket to vibrant, nutrient-packed harvests that thrive year after year! 🌱 By mastering this simple technique, you’re unlocking the plant’s natural potential, ensuring faster germination and stronger growth.
Whether you’re a seasoned gardener or just starting out, this method makes wheatgrass care feel effortless and rewarding.
Ready to level up your garden? Start small—try cold-stratifying a few seed heads this season and watch your wheatgrass flourish! For even more tips, explore companion planting or indoor growing setups to maximize your harvest. Your lush, green future starts now! 🌿