Watering
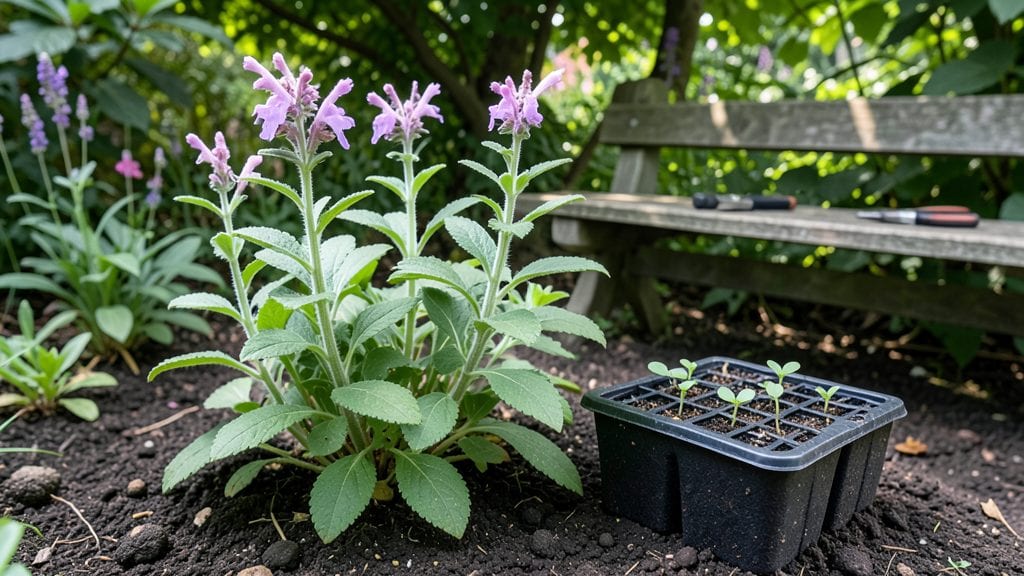
Wood betony seedlings thrive when you nail the moisture balance—too dry and they wilt, too wet and they rot. I’ve learned the hard way that these delicate plants need consistently damp (not soggy) soil to grow sturdy stems and vibrant purple blooms.
The secret lies in understanding their natural habitat: partial shade and rich, well-draining soil that holds moisture without staying waterlogged.
Start with a mix of peat moss, perlite, and compost to mimic their woodland roots. Keep seedlings in a shaded spot with indirect light—direct sun scalds their tender leaves. Water gently at the base every 2-3 days, letting the top inch of soil dry slightly between sessions.
Overwatering is the #1 killer, but underwatering stunts growth just as fast.
By month three, you’ll see robust plants with fuzzy leaves and the first hints of those iconic purple flower spikes. The real magic happens when pollinators discover them—bees adore the nectar, and the plant’s medicinal properties make it a garden superstar.
Just watch for aphids hiding in the foliage; a spray of soapy water keeps them at bay.
Wood betony adapts to containers or garden beds, but always space them 12-18 inches apart. In cooler climates, they’ll return year after year, while warmer zones treat them as perennials with proper care.
The key? Stay consistent with moisture and light, and you’ll have a thriving plant that rewards both gardeners and pollinators alike.
📚 In This Guide
- What you need
- Instructions
- Tips and common mistakes
- Wrapping up and next steps
What you need
- ● Wood betony seeds: High-quality, organic seeds (ensure they’re Betonica officinalis or similar). Start with 5–10 seeds for a small batch.
- ● Seed-starting trays or small pots: 2–4 inch pots (or a seed tray with cells) for individual seedlings. Use well-draining containers with drainage holes.
- ● Seed-starting mix: Lightweight, sterile potting soil blend (look for a mix labeled for herbs or seedlings). Avoid garden soil—it’s too dense!
- ● Watering can or spray bottle: A fine-mist sprayer is ideal to avoid disturbing seeds.
- ● Humidity dome or plastic wrap: Keeps moisture locked in during germination (critical for wood betony!)
- ● Grow lights or sunny windowsill: Wood betony loves bright, indirect light (12–16 hours/day). A LED grow light works if natural light is weak.
- ● Small hand trowel or spoon: For gentle soil adjustments.
- ○ pH test kit (optional): Wood betony prefers slightly acidic to neutral soil (pH 6.0–7.0).
- ○ Fertilizer (optional, post-germination): A balanced, water-soluble fertilizer (5-5-5 or 10-10-10) diluted to half-strength.
- ○ Thermometer (optional): Ideal germination temp: 60–70°F (15–21°C).
Instructions for cultivating healthy wood betony seedlings
Mastering moisture control transforms fragile seedlings into robust plants ready for transplanting.
Prepare the Seed Starting Mix
Fill your seed trays with a lightweight, well-draining mix designed for woodland perennials. I like to blend equal parts of the seed-starting mix and perlite to create an airy medium that prevents compaction. The goal is to mimic the loose, slightly acidic conditions wood betony thrives in. Moisten the mix until it reaches a consistency similar to a damp sponge—squeeze a handful, and just a few drops should bead on the surface.
Press the mix gently into the trays, leaving about ½ inch below the rim for watering. This extra space prevents overflow when you water. I use a clean, flat tool to level the surface, ensuring even contact between seeds and soil. Uneven planting leads to inconsistent germination rates, and wood betony seedlings are particularly sensitive to this.
Sow Seeds at the Right Depth
Scatter the wood betony seeds thinly across the surface, spacing them about ¼ inch apart. Press them lightly into the mix—just enough to ensure contact with moisture, but don’t bury them deeper than ⅛ inch. Wood betony seeds need light to germinate, so covering them too deeply will delay or prevent sprouting entirely.
Place the tray in a humidity dome or cover it loosely with plastic wrap to retain moisture. The key here is to keep the environment consistently damp, not soggy. Check daily and mist the surface lightly if the top layer feels dry to the touch. You’ll know you’ve got the moisture right when condensation forms on the inside of the dome but no water pools on the soil surface.
Maintain Ideal Moisture Levels for Germination
Keep the tray in a warm, shaded area where temperatures stay between 65-70°F. Wood betony seeds germinate best in stable conditions, so avoid placing them near drafts or direct heat sources. Germination typically takes 2-4 weeks, but patience is critical—rushing to check daily can disturb the delicate seeds.
Once the first seedlings emerge, remove the humidity dome immediately. This prevents fungal growth, which wood betony seedlings are particularly prone to. Water gently from the bottom by placing the tray in a shallow dish of water for 10-15 minutes, allowing the roots to absorb moisture without disturbing the soil surface. You’ll see healthy seedlings develop sturdy stems and deep green leaves within 3-4 weeks if moisture is managed correctly.
Transition to Independent Watering
When seedlings reach about 2 inches tall and show their first set of true leaves, it’s time to adjust your watering routine. Reduce the frequency but increase the depth—water only when the top ½ inch of soil feels dry. Overwatering at this stage causes root rot, which is fatal for wood betony.
Use a spray bottle for light misting to avoid disturbing the seedlings. Aim for the soil, not the leaves, to prevent fungal issues. Place the tray in a location with bright, indirect light—direct sun can scorch young leaves. You’ll notice stronger, more upright growth when moisture is balanced, and the leaves will develop a rich, vibrant color.
Prepare for Transplanting
About 6-8 weeks after sowing, when seedlings have 4-6 true leaves and a well-developed root system, they’re ready for transplanting. Harden them off by placing the tray outside in a sheltered spot for 1-2 hours the first day, gradually increasing exposure over 10 days. This acclimates them to outdoor conditions without shock.
Transplant on a cloudy day or in the late afternoon to minimize stress. Water deeply after transplanting to help the roots establish quickly. The seedlings you’ve nurtured with precise moisture control will now thrive in their permanent home, ready to bloom and spread their distinctive purple flowers.
Tips & tricks for cultivating healthy wood betony seedlings
Wood betony seedlings demand patience and precision, especially when it comes to moisture. These key strategies will help you avoid common pitfalls and create the ideal conditions for strong, healthy starts.
Soil Mix Consistency: When preparing your seed-starting mix in Step 1, the damp sponge test is your best friend. After blending equal parts seed-starting mix and perlite, squeeze a handful—if just a few drops bead on the surface, you've achieved the perfect moisture level. Too dry? Add a light mist. Too wet? Mix in more perlite to improve drainage. This balance prevents both compaction and waterlogging, both of which can suffocate delicate wood betony roots.
Seed Depth Precision: In Step 2, pressing seeds just enough to ensure contact with moisture without burying them deeper than ⅛ inch is crucial. I use a clean toothpick to gently press each seed—this ensures light exposure while maintaining moisture contact. Remember, wood betony seeds need light to germinate, so avoid pressing too firmly or covering with extra soil.
Humidity Management: The 10-15 minute bottom-watering technique in Step 3 is a game-changer for maintaining consistent moisture without disturbing seedlings. Place your tray in a shallow dish of water and let it soak for exactly this time frame. You'll know it's working when the top layer feels uniformly moist but no water pools on the surface. This method prevents fungal growth while keeping roots hydrated—critical for wood betony's sensitive nature.
Light Transition Strategy: When your seedlings reach 2 inches tall in Step 4, gradually introduce them to brighter light conditions over 3-4 days. Start with morning sunlight only, then gradually increase exposure. I place mine near an east-facing window first, then move to indirect south light. This slow transition prevents leaf scorch while ensuring they develop strong stems capable of supporting their eventual blooms.
Pro Tips for Wood Betony Seedling
- Wood betony seedlings demand patience and precision, especially when it comes to moisture.
- Soil Mix Consistency: When preparing your seed-starting mix in Step 1, the damp sponge test is your best friend.
- Seed Depth Precision: In Step 2, pressing seeds just enough to ensure contact with moisture without burying them deeper than ⅛ inch is crucial.
Frequently asked questions
Got questions about nurturing your wood betony seedling? Here are some of the most common ones—plus practical answers to help you grow a thriving plant!
How often should I water my wood betony seedling?
Keep the soil consistently moist but not soggy—water lightly every 2-3 days, or when the top inch feels dry. Seedlings are delicate, so avoid overwatering, which can cause root rot. A spray bottle works great for gentle hydration!
How long does it take for wood betony seedlings to germinate?
Germination usually takes 2-4 weeks in warm (65-75°F), moist conditions. If your soil is too dry or cold, it may take longer. For faster results, use a seedling heat mat and keep the tray covered with plastic wrap until sprouts appear!
Can I grow wood betony from cuttings instead of seeds?
Yes! Wood betony can be propagated from softwood cuttings in spring or early summer. Snip 3-4 inch stems, remove lower leaves, and dip in rooting hormone before planting in moist perlite or sand. Keep humid until roots form (4-6 weeks).
What pests should I watch for with wood betony seedlings?
Common culprits include aphids, spider mites, and slugs. Check undersides of leaves for tiny pests. Treat aphids with soapy water; deter slugs with diatomaceous earth. Healthy seedlings with good airflow resist pests better—so avoid overcrowding!
Can wood betony seedlings handle direct sunlight?
Start with partial shade (3-4 hours of morning sun) to prevent stress. Once established (after 4-6 weeks), gradually introduce full sun. Too much direct sunlight can scorch young leaves—watch for yellowing or wilting as warning signs.
Wrapping up and next steps
Growing a thriving wood betony seedling starts with mastering moisture—neither too dry nor too soggy! By following the right watering techniques, you’ll set your plant up for lush growth and vibrant blooms. Remember, consistency is key, and observing your seedling’s needs will guide you every step of the way.
Now that you’re armed with these moisture control secrets, it’s time to roll up your sleeves and give your wood betony the care it deserves. Ready to watch it flourish? Start nurturing your seedling today—your future garden will thank you! 🌱