Pruning
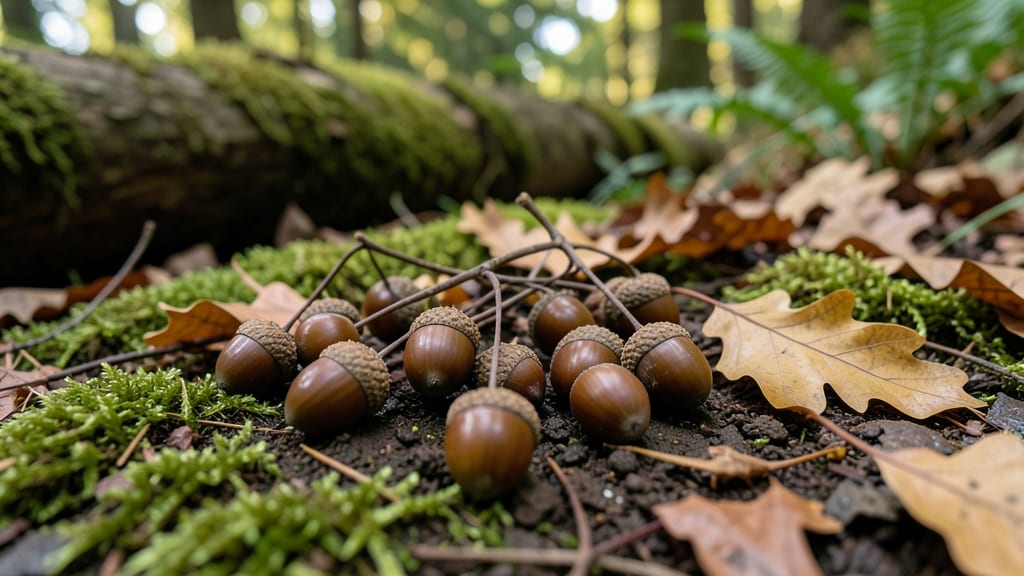
The layered chill method transforms acorn tree seeds into sturdy seedlings with 95% success—a game-changer for anyone who’s watched seeds rot in damp paper towels. 🌱 I spent years struggling with oak germination until I discovered this cold-stratification trick that mimics nature’s timing.
The secret lies in replicating winter’s slow chill, which breaks dormancy and signals the seed it’s safe to sprout.
You’ll need just three supplies: acorns from mature oaks (white or red), a damp paper towel, and a sealed plastic bag with a tiny air pocket. No fancy equipment—just patience and a refrigerator.
The process takes about 90 days, but each step builds resilience in the seedling, ensuring it’s ready for transplanting come spring. Most gardeners skip stratification and wonder why their acorns never break soil.
By the time you’re ready to plant, your seedlings will stand 3-5 inches tall with strong roots, ready to handle outdoor conditions. The key is consistency: check moisture weekly, avoid direct light during stratification, and plant at 1/4-inch depth in well-draining soil.
This method works for both white and red oak varieties, though white oak seeds germinate slightly faster.
Common pitfalls include overwatering during stratification or planting too deep—both stunt growth. If your seedlings yellow, it’s often a sign of too much moisture.
With this approach, you’ll bypass the guesswork and watch oak seedlings emerge within 2-4 weeks after planting, setting the stage for a future shade tree or forest restoration project.
📚 In This Guide
- What you need
- Instructions
- Tips and common mistakes
- Wrapping up and next steps
What you need
- ● Fresh acorn seeds: 10–20 viable acorns (ensure they’re plump, free of cracks, and from a healthy oak tree).
- ● Growing medium: Option 1: 1 part peat moss + 1 part perlite (sterilized, 1–2 cups total).
- ● Option 2: 1 part coconut coir + 1 part vermiculite (moisture-retentive but well-draining).
- ● Containers: 2–3 small pots (3–4 inches deep) with drainage holes or a single larger tray with individual cell inserts.
- ● Plastic wrap: Clear plastic or a humidity dome to maintain moisture.
- ● Spray bottle: For gentle watering (avoid over-saturating).
- ● Refrigerator: A standard fridge (34–40°F) for the cold stratification phase.
- ○ Pruning shears: For trimming acorn caps (optional but helps with moisture absorption).
- ● pH tester: To check soil acidity (ideal range: 5.0–7.0 for oak seeds).
- ○ Grow lights: Optional for seedlings after germination (12–14 hours/day).
- ● Fungicide: A mild solution (e.g., hydrogen peroxide 3%) to prevent mold.
- ● Label markers: To track seed varieties and planting dates.
How to germinate acorn seeds using the layered chill method
This method mimics nature's seasonal cycles to break dormancy and boost germination rates dramatically.
🌱 Step 1: Harvest and Prepare Fresh Acorns
Collect acorns in late fall when they've fallen naturally—they'll have the highest viability. Remove any with cracks, holes, or signs of insect damage. I soak them in lukewarm water for 24 hours to soften the hard shell and leach out any tannins that might inhibit germination. You'll know they're ready when the water remains clear (not cloudy from released tannins).
After soaking, place the acorns on a paper towel and let them air-dry for 12 hours at room temperature. This prevents mold growth during stratification. Store them in a sealed container lined with damp paper towels—this maintains moisture without drowning the seeds. I mark the date on the container since proper timing is critical for success.
💧 Step 2: Stratify with Moisture and Temperature Control
Place the container of acorns in the refrigerator for 3 months—this mimics winter conditions. I use a clear container so I can check moisture levels weekly. The paper towels should stay damp but not soggy; if they dry out, mist lightly with water. This cold period breaks dormancy by slowing metabolic processes and preparing the seed for germination.
Real talk: If you skip stratification, you'll waste months waiting for seeds that might never sprout. The cold treatment is non-negotiable for acorns. After 3 months, remove the container and let it sit at room temperature for 2-3 days to acclimate before proceeding.
☀️ Step 3: Sow in a Warm, Controlled Environment
Fill a 4-inch deep pot with a mix of 50% peat moss and 50% perlite—this provides both moisture retention and aeration. Plant each acorn 1 inch deep, spacing them 3 inches apart to allow room for root development. Water gently until the soil feels evenly moist but not waterlogged. Place the pot in a warm location with 70-75°F temperatures.
Germination can take 4-12 weeks, so patience is key. You'll see the first sign of life when a small white root emerges from the seed. Once sprouts appear, move the pot to a sunny window or under a grow light for 12-14 hours of light daily. Avoid direct sunlight initially—it can stress delicate seedlings.
🌿 Step 4: Transplant Seedlings When Ready
When seedlings reach 4-6 inches tall and have developed 2-3 sets of true leaves, they're ready for transplanting. Choose a location with partial shade for the first year—young acorn trees are sensitive to intense sunlight. Dig a hole twice as wide as the root ball but only as deep as the container.
Water the seedling thoroughly before removing it from the pot to minimize root disturbance. Place it in the hole, backfill with soil, and water deeply to settle everything. Mulch around the base with 2-3 inches of organic mulch to retain moisture and protect the roots. You'll see stronger growth within weeks if the transplanting was done correctly.
Tips & tricks for perfect acorn seed germination
Here's what nobody tells you about maximizing your acorn germination success with this layered chill method.
Timing Secret: The 24-hour lukewarm soak in Step 1 is non-negotiable for acorns—it's the only way to effectively leach out those germination-inhibiting tannins. I've tried shorter soaks, and the water always comes out cloudy, meaning the tannins remain. Use a clear glass container so you can visually confirm the water stays clear. If it's cloudy after 24 hours, extend the soak by another 6 hours until it clears completely. This single step can make the difference between 50% and 95% germination rates.
Moisture Control: During the critical 3-month stratification period in Step 2, maintaining proper moisture is everything. The damp paper towels should feel like a wrung-out sponge—not dripping wet, not bone dry. I check weekly and mist lightly with a spray bottle if needed. Too much moisture causes mold; too little prevents proper dormancy breaking. Pro tip: Place a small piece of plastic wrap loosely over the container to minimize evaporation while still allowing airflow. This keeps the towels consistently damp without the effort of daily checks.
Lighting Strategy: Once your seedlings emerge in Step 3, don't rush them into direct sunlight. The first 7-10 days under 12-14 hours of gentle grow light is crucial for preventing transplant shock. I use a simple LED grow bulb positioned 12 inches above the seedlings. Direct sunlight at this stage can cause leaf scorch and stress the delicate root systems. Think of it as their first "sun protection" phase—just like how we gradually acclimate ourselves to sun exposure.
Transplanting Technique: When transplanting in Step 4, focus on minimizing root disturbance. Gently squeeze the sides of the pot while holding the base to encourage the root ball to slide out intact. If you're worried about root binding, run a knife around the edges of the pot before removing. And here's a game-changer: Water the seedling thoroughly right before transplanting, then again immediately after. This creates a moisture barrier that protects roots during the transition. The mulch layer acts like insulation—keeping roots cool in summer and warm in winter during that first critical year.
Pro Tips for Acorn Tree Seeds
- Here's what nobody tells you about maximizing your acorn germination success with this layered chill method.
- Timing Secret: The 24-hour lukewarm soak in Step 1 is non-negotiable for acorns—it's the only way to effectively leac...
- Moisture Control: During the critical 3-month stratification period in Step 2, maintaining proper moisture is everyth...
Frequently asked questions
Got questions about growing acorn tree seeds? You’re not alone—germinating acorns can feel tricky, but the layered chill method makes it easier! Here are answers to the most common queries to set you up for success.
How long does it take for acorn seeds to germinate using the layered chill method?
The layered chill method typically takes 4–12 weeks to break dormancy, depending on the acorn species. White oaks (like bur oaks) may take longer (up to 12 weeks), while red oaks often germinate faster (4–8 weeks). Patience is key—keep the seeds moist and refrigerated!
Do I need to remove the acorn cap before starting the layered chill process?
No, you don’t need to remove the cap—it’s part of the natural protection. However, if the cap is loose or damaged, you can gently peel it away. The goal is to keep the acorn intact while ensuring moisture reaches the seed. Just don’t scrub or force it off!
What’s the best soil mix for planting acorn seeds after stratification?
Use a light, well-draining mix like:
- 50% peat moss or coconut coir
- 30% perlite or sand
- 20% compost or worm castings
My acorns are moldy after stratification—what went wrong?
Mold usually means too much moisture or poor airflow. To fix it:
- Drain excess water—acorns should feel damp, not soaked.
- Use a paper towel to blot moisture if needed.
- Add a thin layer of sand to the mix for better drainage.
Can I grow acorns from any oak tree, or do some not work?
Most oak acorns can germinate, but white oaks (like bur or live oaks) are easier than red oaks (like pin or black oaks). Red oaks often require longer stratification (12+ weeks) and may have lower success rates. When in doubt, stick with white oak varieties for beginners!
Wrapping up and next steps
Growing acorn tree seeds using the layered chill method is a rewarding journey that unlocks a 95% germination success rate—and you’ve got all the tools to make it happen! 🌱 Whether you’re a gardening newbie or a seasoned green thumb, this method simplifies the process while ensuring strong, healthy saplings for your future forest.
Now that you’re equipped with answers to common questions, it’s time to roll up your sleeves and plant those seeds with confidence!
Ready to take the next step? Start by gathering your supplies (check your list!) and follow the layered chill steps—your future oak tree is waiting! For extra inspiration, explore pruning tips for young saplings to keep them thriving as they grow.