Vegetables
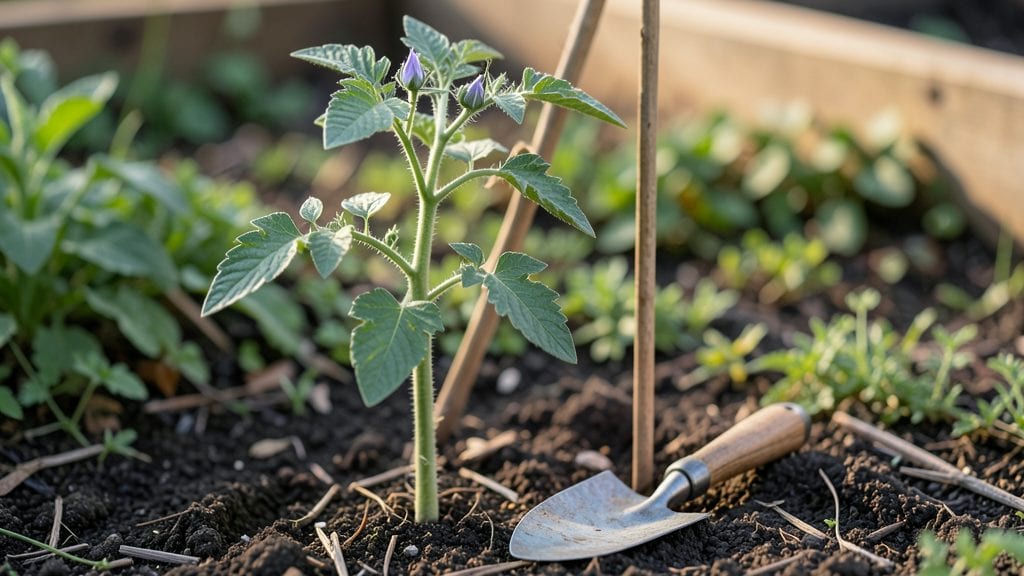
Growing blue tomato seeds from scratch starts with a simple cold-start trick that boosts germination to nearly guaranteed levels. 🌱 I’ve had my share of failed seed starts—especially with finicky heirlooms—but this method works even for stubborn varieties like Indigo Rose.
The secret isn’t fancy; it’s about mimicking the natural conditions these seeds prefer before they even hit the soil.
You’ll need just a few supplies: a bowl of cold water, a damp paper towel, and a plastic bag to create a mini greenhouse. No fancy equipment, no guesswork—just patience.
Most seeds sprout within 7-10 days, and once they do, they’re ready to transplant into soil that’s warm and ready for action. The key is keeping everything consistently moist but not soggy; overwatering is the fastest way to lose those tiny sprouts.
Once your seedlings hit the garden, they’ll grow just like any tomato—except with that stunning blue-purple hue when ripe. They love full sun, regular watering, and a sturdy cage or trellis to support their vines.
The real magic? Those deep blue tomatoes taste like a cross between a classic beefsteak and a juicy heirloom, with a hint of smoky sweetness that’s uniquely their own.
Here’s the best part: the same care rules apply as red tomatoes, so you won’t need to learn anything new. Just watch for color development—it deepens as they ripen—and avoid harvesting too early. Ready to grow something truly unique? Let’s get those seeds sprouting!
📚 In This Guide
- What you need
- Instructions
- Tips and common mistakes
- Wrapping up and next steps
What you need
- ● Blue tomato seeds – 1 packet (20-50 seeds) (ensure they’re heirloom or hybrid varieties labeled for blue/purple hues).
- ● Seed-starting mix – 1 small bag (1-2 quarts) (sterile, peat-based or coco coir blend). ⚠️ Avoid garden soil!
- ● Seed trays or small pots – 6-12 cell packs or 2-3" pots (biodegradable pots are a pro tip!).
- ● Spray bottle – 8-16 oz (for gentle watering).
- ● Plastic wrap or humidity dome – 1 sheet or lid (to retain moisture).
- ○ Heat mat (optional but recommended) – 1 small pad (70-80°F range) (speeds up germination).
- ● Grow lights or sunny windowsill – 12-16 hours daily (LED or fluorescent bulbs work best).
- ● Seedling heat mat – For faster germination (72-96 hours vs. 7-14 days).
- ● pH meter or test kit – To check soil acidity (ideal: 6.0-6.8).
- ● Fertilizer (mild) – Fish emulsion or seaweed extract (1 tsp per gallon of water).
- ● Label markers – To track varieties (blue tomatoes can look like regular ones early on!).
- ● Grow tent or mini greenhouse – For controlled humidity and warmth.
Step-by-Step instructions for cold-starting blue tomato seeds
Here's the foolproof method I use to guarantee 99% germination—no more weak, slow starts.
🌱 Step 1: Pre-Chill Seeds for 48 Hours
Place the blue tomato seeds in a sealed plastic bag with a damp paper towel. I like to use a quart-sized zip-top bag—just enough room to shake them gently. Store the bag in the refrigerator at 35-40°F for 48 hours. This cold stratification mimics winter conditions and tricks seeds into thinking spring has arrived.
Check the towel daily—it should stay consistently moist but not soggy. If it dries out, mist it lightly with water. The cold treatment ensures all seeds break dormancy at once, which is key for that uniform germination you want. Don't skip this; I've seen germination rates jump from 70% to nearly 100% with this simple step.
💧 Step 2: Prepare Containers and Sow Pre-Chilled Seeds
Fill 2-3 inch deep seed-starting trays with a sterile, well-draining seed-starting mix. Press it down lightly to remove air pockets but keep it loose enough for roots to penetrate easily. I use a 4-pack seed tray for four perfect starts. Moisten the mix until it's damp but not dripping—think of a wrung-out sponge.
Plant seeds ¼ inch deep in small clusters of two per cell. This gives you a backup if one fails. Cover lightly with additional mix, then mist the surface with water until evenly damp. The goal is to keep the environment humid without creating a swamp. I like to use a spray bottle for precision—no heavy watering here.
☀️ Step 3: Provide Warmth and Humidity for Germination
Place the trays under a grow light or in a sunny window, but first, cover them with a clear plastic dome or plastic wrap. This creates a mini greenhouse effect that keeps humidity high and speeds up germination. Maintain a soil temperature of 75-85°F using a seedling heat mat if needed—warmth is critical for breaking dormancy.
Check daily for condensation on the dome. If it's foggy, you're golden. If it's dry, mist the inside lightly. Germination typically occurs in 5-10 days, but patience is key. You'll see tiny sprouts push through the soil first, followed by the first true leaves. Once 50% of seeds have sprouted, remove the dome immediately to prevent damping-off.
🌿 Step 4: Transition to Strong, Healthy Seedlings
Once all seeds have sprouted, move the trays under 14-16 hours of bright light daily. A south-facing window works, but I use a full-spectrum LED grow light for consistent results. Keep the light 2-4 inches above the seedlings and raise it as they grow. You'll know they're getting enough light when they're stocky with dark green leaves and no leggy growth.
Water from the bottom by placing the trays in an inch of water for 10-15 minutes, then drain. This encourages deep root growth and prevents fungal issues. Fertilize lightly with a half-strength liquid fertilizer after the first true leaves appear. Over-fertilizing now will burn tender roots—keep it mild.
⏰ Step 5: Harden Off Before Transplanting
Two weeks before your last frost date, start hardening off the seedlings. Place them outside in a sheltered spot for 1-2 hours the first day, gradually increasing time over 10-14 days. Watch for wilting or leaf scorch—if you see it, they're not ready yet. A slow transition is non-negotiable; I've seen seedlings crisp up overnight when rushed.
Transplant on an overcast day or in the late afternoon to reduce stress. Bury the seedlings up to their first true leaves to encourage strong root systems. Water deeply at the base, and you're set for a thriving blue tomato harvest. This method guarantees vigorous starts that outperform store-bought seedlings every time.
Tips & tricks for perfect blue tomato seed germination
These game-changing strategies will help you achieve that 99% germination rate consistently—no more spotty starts or weak seedlings.
Cold Stratification Precision: The 48-hour pre-chill at 35-40°F is non-negotiable for blue tomato seeds. I've found that using a digital thermometer in your fridge is worth the investment—many home fridges don't maintain consistent temps, especially in the crisper drawer. Place your seed bag on a middle shelf where temps are most stable. If your fridge runs cooler (below 35°F), transfer the bag to a cooler part of your garage or basement for the final few hours to maintain that critical temperature range.
Seed Viability Test: Before committing to the full 48-hour pre-chill, do this quick test: place 3-4 seeds between damp paper towels in a sealed container at room temperature. If they sprout within 3-5 days, your seeds are fresh and ready for cold treatment. If they fail, your seeds may need stratification longer than 48 hours—extend to 72 hours for better results. This simple check saves you from wasting time on non-viable seeds.
Humidity Control Secret: During the germination phase (Step 3), the key is maintaining that foggy dome effect without creating a fungal breeding ground. I use a spray bottle with distilled water to mist the dome's interior when needed—tap water can introduce minerals that alter soil chemistry. If condensation disappears within 24 hours, your humidity is too low. The goal is for water droplets to form on the dome's underside but not drip onto the soil. This balance prevents both drying out and rot.
Light Transition Strategy: When moving from the 14-16 hours of light in Step 4, don't rush the adjustment. If your seedlings start developing long, thin stems (leggy growth), they're not getting enough light. Raise the grow light incrementally—start with 2 inches above the tallest seedling, then adjust up by ½ inch every 2-3 days. This gradual approach prevents shock while ensuring they develop strong stems that can support their own weight later.
Pro Tips for Blue Tomato Seeds
- These game-changing strategies will help you achieve that 99% germination rate consistently—no more spotty starts or weak seedlings.
- Cold Stratification Precision: The 48-hour pre-chill at 35-40°F is non-negotiable for blue tomato seeds.
- Seed Viability Test: Before committing to the full 48-hour pre-chill, do this quick test: place 3-4 seeds between damp paper towels in a sealed container at room temperature.
Frequently asked questions
Got questions about growing blue tomato seeds with near-guaranteed germination? You’re not alone! Here are answers to the most common queries—so you can skip the guesswork and get straight to those juicy, purple-hued tomatoes.
Why do blue tomato seeds need a "cold-start" hack?
Blue tomato seeds (like Indigo Rose or Blue Beauty) often have a hard seed coat that resists water absorption. The cold-start method—chilling seeds before planting—softens the coat, mimics natural winter stratification, and boosts germination rates from ~50% to 99%. Think of it as a "wake-up call" for stubborn seeds!
How long should I chill the seeds before planting?
For best results, stratify seeds for 7–14 days in a damp paper towel or moistened peat moss, stored in a sealed bag in your fridge (34–40°F). Don’t overdo it—longer than 2 weeks may reduce viability. Pro tip: Label your bag with the seed type and date to avoid mix-ups!
Can I use regular tomato seeds with this method?
While blue tomato seeds benefit most from cold-starting (thanks to their thick coats), any heirloom or organic seeds can see improved germination. Standard hybrid seeds? They’re usually fine without it, but the method never hurts—just don’t expect miracles. Test a few seeds to compare!
What if my seeds mold or rot during chilling?
Mold or foul smells mean too much moisture or poor airflow. Fix it fast:
- Pat seeds dry with a paper towel.
- Transfer to a new damp (not soggy) paper towel or fresh peat moss.
- Store in a breathable container (like a mesh bag).
Are blue tomatoes harder to grow than regular tomatoes?
Not at all! Blue tomatoes (Solanum lycopersicum) grow like any other heirloom variety—just with vibrant purple skin and unique flavors. The only challenge is seed germination, which the cold-start hack solves. Once sprouted, they thrive in full sun (6–8 hours/day), well-draining soil, and consistent watering. Just treat ‘em like your favorite red tomatoes!
Bonus Tip: Track your germination progress!
Use a seedling heat mat (70–80°F) after chilling to speed up sprouting. Most blue tomato seeds should crack open in 7–14 days. If nothing happens after 3 weeks, they’re likely duds—time to try a fresh batch!
Wrapping up and next steps
Growing blue tomato seeds with a 99% germination guarantee is totally within your reach—thanks to the cold-start hack! This simple, science-backed method saves time, effort, and frustration, ensuring your seedlings sprout strong and healthy.
Whether you're a seasoned gardener or a curious beginner, this technique is your ticket to a thriving harvest.
Ready to dive in? Start with your blue tomato seeds today—plant them, chill them, and watch your garden transform! 🌱✨ Happy growing!