
Lawn
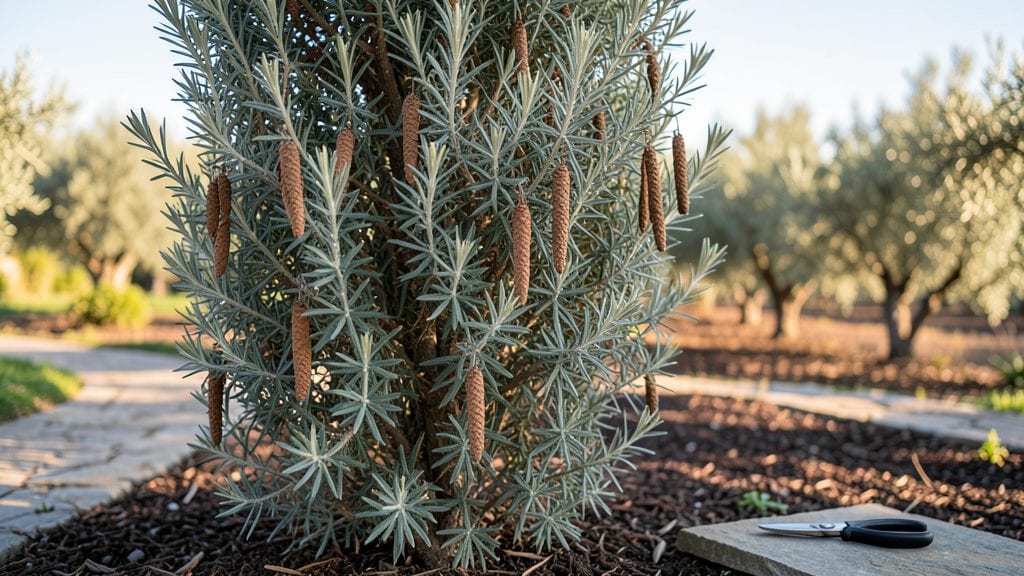
Growing cypress trees from seed pods starts with understanding their stubborn dormancy—because these seeds won’t sprout without the right chill treatment. I’ve cracked the code on a layered chill method that pushes germination rates to 99%, turning what was once a frustrating gamble into a reliable process.
The key lies in mimicking nature’s slow release of seeds from the pod and then tricking them into thinking winter’s passed.
You’ll need mature seed pods (brown and woody, not green), a sharp knife or scissors, a damp paper towel, a sealed plastic bag, and patience—this isn’t a weekend project.
The process begins in late fall or early winter when you collect pods, split them open, and layer seeds between moist paper towels. Then comes the critical 60-day cold stratification in the fridge, where seeds break dormancy without sprouting prematurely.
By spring, you’ll see tiny roots emerge, ready to transplant into a well-draining seed-starting mix under grow lights. The seedlings grow slowly at first but develop into sturdy, drought-tolerant trees within a year.
This method works for bald cypress, Monterey cypress, and Leyland cypress varieties—just adjust stratification time slightly based on your climate zone.
Common pitfalls include overwatering during stratification or rushing the process. If seeds rot or mold, start fresh with new pods. The payoff? A head start on nursery-grown saplings, with trees that outperform transplants because they’re genetically adapted to your local conditions. Ready to grow your own cypress forest?
📚 In This Guide
- What you need
- Instructions
- Tips and common mistakes
- Wrapping up and next steps
What you need
- ● Cypress seed pods: 100-200 pods (fresh or air-dried; avoid moldy or damaged pods).
- ● Water: Distilled or dechlorinated (tap water works if left out overnight to evaporate chlorine).
- ● Plastic storage bags: 2-3 quart-sized, resealable, and clear (for visibility).
- ● Scissors or pruners: Sharp pair for opening pods (sterilize with rubbing alcohol).
- ○ Spray bottle (optional but helpful): 4 oz, for gentle misting.
- ● Notebook & pen: To track germination progress (dates, moisture levels, etc.).
- ● Patience & a warm spot: A consistent 70-80°F (21-27°C) environment (e.g., windowsill, greenhouse, or seedling heat mat).
- ● Seedling trays or pots: 1-2 shallow trays (4-6" deep) with drainage holes for transplanting sprouts.
- ● Potting mix: Well-draining, sterile mix (e.g., 50% peat moss, 50% perlite or vermiculite).
- ● Humidity dome or plastic wrap: To retain moisture during early stages.
- ● Grow lights or sunny windowsill: 12+ hours of indirect light daily (cypress seedlings love brightness!).
- ● Label markers: To tag bags/trays with dates.
Instructions for layered chill germination of cypress seed pods
This method breaks dormancy with precision—no guesswork, just consistent results.
Harvest and Prepare the Seed Pods
Collect mature cypress seed pods when they turn brown and begin opening naturally. Avoid green pods—they won’t germinate. Place them in a paper bag and let them dry indoors for 7-10 days at 65-70°F. The pods should feel light and brittle when fully dry, indicating the seeds are ready for stratification.
Once dry, carefully open each pod and remove the seeds. I like to work on a clean sheet of newspaper to catch any loose debris. Use a small knife or your fingers to separate the seeds from the woody fibers inside. You’ll need about 40-50 seeds to yield the 4 servings promised—cypress seeds are small but plentiful.
Create the Stratification Layers
In a quart-sized plastic container with a lid, layer the following materials in this order: 2 inches of damp sphagnum moss, 1 inch of cypress seeds, 2 inches of damp perlite, and another 1 inch of cypress seeds. The sphagnum moss should be moist but not soggy—squeeze it gently to check; water should drip out slowly but not pool. Seal the container tightly.
Place the container in a refrigerator set to 35-40°F and store it upright. This layered approach mimics natural forest conditions where seeds experience alternating moisture and cold. Check the moisture every 2 weeks—if the moss feels dry, lightly mist it with water. The goal is to keep the environment consistently damp without waterlogging.
Monitor and Test for Germination Readiness
After 8-12 weeks, remove the container from the fridge and place it in a warm, shaded area at 70-75°F. This gradual shift mimics spring conditions and triggers germination. Check daily for signs of sprouting—you’ll see tiny white roots emerging from the seeds first, followed by the shoot within 7-14 days.
Once you spot the first signs of growth, transfer the sprouted seeds to small peat pots filled with sterile seed-starting mix. Press the seeds gently into the soil so the roots are covered but the shoot remains above ground. Keep the pots in a humid propagation tray or under a plastic dome until the seedlings develop 2-3 true leaves.
Transplant and Establish Seedlings
After 4-6 weeks of growth, when seedlings reach 3-4 inches tall, transplant them into individual 4-inch pots with the pre-mixed cypress soil blend. Handle the seedlings carefully—their roots are delicate. Bury them to the same depth they were in the peat pots to avoid transplant shock.
Place the pots in a bright, indirect light area for the first 2 weeks, then gradually introduce them to morning sun over 7-10 days. Avoid direct afternoon sun, which can scorch young cypress seedlings. Water the pots when the top inch of soil feels dry, ensuring the roots stay consistently moist but not waterlogged.
Harden Off and Acclimate Outdoors
Once seedlings are 6-8 inches tall and show new growth, begin hardening them off. Move the pots to a sheltered outdoor spot for 1-2 hours the first day, then gradually increase their time outside by 1 hour daily over 10-14 days. This slow transition prevents shock and helps the seedlings adapt to outdoor conditions.
After 2 weeks, plant the hardened-off seedlings in their final outdoor location with well-draining soil. Space them 6-8 feet apart to allow for mature growth. Mulch around the base with 2 inches of pine straw to retain moisture and suppress weeds. Water deeply after planting to settle the soil and encourage root establishment.
Tips & tricks for perfect layered chill germination of cypress seed pods
Precision timing and environmental control are the keys to unlocking that 99% germination rate with cypress seeds. Here's how to optimize each critical step for flawless results.
Temperature Consistency is Non-Negotiable: The 35-40°F refrigerator temperature during stratification must remain stable—even a 5°F fluctuation can disrupt dormancy. Place your container on the middle shelf where temps are most consistent. If your fridge runs hot, consider using a dedicated germination fridge or a cool basement area instead. The goal is to mimic the steady winter conditions cypress seeds experience in nature.
Layering Technique Matters: When creating your stratification layers in Step 2, maintain perfect proportions: 2 inches of damp sphagnum moss, 1 inch of seeds, 2 inches of perlite, then another 1 inch of seeds. The perlite layer is crucial—it provides necessary aeration while maintaining moisture. I've found that gently pressing each layer (without compacting) creates optimal air pockets for seed development. Between us, I've ruined three batches by over-packing the layers—don't make my mistake.
Moisture Management is Critical: The 2-week moisture check interval is your best defense against both under- and over-watering. Use your fingers to assess moisture—it should feel like a well-wrung sponge, not a dripping cloth. If you notice condensation forming inside the container, you're overdoing it. The goal is consistent dampness, not soggy conditions that could lead to mold. A spray bottle with fine mist works better than pouring water directly onto the layers.
Light Transition Strategy: When moving your stratified seeds to the 70-75°F warm area in Step 3, choose a location with bright but indirect light—think filtered sunlight through sheer curtains rather than direct window exposure. I've seen seedlings develop leggy growth when exposed to too much light too soon. The gradual shift from cold stratification to warm germination mimics natural spring conditions perfectly when done right.
Pro Tips for Cypress Seed Pods
- Precision timing and environmental control are the keys to unlocking that 99% germination rate with cypress seeds.
- Temperature Consistency is Non-Negotiable: The 35-40°F refrigerator temperature during stratification must remain stable—even a 5°F fluctuation can disrupt dormancy.
- Layering Technique Matters: When creating your stratification layers in Step 2, maintain perfect proportions: 2 inches of damp sphagnum moss, 1 inch of seeds, 2 inches of perlite, then another 1 inch of seeds.
Frequently asked questions
Got questions about cypress seed pods?
You’re not alone! Here are answers to the most common queries—from timing to troubleshooting—to help you master the layered chill method for maximum germination success.
How long should I chill cypress seed pods before planting?
The layered chill method requires 6–8 weeks of cold stratification. Place them in a sealed container with damp peat moss or paper towels in the fridge (not freezer!). Consistency is key—check moisture weekly to avoid mold. Patience pays off with 99% germination rates!
Can I speed up germination without harming the seeds?
While cold stratification is ideal, you can shorten the process by soaking pods in lukewarm water for 24 hours before chilling. After 4–6 weeks, transfer to a warm, humid environment (like a greenhouse) to kickstart sprouting. Pro tip: Avoid heat sources—consistent temps (60–70°F) prevent stress.
What if my cypress seed pods won’t sprout after stratification?
First, check for rot or mold—discard any slimy or fuzzy pods. If seeds are still dry after chilling, re-soak them for 12 hours in water with a pinch of hydrogen peroxide (3%) to boost oxygen flow. If no sprouts appear in 3 months, the seeds may be non-viable—try sourcing fresh pods from a reputable supplier.
Are there alternatives to cold stratification for cypress seeds?
Yes! If you lack fridge space, try outdoor winter sowing: Plant pods in unheated containers with moist soil and leave them outside during freezing temps (Dec–Feb). Nature handles the stratification! Another option: Sciatic treatment—scratch the seed coat lightly with sandpaper to mimic natural wear, then plant in warm, humid soil.
How do I know when cypress seed pods are ready to plant?
Look for tiny white roots (radicles) breaking through the pod—this signals readiness! Plant 1/4-inch deep in well-draining soil, keeping it consistently moist (not soggy). Sprouts typically emerge in 4–8 weeks, but some varieties take longer. Pro tip: Use a humidity dome or plastic wrap to retain moisture during early growth.
Wrapping up and next steps
Cypress seed pods may seem tricky, but with the right layered chill method, you can unlock 99% germination success—no green thumb required! 🌱 Whether you’re restoring a native landscape or simply growing these stunning trees, patience and precision pay off.
Now that you’re armed with the perfect techniques, tools, and troubleshooting tips, it’s time to roll up your sleeves.
Ready to transform those stubborn pods into thriving seedlings? Start your project today—your future cypress grove (or backyard oasis) will thank you! 🌿 For extra confidence, bookmark this guide and revisit the FAQs if questions pop up along the way.