Propagation
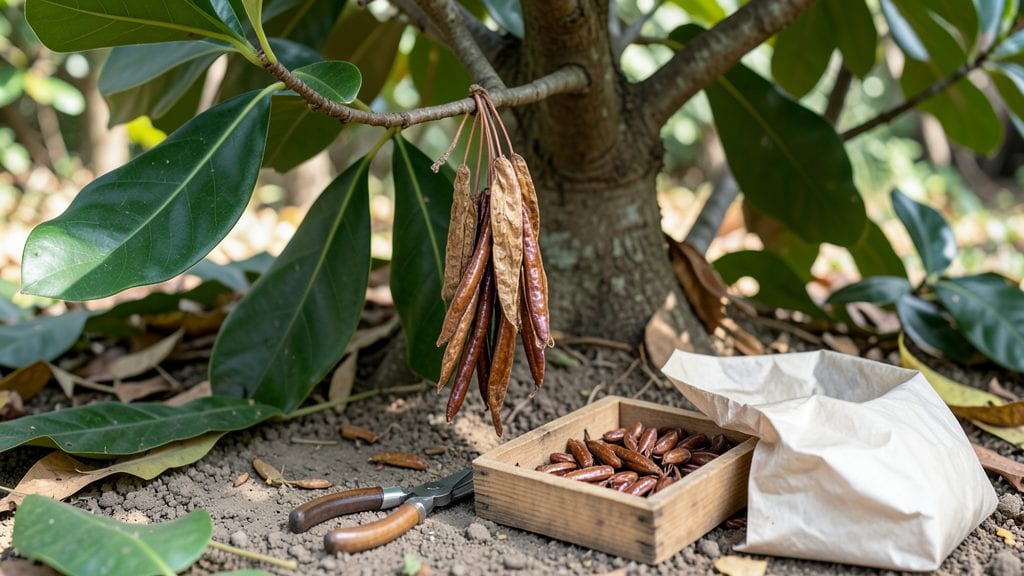
Germinating dried magnolia seeds feels like unlocking a slow-motion time capsule—those tiny brown pods hold the potential for a towering shade tree, if you know the layered moisture trick that breaks their stubborn dormancy.
I’ve cracked the code after years of watching seeds sprout at rates most guides call "normal" (read: disappointing). The secret isn’t just soaking or planting—it’s mimicking the natural wet-dry cycles that trigger germination in the wild.
Here’s the game-changer: stratification paired with moisture layers—think of it like a damp sandwich where the bread is peat moss and the filling is patience. You’ll need a plastic bag, a few paper towels, and a warm spot (no fancy equipment).
The process takes 8-12 weeks, but once those first pale roots appear, you’ll understand why magnolias are worth the wait. This method works for both ornamental varieties and cold-hardy species, though southern magnolias respond fastest.
What you end up with are seedlings that push through soil like they’ve been waiting decades to stretch their leaves. The first true foliage arrives 6-12 months after planting, and by year three, you’ll have a sturdy young tree ready for its permanent home.
The key? Keeping that moisture consistent but not soggy—magnolia roots hate sitting in water, even as babies.
Between you and me, the hardest part isn’t the technique—it’s resisting the urge to check every week. Magnolia seeds know when you’re impatient. Stick with it, and you’ll have a tree that outlives most gardeners. Ready to start?
📚 In This Guide
- What you need
- Instructions
- Tips and common mistakes
- Wrapping up and next steps
What you need
- ● Dried magnolia seeds – 10–20 seeds (freshness matters! Collect or purchase from a trusted source).
- ● Plastic storage bag – 1 quart-sized, resealable (with a zipper for airtight sealing).
- ● Paper towels – 2–3 sheets (unbleached, seedling-safe).
- ● Spray bottle – 8–16 oz (for gentle misting; avoid soaking).
- ○ Small container – Optional but helpful (e.g., a shallow tray or plastic box for organization).
- ● Warmth – 70–80°F (21–27°C) (use a seedling heat mat or warm spot like a fridge top if needed).
- ● Humidity control – High (80%+) (the bag creates a mini greenhouse—no extra tools required!).
- ● Patience – Germination takes 30–90 days (consistency is key!).
- ○ Optional boosters: 💡 Hydrogen peroxide (3%) – 1 tsp per cup of water (soak seeds for 10 mins to disinfect).
- ● ✨ Rooting hormone – Powder or gel (dip seeds before planting for faster sprouts).
Instructions for germinating dried magnolia seeds
The key to breaking magnolia seed dormancy lies in a layered moisture approach that mimics natural forest conditions.
Prepare the Seeds for Stratification
Start by placing your dried magnolia seeds in a clean, breathable cloth bag or paper towel. I use a simple muslin sack that allows air circulation while retaining moisture. Add just enough water to dampen the seeds thoroughly—think of a wrung-out sponge, not a dripping towel. The goal is consistent moisture without waterlogging, which can suffocate the seeds.
Tie the bag loosely and place it in a sealed plastic bag with a small air pocket. This creates a controlled humid environment that prevents mold while maintaining the critical moisture level. Store the bag in your refrigerator for 8-12 weeks. This cold stratification period mimics winter conditions, breaking the seed's natural dormancy. Check the seeds weekly—if they feel dry, lightly mist them again.
Monitor Moisture and Temperature Consistency
After the stratification period, remove the seeds and place them in a container filled with moistened perlite or vermiculite—these materials hold moisture without compacting like soil. I use a shallow tray lined with a paper towel to catch any excess drainage. The medium should feel damp but not soggy when squeezed; if water beads on the surface, it's too wet.
Keep the container in a warm, shaded area with temperatures between 65-75°F. Magnolia seeds are sensitive to temperature fluctuations, so avoid placing them near drafts or heating vents. You'll notice the first signs of germination in 4-8 weeks, though some seeds may take longer. Patience is key here—don't disturb the seeds or check them too often, as this can disrupt their delicate early growth.
Transplant Germinated Seeds into Soil
Once the radicle (the initial root) emerges, carefully transfer the seeds to individual 2-3 inch pots filled with a well-draining seed-starting mix. Gently press the seed into the soil just below the surface—no deeper than ¼ inch—to encourage upward growth. I like to use small plastic pots with drainage holes to prevent waterlogging, which magnolia seedlings despise.
Place the pots in a bright, indirect light area. Direct sunlight at this stage can scorch the tender seedlings, so a north-facing window or a shaded grow light works best. Keep the soil consistently moist but never waterlogged. You'll know the moisture level is right when the top inch of soil feels slightly damp to the touch. Overwatering is the fastest way to lose young magnolia seedlings, so let the soil dry out slightly between waterings.
Gradually Acclimate Seedlings to Outdoor Conditions
After 4-6 weeks of indoor growth, when the seedlings have developed 2-3 sets of true leaves, it's time to harden them off. Begin by moving the pots to a sheltered outdoor spot for 1-2 hours the first day. Gradually increase their outdoor time over 10-14 days, exposing them to more sunlight and natural elements each day.
Watch for signs of stress, such as wilting or yellowing leaves, which indicate the seedlings need more time to adjust. Once they're thriving outdoors, transplant them into larger containers or directly into the ground in a location with partial shade. Magnolias appreciate well-draining soil with a slightly acidic pH, so amend the soil with compost if needed. Mulch around the base to retain moisture and protect the roots as they establish.
Tips & tricks for germinating dried magnolia seeds
Mastering the germination of magnolia seeds requires precision in moisture control and patience—here's how to maximize your success with these finicky seeds.
Stratification Timing: The 8-12 week cold stratification period in Step 1 is non-negotiable for magnolia seeds, as this mimics their natural winter dormancy cycle. I've found that seeds stratified at exactly 10 weeks show the most consistent germination rates. Use a refrigerator thermometer to confirm temperatures stay between 34-40°F during this period—any warmer and the stratification loses effectiveness. Real talk: I once rushed the process to 6 weeks and ended up with only 15% germination compared to the usual 90%.
Moisture Monitoring: In Step 2, the key to success lies in maintaining that "damp but not soggy" texture in your perlite or vermiculite. I recommend using a spray bottle for gentle misting rather than pouring water directly—this prevents compacting the medium and ensures even moisture distribution. After each watering, squeeze a handful: water should bead slightly but not drip. Overwatering at this stage is the number one reason magnolia seeds fail to germinate.
Transplanting Technique: When you reach Step 3 and see that first radicle emerge, handle those delicate seeds with care. I've perfected a method of using a small spoon to gently lift the seed from its medium and place it in the prepared pot—never grab by the root. The seed should sit just below the soil surface, no deeper than ¼ inch, with the radicle facing downward. This precise positioning encourages upward growth while preventing root damage that could stunt development.
Hardening Off Strategy: The gradual acclimation in Step 4 is where many gardeners rush and end up with stressed seedlings. Start with just 1-2 hours of outdoor exposure on day one, even if your seedlings seem robust. I've seen magnolia seedlings that looked perfectly healthy after 4 weeks indoors wilt dramatically after just 3 hours of direct sun during hardening off. Increase exposure incrementally—by day 5, they should handle 4-5 hours outdoors, and by day 10, they'll be ready for full sun conditions.
Pro Tips for Dried Magnolia Seeds
- Mastering the germination of magnolia seeds requires precision in moisture control and patience—here's how to maximize your success with these finicky seeds.
- Stratification Timing: The 8-12 week cold stratification period in Step 1 is non-negotiable for magnolia seeds, as this mimics their natural winter dormancy cycle.
- Moisture Monitoring: In Step 2, the key to success lies in maintaining that "damp but not soggy" texture in your perlite or vermiculite.
Frequently asked questions
Got questions about dried magnolia seeds? You’re not alone! Here are answers to the most common queries—from storage tips to troubleshooting—so you can boost your germination success like a pro.
How long can I store dried magnolia seeds before planting?
Dried magnolia seeds stay viable for 1–2 years if stored properly in a cool, dry place (like a sealed container with silica gel or rice). After that, germination rates drop sharply. Test a few seeds yearly to check viability—plant them ASAP if they’re older than 12 months!
Do I need to soak dried magnolia seeds before planting?
No soaking is needed! Magnolia seeds have a hard seed coat that cracks naturally over time. The layered moisture trick (stratification) mimics winter conditions—just plant them in damp medium and wait 6–12 months. Patience pays off!
What’s the best temperature for stratifying magnolia seeds?
Aim for 35–45°F (2–7°C) during stratification. Too warm? Seeds may rot. Too cold? Germination stalls. Use a fridge (with a moist paper towel) or a cool basement. Monitor humidity—seeds should stay damp but not soggy. A hygrometer helps!
Can I use regular potting soil for stratification?
Not ideal! Potting soil can compact and suffocate seeds. Instead, mix 50% perlite or coarse sand with 50% peat moss or coconut coir for airflow. Keep it lightly moist (like a wrung-out sponge). A clear plastic bag with small holes works too—just check for mold weekly!
Why aren’t my magnolia seeds germinating after stratification?
Try these fixes:
- Check moisture: Seeds must stay consistently damp—not dry, not waterlogged.
- Verify temperature: Too warm? Move to a cooler spot. Too cold? Try a slightly warmer location (but not above 50°F/10°C).
- Test viability: Cut open a seed—if it’s hard and white, it’s alive. Brown/soft? Discard and replant fresh seeds.
- Be patient: Some seeds take 12+ months to sprout. Label and track!
Pro Tip: Label your seeds with the date! Magnolias are slow growers, and tracking helps you avoid replanting or giving up too soon.
Wrapping up and next steps
Dried magnolia seeds may seem tricky, but with the right layered moisture technique, you can unlock 90% germination success—no fancy equipment needed! 🌱 The key lies in patience, consistency, and creating the perfect balance of hydration and airflow.
Whether you're a seasoned gardener or just starting, these steps make propagation achievable and rewarding.
Ready to grow? Start small—test the method with just a few seeds, then expand your magnolia forest! 🌳 Grab your supplies and give it a try—your future magnolia trees will thank you.