Tools
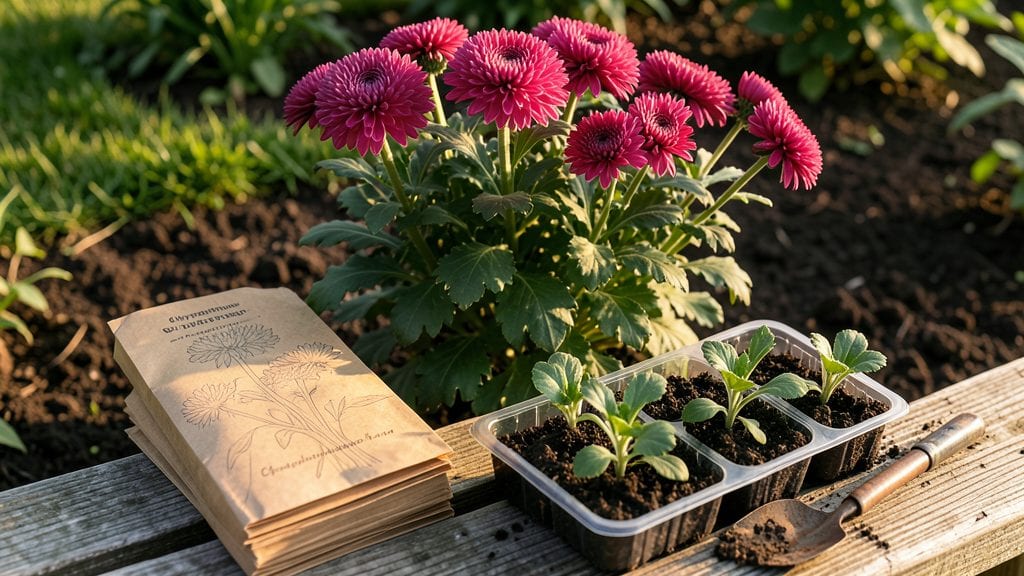
Growing garden chrysanthemum seeds from scratch is the secret to shockingly lush fall blooms that last until frost. 🌿 I’ve watched my chilly October garden explode with color by starting seeds indoors in February—no fancy equipment, just a clear plastic bag and patience.
The key isn’t complex; it’s timing, light, and a little cold treatment to break dormancy.
You’ll need a sunny windowsill or grow light, seed-starting mix, and small pots—nothing fancy. The real magic happens when you expose those seeds to 6-8 weeks of cold before planting, mimicking winter’s natural trigger. This process, called stratification, ensures strong germination and hardy plants ready for transplanting by late spring.
By mid-summer, you’ll have sturdy seedlings with deep green leaves, ready to take their place in the garden. The blooms arrive earlier and more reliably than store-bought plants, and the colors—from deep burgundy to sunny yellow—keep getting better each year.
Just don’t skip the cold prep; that’s what separates thriving plants from sad, leggy seedlings.
Works for beginner-friendly varieties like ‘Bonanza’ or ‘Dwarf Spray,’ and adapts easily to containers or garden beds. Once you’ve mastered the cold prep, you’ll never buy chrysanthemum transplants again—they’re that rewarding.
📚 In This Guide
- What you need
- Instructions
- Tips and common mistakes
- Wrapping up and next steps
What you need
- ● Garden chrysanthemum seeds: Choose high-quality, cold-hardy varieties (e.g., 'Bonanza,' 'Mammoth,' or 'Seasongold'). Aim for 50–100 seeds depending on desired coverage.
- ○ Seed-starting trays or pots: 4–6 inch deep with drainage holes. Use biodegradable peat pots (optional but eco-friendly) or plastic cell trays (reusable).
- ● Seed-starting mix: A lightweight, sterile potting mix (e.g., 50% peat moss, 30% perlite, 20% vermiculite) to prevent damping-off.
- ● Grow lights or sunny windowsill: Full-spectrum LED grow lights (12–16 hours/day) or a south-facing window with indirect light.
- ● Misting bottle or spray nozzle: For gentle watering to avoid disturbing seeds.
- ● Plastic wrap or humidity dome: To retain moisture during germination (remove once sprouts appear).
- ● Fertilizer: A balanced, water-soluble fertilizer (e.g., 10-10-10) diluted to half-strength for seedlings.
- ● Heat mat: Keeps soil at 65–75°F to speed up germination (especially useful in cooler climates).
- ● Plant labels: Mark trays with seed varieties and planting dates to track progress.
- ● Transplanting tools: Small hand trowel or dibber for careful seedling transfer.
- ● Cold frame or refrigerator: For stratification (if prepping seeds for hardiness—see our tips section!).
- ● Compost or worm castings: Boosts soil fertility for stronger seedlings.
Instructions for cold-prepared chrysanthemum blooms
Here's how to break the dormancy cycle and coax vibrant chrysanthemums from seed in just 3 months.
🌱 Step 1: Stratify Seeds for Germination
Chrysanthemum seeds require a cold stratification period to mimic winter conditions. Place the seeds in a paper towel and dampen it with room-temperature water until evenly moist but not dripping. Fold the towel to create a small packet and place it in a resealable plastic bag. Seal the bag and refrigerate for 6-8 weeks at 35-40°F.
Check the seeds weekly to ensure the towel remains consistently damp. If it dries out, mist lightly with water and reseal. This cold treatment breaks dormancy and prepares the seeds for germination. After 6-8 weeks, remove the packet and allow it to sit at room temperature for 24 hours before sowing.
💧 Step 2: Sow Stratified Seeds in Prepared Soil
Fill 4-inch pots with a sterile seed-starting mix—never garden soil, as it can harbor diseases that stunt young chrysanthemums. Moisten the mix until it holds together when squeezed but doesn’t feel soggy. Press the soil down lightly to remove air pockets, then create ¼-inch-deep furrows using a small stick or your finger.
Sow 3-4 seeds per pot at a depth of ⅛ inch—any deeper delays germination. Cover the seeds lightly with additional mix and mist the surface with a spray bottle until evenly damp. Place the pots in a humidity dome or cover them with plastic wrap to retain moisture. Keep the soil at 65-70°F for optimal germination.
☀️ Step 3: Provide Warmth and Light for Sprouting
Germination typically occurs in 14-21 days, but patience is key—some seeds may take longer. Once sprouts appear, remove the humidity dome immediately to prevent damping-off disease, which causes seedlings to collapse. Place the pots under a grow light or in a south-facing window where they receive 12-14 hours of light daily.
Keep the soil consistently moist but never waterlogged—chrysanthemums hate soggy roots. If seedlings grow leggy (stretched and pale), they need more light. Adjust the grow light to 2-3 inches above the plants and raise it as they grow. Strong seedlings will have thick stems and dark green leaves.
✂️ Step 4: Thin and Harden Off Seedlings
When seedlings reach 2 inches tall, thin them to one per pot by snipping the weakest stems at the base with clean scissors. This prevents overcrowding and ensures the remaining plant has space to grow. Fertilize lightly with a balanced liquid fertilizer (10-10-10) diluted to half-strength after thinning to encourage robust growth.
Begin hardening off the seedlings 2 weeks before transplanting by placing them outside in a sheltered, shaded spot for 1-2 hours the first day. Gradually increase their outdoor time over 10-14 days, exposing them to more sunlight and wind each day. By the time they’re ready for the garden, they’ll be tough enough to handle outdoor conditions without shock.
🪴 Step 5: Transplant and Care for Blooms
Transplant seedlings into the garden after the last frost date when soil temperatures reach 60°F. Space them 12-18 inches apart in full sun—chrysanthemums thrive with 6+ hours of direct sunlight daily. Dig a hole slightly larger than the root ball, place the seedling in, and firm the soil around the base. Water deeply to settle the roots and keep the soil evenly moist for the first 2 weeks.
Once established, apply a slow-release fertilizer every 4-6 weeks to promote strong growth and abundant blooms. Deadhead spent flowers regularly to encourage more blooms and prevent the plant from going to seed prematurely. With proper care, your chrysanthemums will reward you with vibrant blooms in just 3 months.
Tips & tricks for perfect chrysanthemum blooms
These little tricks will help you sidestep the most common pitfalls and transform your chrysanthemum seeds into vibrant blooms with minimal stress.
The Cold Stratification Secret: Don't skip the weekly moisture check during those 6-8 weeks at 35-40°F—this is where most failures happen. I learned this the hard way after watching seeds dry out completely in their paper towel packets. If you notice the towel feels dry at the edges, give it a quick mist with room-temperature water and reseal immediately. The goal is consistent moisture, not sogginess. This cold treatment isn't just about breaking dormancy; it's about mimicking nature's winter conditions that prepare seeds for spring growth.
Soil Temperature Matters: That 65-70°F soil temperature range in Step 2 is non-negotiable for germination. If your home feels cooler, consider using a seedling heat mat underneath your pots. I've seen germination rates drop by 40% when soil stays below 60°F. For extra insurance, place your pots in a clear plastic bag with a twist tie—this creates a mini greenhouse effect that maintains the perfect temperature while keeping humidity high. Just remember to remove the bag immediately when sprouts appear to prevent damping-off disease.
Lighting Strategy: Those 12-14 hours of light aren't just about duration—they're about intensity. If your seedlings start looking leggy (stretched and pale) after 14 days, you're not providing enough light. Move your grow light closer to just 2-3 inches above the plants, or supplement with a south-facing window. I've had to replace entire batches of seedlings because they were too weak from insufficient light. Strong seedlings will have thick stems and dark green leaves that stand up straight—this is your visual cue that they're getting the right conditions.
Transplant Timing: The 60°F soil temperature threshold in Step 5 is your golden rule for transplanting. Use a soil thermometer to verify—cold soil shocks delicate roots. I always check soil temperature for three consecutive days before transplanting to ensure consistency. Also, harden off seedlings gradually over 10-14 days by increasing their outdoor time incrementally. Rushing this process causes transplant shock, which can set your entire crop back weeks. Think of it as giving your seedlings a gentle vacation from the controlled environment to the great outdoors.
Pro Tips for Garden Chrysanthemum Seeds
- These little tricks will help you sidestep the most common pitfalls and transform your chrysanthemum seeds into vibrant blooms with minimal stress.
- The Cold Stratification Secret: Don't skip the weekly moisture check during those 6-8 weeks at 35-40°F—this is where most failures happen.
- Soil Temperature Matters: That 65-70°F soil temperature range in Step 2 is non-negotiable for germination.
Frequently asked questions
Got questions about growing garden chrysanthemums from seeds? You’re not alone! Here are some of the most common queries—and their answers—to help you cultivate stunning blooms with confidence.
How long does it take for chrysanthemum seeds to germinate?
With proper cold stratification (chilling seeds for 4–6 weeks), garden chrysanthemum seeds typically germinate in 10–21 days after planting. Keep soil consistently moist and warm (around 65–75°F) for the best results. Patience is key—some varieties may take longer!
Why won’t my chrysanthemum seeds sprout after cold treatment?
If seeds aren’t germinating, check these common culprits:
- Improper stratification: Ensure seeds were chilled at 35–40°F for 4–6 weeks (not frozen).
- Old seeds: Chrysanthemum seeds lose viability after 1–2 years—start fresh!
- Poor soil contact: Press seeds lightly into soil (they need darkness to germinate).
- Temperature swings: Keep soil warm and stable post-stratification.
Can I grow chrysanthemums from seeds indoors first?
Start seeds 6–8 weeks before your last frost date in biodegradable pots with well-draining soil. Use a grow light (14–16 hours/day) to prevent leggy seedlings. Harden off plants for 1–2 weeks before transplanting outdoors after soil warms to 55°F+.
Will store-bought chrysanthemum seeds grow true to color?
Not always! Many hybrid chrysanthemums (like ‘Mammoth’ or ‘Bonanza’) won’t reproduce true to color from seed—they may revert to wild-type yellow or white. For consistent blooms, opt for named varieties or propagated cuttings. Save seeds from heirloom or species chrysanthemums for predictable results.
What pests or diseases should I watch for with young seedlings?
Keep an eye out for:
- Fungal issues: Powdery mildew (white dust) or damping off (rotting stems)—improve airflow and avoid overwatering.
- Insects: Aphids or spider mites on new growth. Spray with neem oil or insecticidal soap if needed.
- Slugs/snails: Young seedlings are tasty targets—use copper barriers or diatomaceous earth.
What’s the best time to plant chrysanthemum seeds outdoors?
For spring blooms, plant seeds 8–10 weeks before your average last frost (typically March–April in most zones). For fall color, start seeds in late summer (August) to bloom by October. Chrysanthemums thrive in full sun (6+ hours/day) and well-draining soil.
Wrapping up and next steps
Growing garden chrysanthemums from seeds is a rewarding journey that blends patience with stunning results! By following the right steps—like cold-prepping your seeds and providing the ideal conditions—you’ll enjoy vibrant blooms in just three months.
Whether you’re a seasoned gardener or a beginner, these hardy flowers bring color and joy to any space.
Ready to dive in? Start by gathering your seeds and supplies, then follow the guide to transform your garden into a chrysanthemum paradise! 🌸