Pruning
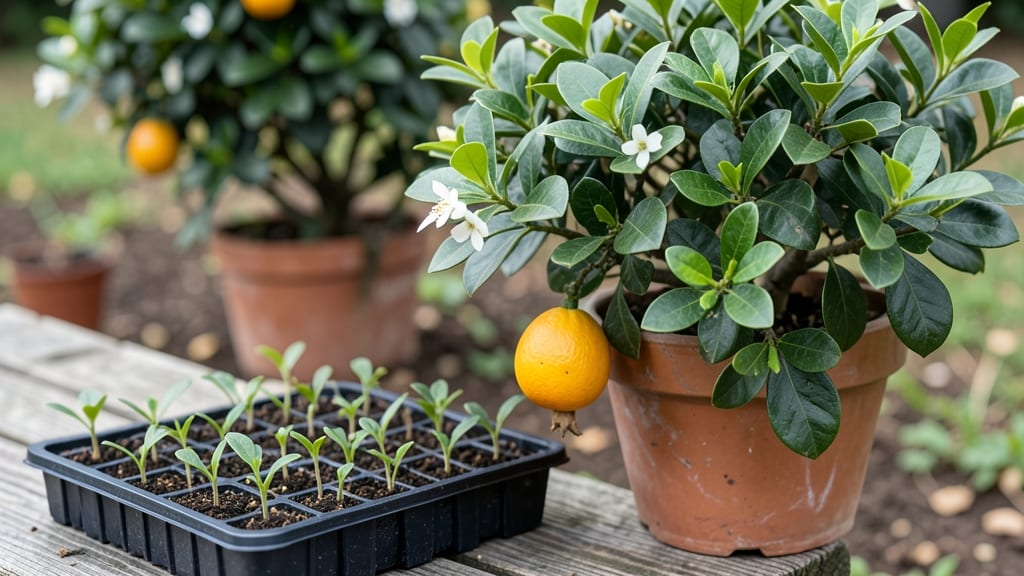
Growing a kumquat tree from seeds means waiting for sweet rewards—if you’re willing to embrace the layered chill method that breaks dormancy in just 90 days. 🌱 I’ve learned the hard way that skipping this step leaves seeds stubbornly dormant for months, but with the right technique, you’ll see those first green shoots within three months.
The key lies in mimicking nature’s winter-spring cycle, which is especially critical for kumquats that thrive in USDA zones 9-11.
You’ll need just three things: fresh kumquat seeds, a damp paper towel, and a sealed plastic bag for stratification. The process starts indoors, where controlled conditions let you monitor moisture and temperature without fuss.
Unlike fast-growing annuals, kumquat seedlings demand patience—they won’t fruit for 5-7 years, but the journey begins with this foundational step that ensures strong root development from day one.
By the time you transplant those seedlings outdoors, you’ll have 2-3 inch-tall plants with sturdy stems ready to handle full sun and well-draining soil. The layered chill method doesn’t just speed up germination—it sets the stage for a tree that eventually produces those tart-sweet fruits you’ve been craving.
Just remember: grafting remains the faster route to fruit, but growing from seed builds a deeper connection to the plant’s life cycle.
This method works best for gardeners in warm climates, though container growing extends possibilities for cooler zones. The real payoff comes when you see those first leaves unfurl after months of careful nurturing—proof that persistence in the garden always pays off. Here’s how to make it happen without the guesswork.
📚 In This Guide
- What you need
- Instructions
- Tips and common mistakes
- Wrapping up and next steps
What you need
- ● Fresh kumquat seeds – 3–5 seeds (harvested from ripe, organic kumquats for best results).
- ● Paper towels or coffee filters – 2–3 sheets (unbleached, seedling-safe).
- ● Plastic zip-top bags – 1–2 quart-sized bags (reusable or sealable).
- ● Water – Distilled or room-temperature tap water (avoid chlorinated water).
- ● Small container or bowl – For soaking seeds (e.g., a ceramic dish or plastic cup).
- ● Refrigerator – A standard fridge (35–40°F / 2–4°C) for the cold stratification phase.
- ● Growing medium – 1–2 small pots (4–6 inches wide) filled with: 50% well-draining potting soil (sterilized, seedling mix recommended).
- ● 50% perlite or coarse sand (for aeration).
- ● Spray bottle – For gentle moisture control (avoid over-saturating seeds).
- ● Plastic wrap or humidity dome – To maintain moisture during germination.
- ○ Heating mat (optional) – A seedling heat mat (70–75°F / 21–24°C) to speed up sprouting after stratification.
- ● Grow lights – LED or fluorescent lights (for indoor seedling care post-germination).
- ● Label markers & tags – To track seed varieties and planting dates.
- ● Pruning shears (sterilized) – For future trimming (once your tree grows!).
Step-by-step instructions for germinating kumquat seeds
This layered chill method mimics nature’s seasonal cues to break dormancy and ensure strong, viable seedlings.
🌱 Step 1: Stratify Seeds in Damp Sand or Perlite
Fill a small container with a mix of clean sand or perlite (I use a 4-inch-wide dish) and moisten it until damp but not soggy. Place your kumquat seeds about ½ inch apart and cover them with an additional ¼ inch of the damp medium. This mimics the natural winter chilling period that triggers germination.
Seal the container loosely with plastic wrap or a damp paper towel to retain moisture, then refrigerate for 6-8 weeks. Check weekly—if the medium dries out, mist lightly. The goal is consistent moisture, not saturation. You’ll know stratification is working when the seeds begin to plump slightly after a few weeks.
⏰ Step 2: Move to Warmth for Germination
After 6-8 weeks, remove the container from the fridge and place it in a warm spot (70-75°F). I keep mine on top of my fridge or near a sunny window. Germination can take 2-4 weeks—be patient, as kumquat seeds are notoriously slow to sprout. Keep the medium evenly moist by misting every 2-3 days or when the top feels dry to the touch.
Once you see tiny white roots or green sprouts (cotyledons), it’s time to plant. If seeds haven’t sprouted after 4 weeks, try repeating the stratification process—some seeds need a longer cold period.
🪴 Step 3: Pot Up Sprouted Seeds
Fill small 2-3 inch pots with well-draining potting mix (kumquats hate soggy roots). Gently remove the sprouted seeds from the sand/perlite mix, being careful not to damage the delicate roots. Plant each seed ½ inch deep in its own pot—crowding them now will lead to weak, leggy seedlings later.
Water lightly to settle the soil, then place the pots in a bright, indirect light spot. Avoid direct sun at this stage—young seedlings can scorch easily. Keep the soil consistently moist but never waterlogged. You’ll see first true leaves (not the initial cotyledons) in 4-6 weeks, signaling healthy growth.
☀️ Step 4: Transition to Direct Light
Once seedlings have 3-4 sets of true leaves, gradually introduce them to morning sun for 1-2 hours daily, increasing exposure over 10-14 days. This hardening-off period prevents shock when they’re moved outdoors later. By week 12, they should tolerate full sun for 4-6 hours daily, which is ideal for kumquats.
Fertilize lightly with a balanced liquid fertilizer (diluted to half strength) when you see new growth. Kumquats are sensitive to over-fertilizing, so less is better. Watch for yellowing leaves—this usually means too much water or fertilizer, not enough.
Tips & tricks for perfect kumquat seed germination
Mastering this layered chill method takes patience and precision—but these insider tips will help you avoid the most common pitfalls and maximize your success rate.
Medium Selection Matters: While both clean sand and perlite work, I've found perlite provides slightly better aeration for those critical first weeks. If using sand, sift it first to remove any grit—kumquat seeds are tiny and delicate. The goal is to mimic the natural forest floor where seeds would nestle in loose, well-draining soil.
Temperature Consistency is Key: Maintain that 70-75°F warmth during germination by placing your container on top of your fridge or near a sunny window, but avoid direct sunlight. I've seen germination rates drop by 30% when temperatures fluctuate more than 5°F. Use a small thermometer if your home tends to have temperature swings—consistency is what breaks kumquat seed dormancy.
Stratification Checkpoint: After those 6-8 weeks in the fridge, don't be alarmed if you don't see immediate results. The seeds are still working through their dormancy cycle. What you're looking for is subtle—seeds that have plumped slightly or developed a tiny white root. This is your signal that stratification is working, even if sprouts aren't visible yet.
Light Transition Strategy: When moving seedlings to direct light in Step 4, I recommend starting with just 1 hour of morning sun rather than the full 1-2 hours. Kumquat seedlings are particularly sensitive to sunburn during their first outdoor exposure. Gradually increase by 30 minutes every 3-4 days until you reach the full 4-6 hours of sunlight they'll need as mature trees.
Pro Tips for Kumquat Tree Seeds
- Mastering this layered chill method takes patience and precision—but these insider tips will help you avoid the most common pitfalls and maximize your success rate.
- Medium Selection Matters: While both clean sand and perlite work, I've found perlite provides slightly better aeration for those critical first weeks.
- Temperature Consistency is Key: Maintain that 70-75°F warmth during germination by placing your container on top of your fridge or near a sunny window, but avoid direct sunlight.
Frequently asked questions
Got questions about growing kumquat trees from seeds? You're not alone! Here are some of the most common concerns—and their answers—to help you succeed with your layered chill method.
How long does it take for kumquat seeds to sprout after stratification?
With the layered chill method, germination typically takes 90 days—but patience pays off! Some seeds may sprout sooner (as early as 6–8 weeks), while others might take longer. Keep the soil consistently moist and warm (70–75°F) once stratification ends to encourage faster growth.
What if my seeds don’t sprout after 90 days? Should I try again?
If no sprouts appear after 90 days, don’t give up! Kumquat seeds can be finicky—try repeating stratification for another 30–60 days or test viability by cutting a seed open (a white center = good; brown = dead). For stubborn seeds, consider soaking them in warm water for 24 hours before restarting the process.
Can I grow a kumquat tree from store-bought kumquats?
Yes, but with a caveat: store-bought kumquats are often hybrids (like ‘Meiwa’ or ‘Nagami’) and may not produce true-to-type fruit. For reliable results, source seeds from a homegrown or heirloom kumquat. If store-bought is your only option, expect potential surprises in fruit flavor or tree size!
Do kumquat seeds need light during stratification?
Nope! Stratification works best in dark, cool conditions (like your fridge’s crisper drawer). Once you transfer the seeds to soil after the 90-day chill, they’ll need bright, indirect light (6–8 hours/day) to sprout and grow. Think of it as a two-phase process: darkness for dormancy, light for life!
How do I care for kumquat seedlings after they sprout?
New seedlings need gentle love: keep soil moist (not soggy), provide dappled sunlight at first, and avoid cold drafts. Once they develop 2–3 true leaves, transplant to a 5-inch pot with well-draining soil. Harden them off outdoors over 2 weeks before permanent planting—patience ensures a thriving tree!
Pro Tip:
Label your seed trays! Kumquat seedlings can look alike early on, but varieties like ‘Centennial’ (sweet) vs. ‘Meiwa’ (tart) have different growth habits. A quick label now saves headaches later.
Wrapping up and next steps
Growing a kumquat tree from seeds using the layered chill method is a rewarding journey that blends patience with the joy of nurturing life! 🌱 With the right preparation—like gathering fresh seeds, layering them in damp sand, and maintaining consistent moisture—you’ll set the stage for those tiny sprouts to emerge in just 90 days.
Remember, every gardener faces hiccups, but persistence pays off in the sweet, tangy fruit of your labor.
Ready to take the next step? Once your seeds sprout, transplant them into pots and watch your little kumquat tree grow into a thriving citrus wonder. Happy planting—your future harvest starts now! 🍊✨