Picking
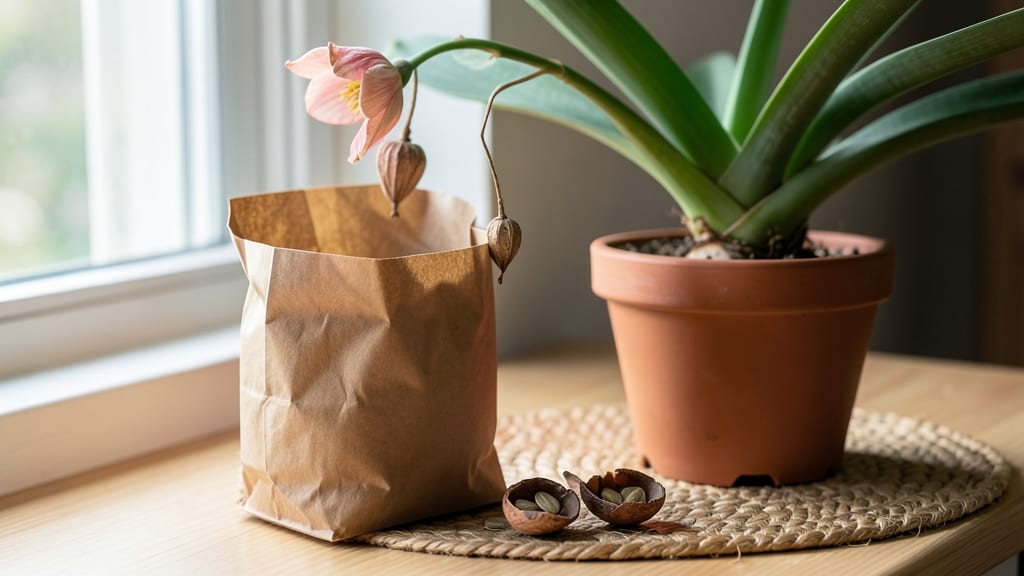
The layered chill method transforms amaryllis seed harvests into next spring’s boldest blooms—if you time it right. 🌱 After your plant finishes flowering, the pods turn papery brown, signaling it’s time to collect seeds.
The key is patience: rush this step, and you’ll end up with shriveled seeds that won’t germinate.
Store-bought bulbs rarely produce viable seeds, but homegrown plants yield plump, dark seeds when pods are fully dry. Sterilize your tools and containers to prevent mold, then store seeds in a cool, dry place until stratification. This layered chill method mimics winter’s natural cycle, breaking dormancy for stronger seedlings.
By spring, you’ll see tiny sprouts pushing through the soil—vibrant green and eager to bloom. The process takes 8-12 weeks from harvest to germination, but the payoff is worth it: homegrown amaryllis with deeper colors and larger flowers than nursery plants.
This method works best for zone 7-10 gardeners, but indoor growers can adapt with a refrigerator chill setup. Avoid overwatering during stratification, and keep seeds in a sealed container with slightly damp (not soggy) peat moss. Here’s how to do it right the first time.
📚 In This Guide
- What you need
- Instructions
- Tips and common mistakes
- Wrapping up and next steps
What you need
- ● Mature amaryllis bulb: Choose a healthy, bloomed bulb (preferably Hippeastrum varieties like ‘Red Lion’ or ‘Paper White’). Pro tip: 💡 Older bulbs (3+ years) produce more seeds!
- ● Scissors or pruners: Sharp, clean pair (sterilize with rubbing alcohol for hygiene).
- ● Small paper bags or envelopes: 2–3 per bulb for seed collection (breathable material preferred).
- ● Labeling tags & marker: To track seed varieties and harvest dates.
- ○ Plastic zip-top bags (quart-size): 1–2 per bulb for stratification (optional but recommended).
- ● Vermiculite or perlite: ½ cup per bag to absorb moisture during stratification.
- ● Refrigerator or cold frame: Set to 35–45°F (2–7°C) for 6–8 weeks.
- ● Grow lights or sunny windowsill: For seedlings post-stratification.
- ● Potting mix: Well-draining blend (cactus/succulent mix works great).
- ● Fungicide (neem oil or hydrogen peroxide): 1 tsp per quart of water to prevent mold.
- ● Notebook or app: To log seedling progress and blooming timelines.
Step-by-Step instructions for harvesting amaryllis seeds
Here's how I turn last season's blooms into next year's seedlings—no fancy tools, just patience and chill.
🌱 Step 1: Collect and Prepare Mature Seed Pods
Wait until the seed pods on your amaryllis turn brown and papery—this means they're fully ripe and ready. Gently twist or cut open each pod with clean scissors, avoiding the fleshy interior. You'll find flat, black seeds inside that look more like tiny beans than traditional bulb seeds.
Spread the seeds on a paper towel to dry in a warm, dry place for 3-5 days. This prevents mold and ensures they'll germinate properly. I like to label the towel with the date—tracking germination time helps me remember which batch I'm dealing with.
💧 Step 2: Layer Chill for Stratification
Fill a quart-sized container with a mix of moistened peat moss and perlite (equal parts). This combo keeps moisture steady while allowing airflow—critical for preventing rot. Place the dried seeds ½ inch deep in the mix, spacing them 1 inch apart so they don’t crowd as they sprout.
Cover the container with plastic wrap and poke a few small holes in it to let air in. Store the container in your refrigerator's crisper drawer for 8-10 weeks. This cold treatment mimics winter dormancy and breaks seed dormancy. Check the mix every 2 weeks—it should stay evenly moist but not soggy.
☀️ Step 3: Warm Up and Germinate
After the chill period, move the container to a warm spot (around 70-75°F) with bright, indirect light. You'll see tiny green sprouts in 4-6 weeks, though some seeds may take longer. Once the seedlings reach 2-3 inches tall, carefully transplant them into 2-inch pots filled with well-draining potting mix.
Keep the soil consistently moist but never waterlogged. You’ll notice the first true leaves (not the tiny seed leaves) emerge after another 3-4 weeks. This is when they’re ready for their first real light—move them under a grow light if natural light is weak.
✂️ Step 4: Harden Off and Transplant
When seedlings have 4-5 leaves and are about 4-5 inches tall, it’s time to harden them off. Place the pots outside in a shaded, sheltered spot for 1-2 hours daily, gradually increasing exposure over 2 weeks. This prepares them for outdoor conditions without shock.
Transplant into the garden or larger 6-inch pots once all danger of frost has passed. Choose a spot with partial shade and well-draining soil. Water deeply after transplanting, and watch for new growth—this signals they’ve taken root. Real talk: these seedlings grow slowly at first, but they’ll reward you with blooms in 2-3 years.
Tips & tricks for perfect amaryllis seed germination
Patience and precision are key when transforming last season's blooms into next year's vibrant seedlings. These tried-and-true strategies will help you avoid common pitfalls and maximize your success rate.
The Heat Factor: During the 3-5 day drying period in Step 1, maintain a consistent warm environment (around 70-75°F) to prevent mold while ensuring proper moisture evaporation. I've found that placing the paper towel on a seedling heat mat works perfectly—just keep it away from direct sunlight to avoid overheating. This step is non-negotiable for breaking down the seed coat's natural dormancy.
Stratification Secrets: The 8-10 week cold treatment in Step 2 is where the magic happens, but consistency is critical. I like to place a small dish of water near the container to maintain humidity levels without overwatering. The plastic wrap with holes creates a mini greenhouse effect that mimics natural winter conditions. Don't rush this process—some seeds may need the full 10 weeks to break dormancy completely.
Lighting Strategy: Once you move to Step 3, position your container within 6 inches of a grow light or south-facing window to ensure proper photosynthesis. The 70-75°F temperature range is ideal for germination, but bright indirect light prevents leggy seedlings. I've seen dramatic differences in seedling vigor when using full-spectrum LED grow lights versus regular household lighting.
Transplant Timing: When your seedlings reach 2-3 inches in Step 3, handle them with care—they're surprisingly delicate at this stage. Use a small spoon or butter knife to gently lift them from the growing mix, preserving as much root structure as possible. This careful transplanting sets the foundation for healthy growth during the critical 3-4 week period before true leaves emerge.
Pro Tips for Harvest Amaryllis Seeds
- Patience and precision are key when transforming last season's blooms into next year's vibrant seedlings.
- The Heat Factor: During the 3-5 day drying period in Step 1, maintain a consistent warm environment (around 70-75°F) to prevent mold while ensuring proper moisture evaporation.
- Stratification Secrets: The 8-10 week cold treatment in Step 2 is where the magic happens, but consistency is critical.
Frequently asked questions
Got questions about harvesting amaryllis seeds? You’re not alone! Here are some common concerns—and straightforward answers—to help you navigate the process with confidence.
How do I know when amaryllis seeds are ready to harvest?
Seeds are ready when the seed pods turn papery brown and begin to split open on their own (usually 6–8 weeks after pollination). If you wait too long, the seeds may scatter or dry out. Gently twist open the pods to collect them—no need to rush!
Can I harvest amaryllis seeds indoors?
Amaryllis thrive indoors, so you can pollinate and harvest seeds in a sunny windowsill or under grow lights. Just ensure the plant gets bright, indirect light (6+ hours daily) and warm temperatures (65–75°F) for best results. A small fan for airflow can also help prevent mold.
What if my amaryllis doesn’t produce seeds?
No seeds? Don’t worry—it’s often due to lack of pollination or stress. Try hand-pollinating with a soft brush (transfer pollen from one flower to another), or ensure your plant gets consistent watering and humidity. If blooms drop without pollination, the plant may need more light or nutrients.
How long does it take for harvested seeds to germinate?
Patience is key! Amaryllis seeds can take 4–12 weeks to germinate, depending on moisture, warmth (70–75°F), and light. Keep them in a light, well-draining mix (like perlite + peat) and mist lightly daily. A humidity dome or plastic wrap can speed up the process.
Can I save seeds from store-bought amaryllis bulbs?
Unfortunately, most commercial amaryllis bulbs (like Hippeastrum hybrids) are sterile and won’t produce viable seeds. For seed-saving, opt for heirloom or open-pollinated varieties (like Amaryllis belladonna) or grow from seed pods you harvest from a pollinated flower.
Wrapping up and next steps
Harvesting amaryllis seeds is a rewarding way to grow new plants and expand your garden’s beauty! By mastering the layered chill method, you’ve unlocked a simple yet effective technique to boost germination rates and ensure vibrant spring blooms. 🌱
Now that you’re equipped with the knowledge, why not start your seed-saving journey today? Gather your materials, follow the steps with confidence, and watch as your patience pays off with stunning new amaryllis plants. Happy gardening!