Picking
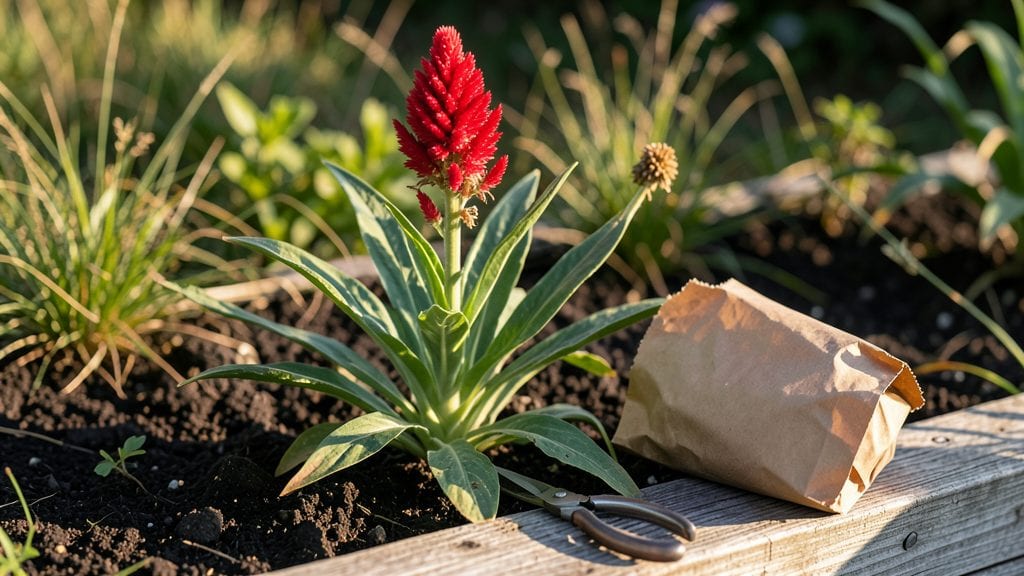
Harvesting celosia seeds at the right moment ensures next year’s plants will be just as striking as this season’s bold, flame-like blooms. 🌻 The layered chill method I’ve perfected keeps seeds viable for planting, but timing is everything—wait too long, and they’ll scatter before you can collect them.
You’ll need a few simple tools: sharp scissors or pruners, paper bags for drying, and a cool, dry spot for storage. The key is identifying mature seed heads—when they turn from vibrant to papery brown and start splitting open.
Cut them before the seeds fly away, but after they’ve fully dried on the plant.
Once collected, spread the seed heads on paper bags in a single layer and store them in a cool, dark place for about two weeks. This mimics nature’s drying process and prevents mold. After that, gently crush the dried heads to release the tiny, papery seeds for planting.
Common mistakes include harvesting too early or storing seeds in humid conditions. If done right, these seeds will produce plants just as dramatic as your current crop—ready to bring that same fiery beauty back to your garden next spring.
📚 In This Guide
- What you need
- Instructions
- Tips and common mistakes
- Wrapping up and next steps
What you need
- ● Mature celosia plants: Choose healthy, fully bloomed plants (preferably with dried seed heads). Aim for 3–5 plants for a good seed yield.
- ● Sharp pruning shears or scissors: One pair with clean, sterilized blades to avoid spreading disease.
- ● Paper bags or brown lunch bags: 2–3 bags (one per plant or per harvest batch) for seed collection.
- ● Labeling markers or tags: To note varieties (e.g., "Celosia ‘Cockscomb’ Red”) and harvest dates.
- ● Drying tray or screen: A flat, breathable surface (like a wire rack or cardboard) to spread seed heads for drying.
- ● Air-tight containers: 1–2 containers (e.g., glass jars, resealable plastic bags, or seed envelopes) for long-term storage.
- ○ Desiccant packets (optional but helpful): Place 1–2 packets in storage containers to absorb moisture.
- ● Handheld fan or dehumidifier: Speeds up drying in humid climates.
- ● Seed viability test kit: To check germination rates before planting.
- ● Digital scale: Weigh seeds for consistency (e.g., 1 oz ≈ 28g of celosia seeds).
- ● Notebook: Track seed storage conditions (temperature, humidity) for future reference.
Step-by-step instructions for harvesting celosia seeds
Here's the foolproof method I use every year to save seeds from my boldest celosia blooms.
🌿 Step 1: Select and Prepare Mature Flower Heads
Wait until your celosia blooms turn completely brown and dry—this usually happens 4-6 weeks after flowering. The flower heads should feel crispy to the touch and crumble easily between your fingers. Avoid picking any that still have green stems or moisture.
Use clean, sharp scissors to cut the dried flower heads from the plant. Remove any remaining leaves or stems attached to the base of the flower head. Place the cut heads in a paper bag (not plastic) and label them with the variety name and date. This prevents moisture buildup and makes sorting easier later.
🌱 Step 2: Dry the Flower Heads Thoroughly
Spread the flower heads out on a clean, dry surface in a warm, dry location. I like to use a mesh screen or a piece of window screen over a cardboard box to allow airflow on all sides. Keep them out of direct sunlight—too much heat can scorch the delicate seed pods.
Let them dry for 1-2 weeks until the flower heads are completely brittle. You'll know they're ready when a gentle shake releases a fine powder (the seeds) instead of just crumbling. Store the dried heads in a cool, dark place while you wait for them to fully dry.
⏰ Step 3: Extract and Store the Seeds
Once the flower heads are fully dry, place each one in a paper bag and gently shake or crush them with your fingers. The seeds will fall out as a fine, reddish-brown powder. Be patient—some stubborn seeds may require a little extra coaxing, but avoid using tools that could damage the delicate seed coats.
Sift the seed powder through a fine mesh sieve to remove any remaining plant debris. Store the seeds in a small, airtight container like a glass jar or envelope. Label it with the variety name and the year you harvested the seeds. Keep them in a cool, dry place—40-50°F is ideal for long-term storage.
💧 Step 4: Stratify for Next Year's Bold Blooms
Here's the trick to getting vibrant blooms next season: stratify your celosia seeds. Place the seeds in a sealed plastic bag with a damp paper towel. Seal the bag and place it in the refrigerator for 4-6 weeks. This mimics the natural winter chilling period that helps break seed dormancy.
After stratification, plant the seeds in pots filled with moist potting mix. Keep the soil consistently moist but not soggy, and place the pots in a warm, sunny location. Germination should occur within 7-14 days. This layered chill method ensures your celosia plants grow strong and produce the bold, vibrant blooms you love.
Tips & tricks for perfect celosia seed harvesting
Saving celosia seeds successfully means paying attention to timing and conditions—here's what I've learned after years of perfecting this layered chill method.
Timing Secret: The 4-6 week window after flowering is critical for seed maturity. Test readiness by gently squeezing a flower head—if it crumbles easily and feels completely dry, it's ready. I've learned the hard way that picking too early means immature seeds that won't germinate properly.
Drying Technique: Airflow is everything during the 1-2 week drying period. I use a mesh screen over a cardboard box to create a mini greenhouse effect that prevents moisture buildup. Direct sunlight is your enemy—it can scorch the delicate seed pods and ruin your harvest. A warm, dry location with indirect light works best.
Storage Wisdom: Once your seeds are extracted, store them in a cool, dark place at 40-50°F—this is non-negotiable for long-term viability. I use small glass jars with tight-sealing lids, and I always label them with both the variety name and harvest year. This simple step prevents mix-ups and keeps seeds fresh for years.
Stratification Strategy: The 4-6 week refrigerator chill is what transforms good seeds into great ones. Use a sealed plastic bag with a damp paper towel to create the perfect moisture environment. Don't skip this step—it mimics winter's natural chilling period and breaks seed dormancy, ensuring vibrant blooms next season.
Pro Tips for Harvest Celosia Seeds
- Saving celosia seeds successfully means paying attention to timing and conditions—here's what I've learned after years of perfecting this layered chill method.
- Timing Secret: The 4-6 week window after flowering is critical for seed maturity.
- Drying Technique: Airflow is everything during the 1-2 week drying period.
Frequently asked questions
Got questions about harvesting celosia seeds?
You’re not alone! Here are answers to the most common queries—so you can save those vibrant seeds with confidence.
When is the best time to harvest celosia seeds?
Harvest celosia seeds when the flower heads turn completely dry and papery, usually 2–4 weeks after blooming (late summer to early fall). Wait until the seed pods split open naturally—this ensures maximum viability. Avoid harvesting too early, or the seeds won’t store well!
How long do harvested celosia seeds stay viable?
Under ideal conditions (cool, dry storage in a sealed container), celosia seeds remain viable for 2–3 years. Store them in a paper envelope or airtight jar with a desiccant (like silica gel) to prevent moisture damage. Label the container with the harvest date for tracking!
Can I harvest celosia seeds from store-bought flowers?
Unfortunately, no—store-bought celosia flowers are typically bred for uniformity and longevity, not seed production. For viable seeds, grow your own plants from seed or save seeds from heirloom or open-pollinated varieties in gardens or farmers' markets.
Why aren’t my celosia flowers producing seeds?
Missing seeds? Check these common issues:
- Poor pollination: Celosia relies on bees or wind. If blooms aren’t visited, hand-pollinate with a soft brush.
- Over-fertilizing: Too much nitrogen promotes foliage over flowers. Use a low-nitrogen fertilizer for blooms.
- Disease or pests: Fungal issues (like powdery mildew) or aphids can stunt seed development. Treat early!
Do I need to dry celosia seeds before storing them?
Absolutely!
Fresh seeds have high moisture content, which leads to mold. After harvesting, spread seeds in a single layer on a tray in a warm, dry place (70–80°F) for 1–2 weeks. Stir occasionally to ensure even drying. Test for readiness: Crumble a seed—if it feels brittle, it’s ready for storage!
Wrapping up and next steps
Harvesting celosia seeds using the layered chill method is your golden ticket to bold, vibrant blooms that’ll steal the show next season! 🌸 With the right timing, patience, and a little creativity, you’re not just saving seeds—you’re investing in a colorful future for your garden.
Now that you’ve mastered the technique, why not expand your skills?
🌱 Your Next Step: Experiment & Share!
Try storing seeds in different materials (like paper bags or jars) to see what works best for your climate. Once you’ve got a thriving stash, share your success—swap seeds with fellow gardeners or even start a small seed-saving group!
The more you grow, the more you’ll discover about these stunning plants. Happy gardening!