Transplanting
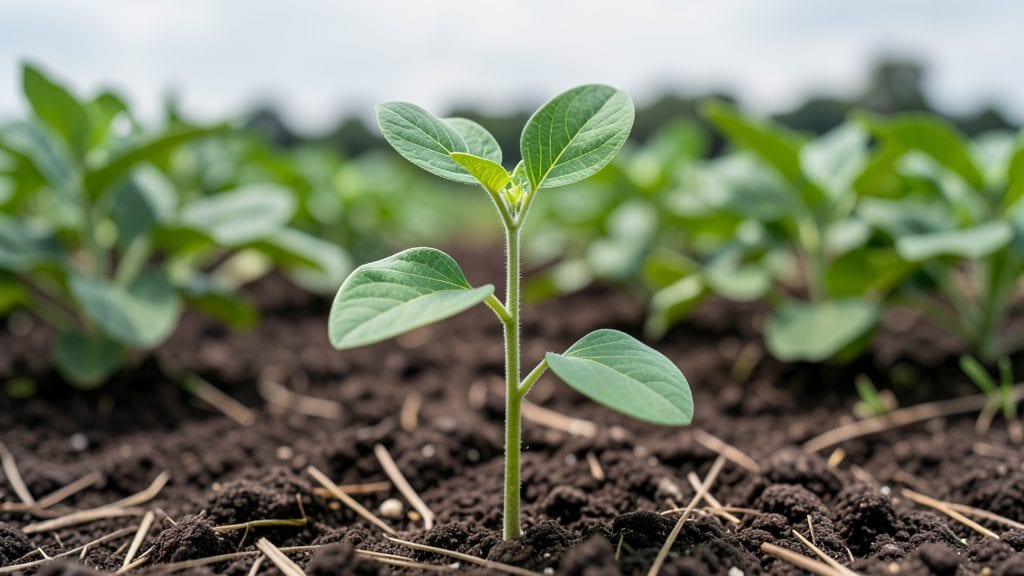
Growing kidney bean seedlings from seed gives you a head start on a high-yielding summer harvest—especially when you nail the early stages.
I’ve learned the hard way that these cold-tolerant starts need just the right balance of warmth, moisture, and patience to avoid leggy, weak plants that flop in the garden. The key difference between thriving seedlings and sad ones?
Soil temperature, planting depth, and light exposure—none of which are as simple as they sound.
You’ll need a warm seed-starting mix (not regular potting soil), biodegradable pots or a flat tray, and a sunny spot indoors or a greenhouse. Kidney beans germinate fastest at 70-85°F, so if your home runs cooler, a heat mat saves the day.
Plant seeds 1-2 inches deep—deeper than most beans—and space them 2-3 inches apart to avoid overcrowding. Too shallow, and they’ll struggle; too deep, and they rot before sprouting.
Once those first green shoots appear in 5-10 days, you’ll want bright light (a south-facing window or grow lights) to prevent spindly growth. Keep the soil consistently moist but not soggy—overwatering is the #1 killer of young seedlings.
When they’re 4-6 inches tall with two true leaves, they’re ready to harden off and transition to the garden, where they’ll reward you with bushels of beans by late summer.
Here’s the thing—kidney beans are forgiving once established, but the seedling stage is where most beginners trip up. Whether you’re starting them indoors in March or direct-sowing after the last frost, the same rules apply.
Let’s get those seeds sprouting strong so you can enjoy that first harvest of tender, homegrown beans.
📚 In This Guide
- What you need
- Instructions
- Tips and common mistakes
- Wrapping up and next steps
What you need
- ● Kidney bean seeds: 10–20 seeds (choose cold-resistant varieties like Black Turtle or Contender for better survival).
- ● Seed-starting trays or pots: 2–4 biodegradable or 4-inch plastic pots (with drainage holes).
- ● Seed-starting mix: 1–2 quarts of lightweight, sterile potting soil (avoid garden soil—it’s too dense!).
- ● Grow lights or sunny windowsill: A full-spectrum LED grow light (12–16 hours/day) or a south-facing window (6+ hours of sunlight).
- ● Spray bottle: For gentle watering (avoid soaking the soil).
- ○ Heat mat (optional but helpful): A seedling mat set to 70–75°F (21–24°C) to speed up germination.
- ● Plant labels: Small markers or popsicle sticks to track varieties.
- ● Fertilizer: A balanced, water-soluble fertilizer (5-10-5 ratio) for post-germination growth.
- ● Humidity dome or plastic wrap: To retain moisture during germination.
- ● Tweezers or small spoon: For careful seed placement.
- ○ Thermometer (optional): To monitor soil and air temperature.
Instructions for growing cold-resistant kidney bean seedlings
Here’s how to get your kidney bean seedlings off to a strong, resilient start—perfect for cooler climates.
Prepare Your Containers and Soil
Start by filling your 4-inch deep containers with a well-draining seed-starting mix. I like to mix in a handful of perlite—about 1 part perlite to 3 parts mix—to improve aeration and prevent waterlogging. Press the soil down lightly to create a firm but not compacted surface. This ensures seeds make good contact with the soil and don’t float to the top when watered.
Moisten the mix thoroughly with warm water until it’s damp but not soggy. You’ll know it’s ready when a handful of soil holds together without crumbling. Avoid garden soil—it’s too dense and can harbor diseases that weaken young seedlings. A sterile mix gives your beans the best chance to thrive from the start.
Plant the Seeds at the Right Depth
Place 2-3 seeds per container about 1 inch deep, spacing them evenly. Kidney beans need warmth to germinate, so I like to pre-soak them for 8-12 hours in warm water before planting. This softens the seed coat and speeds up germination, which is especially helpful if your climate runs cool. Planting too deep can delay sprouting because the seedling has to work harder to reach the surface.
Cover the seeds lightly with additional soil, then water gently with a spray bottle to settle the mix without disturbing the seeds. Place the containers in a warm spot—ideally between 75-85°F—to encourage quick germination. You should see sprouts within 5-10 days, depending on temperature and soil moisture. Keep the soil consistently moist but never waterlogged during this phase.
Provide Optimal Light and Airflow
Once the seedlings emerge, move them to a bright, sunny location with at least 6-8 hours of direct light daily. A south-facing window works well, but if natural light is limited, supplement with a grow light positioned 4-6 inches above the plants. Leggy seedlings with pale leaves mean they’re stretching for light—adjust the light source immediately to prevent weak growth.
Thin the seedlings to one per container once they reach 2 inches tall, using scissors to snip the extras at soil level. This reduces competition for nutrients and gives the remaining plant room to grow. Keep airflow strong by spacing containers 3-4 inches apart—good circulation prevents fungal diseases like damping-off, which can wipe out seedlings overnight.
Harden Off Before Transplanting
About 2 weeks before your last frost date, begin hardening off your seedlings by placing them outside in a sheltered, shaded spot for 1-2 hours the first day. Gradually increase their outdoor time over 7-10 days, exposing them to direct sunlight and wind for longer periods each day. This toughens their stems and leaves, preparing them for the garden.
Watch for signs of stress, like wilting or yellowing leaves—these indicate they’re not ready for full sun yet. Once seedlings tolerate 6+ hours of outdoor exposure without wilting, they’re ready to transplant. Choose a warm, overcast day to minimize transplant shock, and plant them 1 inch deeper than they were in containers to encourage stronger root growth.
Tips & tricks for growing cold-resistant kidney bean seedlings
A few strategic adjustments can transform your seed-starting success rate—especially when working with cool-climate conditions. These insights will help you navigate the unique challenges of growing kidney bean seedlings that thrive despite chilly temperatures.
Soil Preparation Secret: The 1 part perlite to 3 parts seed-starting mix ratio in Step 1 is non-negotiable for kidney beans. Perlite creates those critical air pockets that prevent waterlogging, which can rot seeds before they even sprout. I've found that adding a sprinkle of cinnamon (about 1 teaspoon per container) to the mix during this step acts as a natural antifungal barrier—particularly useful in damp conditions where damping-off is a risk. The key is to mix it thoroughly so it doesn't concentrate in any one spot.
Germination Temperature Strategy: Maintaining that 75-85°F range mentioned in Step 2 requires some creativity if your home runs cooler. I recommend placing containers on top of your refrigerator or near a sunny window during the day, then moving them closer to a heat source at night. For particularly cool climates, consider using a seedling heat mat set to 75°F—this targeted warmth can cut germination time from the 5-10 day range to just 3-5 days. The trade-off is worth it when you're racing against cooler spring temperatures.
Light Management Technique: When supplementing with grow lights as mentioned in Step 3, I've discovered that kidney bean seedlings actually benefit from a 16-hour light cycle rather than the standard 12 hours. Set your timer for 16 hours on/8 hours off to simulate longer summer days, which encourages more robust growth. Position the light so it's just 3-4 inches above the seedlings—closer than the 4-6 inch range suggested, since kidney beans are particularly light-sensitive during early growth stages. Monitor closely to prevent burning.
Harden-Off Progression: The 2-week hardening off period in Step 4 works best when you gradually introduce wind exposure. Start by placing seedlings in a spot where they'll experience gentle breezes, then progressively move them to windier locations over the 7-10 day period. I've found that using a small fan on low speed (about 6 inches away) for 15 minutes daily during the final 3 days of hardening helps acclimate them to outdoor conditions without shocking the plants. This mimics natural wind patterns and prevents transplant shock when they finally go into the garden.
Pro Tips for Kidney Bean Seedlings
- A few strategic adjustments can transform your seed-starting success rate—especially when working with cool-climate conditions.
- Soil Preparation Secret: The 1 part perlite to 3 parts seed-starting mix ratio in Step 1 is non-negotiable for kidney beans.
- Germination Temperature Strategy: Maintaining that 75-85°F range mentioned in Step 2 requires some creativity if your home runs cooler.
Frequently asked questions
Got questions about growing kidney bean seedlings? You’re not alone! Whether you're a first-time gardener or just looking to refine your technique, here are some common concerns—and straightforward answers—to help you cultivate strong, cold-resistant starts for a bountiful harvest.
How long does it take for kidney bean seedlings to sprout?
Kidney bean seeds typically sprout within 7 to 14 days after planting, depending on soil temperature and moisture. For faster germination, keep the soil consistently warm (around 70–80°F) and moist. If your seedlings take longer than two weeks to emerge, check for proper planting depth (about 1 inch deep) and ensure the soil isn’t too cold or compacted.
Can kidney bean seedlings survive a light frost?
While kidney beans are not frost-tolerant, young seedlings can handle a light frost (down to 28–32°F) if they’re already established with a few true leaves. However, prolonged cold or hard freezes (below 28°F) will kill them. To protect seedlings, use row covers or transplant them after the last frost date in your zone. If frost hits early, consider starting seeds indoors under grow lights.
What’s the best alternative if my kidney bean seedlings fail to grow?
If your seedlings struggle, try these cold-resistant alternatives: lima beans (slightly more frost-tolerant), black beans (hardier varieties like ‘Othello’), or pole beans (faster-growing and resilient). For a non-bean option, consider peas (like sugar snap or snow peas), which thrive in cooler soil and can even be planted earlier in spring.
Why are my kidney bean seedlings turning yellow or wilting?
Yellowing or wilting seedlings often signal overwatering, underwatering, or disease. Check the soil—it should be moist but not soggy. If leaves yellow at the bottom, it may be root rot (from overwatering) or fungal issues (like damping-off). Improve drainage, space seedlings properly (2–3 inches apart), and avoid crowding. For prevention, use sterilized soil and rotate crops yearly.
When is the ideal time to transplant kidney bean seedlings outdoors?
Transplant seedlings after the last frost when soil temperatures reach at least 60°F and nighttime temps stay above 50°F. Harden off seedlings (acclimate them to outdoor conditions) for 5–7 days before transplanting. Plant them 1–2 inches deep, spacing rows 18–24 inches apart for bush beans or 4–6 inches apart for pole beans. Morning hours are best to avoid stress from afternoon heat.
Wrapping up and next steps
Growing kidney bean seedlings is a rewarding way to kickstart your summer harvest—especially with their impressive cold resistance! 🌱 By following the right steps, from seed selection to transplanting, you’ll set yourself up for a thriving garden.
Whether you’re a beginner or a seasoned gardener, these resilient plants offer a delicious and nutritious reward.
Ready to take the next step? Start by planting your seeds indoors or directly in the soil—whichever method suits your climate best. Then, watch your seedlings grow into healthy, productive plants that’ll keep your kitchen stocked with homegrown goodness all season long!