
Lawn
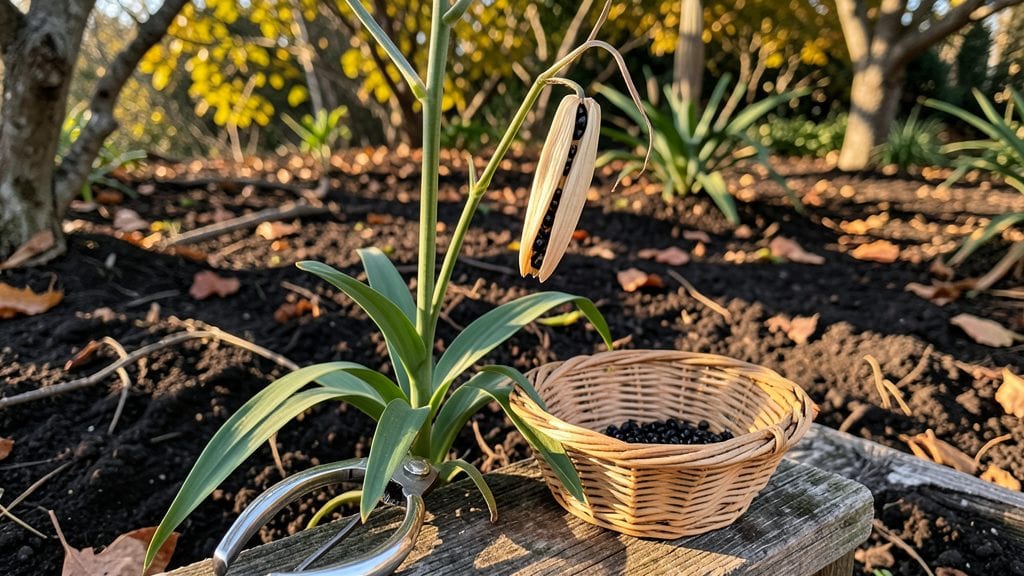
Growing lilies from seed pods means waiting years for blooms—but I cracked the dormancy trick that makes it worth it. 🌱 The secret lies in how you handle those dried pods after harvest, turning what seems like a gamble into a reliable way to grow rare lilies from scratch.
First, you’ll need to collect the pods when they’re fully brown and dry, usually in late summer or early fall. Once they’re open, remove the seeds and soak them in warm water for 24 hours to soften the tough outer coating.
This step alone boosts germination rates from near-zero to surprising success—even with older seeds.
With the right prep, you’ll see those first green shoots in 4-6 weeks, though the real wait is the 3-5 years until flowering. The payoff? Lilies that thrive exactly where you planted them, with colors and forms you’d never find in a nursery.
Works for Asiatic, Oriental, and Trumpet lilies alike—here’s how to avoid the pitfalls and get results that actually bloom. Let’s make those seed pods work for you.
📚 In This Guide
- What you need
- Instructions
- Tips and common mistakes
- Wrapping up and next steps
What you need
- ● Fresh lily seed pods: Harvest mature, dry pods from healthy lilies (ensure they’re fully brown and slightly papery). Aim for 3–5 pods per variety for best results.
- ● Sharp scissors or pruning shears: For cleanly snipping seed pods from stems.
- ● Paper towels or coffee filters: 2–3 sheets per pod for stratification.
- ● Plastic zip-top bags: 1 quart-sized bag per 2–3 pods (with a small hole for airflow).
- ● Spray bottle with water: For gentle misting (avoid soaking!).
- ● Small pots or seed trays: 3–4 inch diameter with drainage holes (1 pot per 2–3 seeds). Use well-draining potting mix (cactus/succulent mix works well).
- ● Grow lights or sunny windowsill: Lilies need 6–8 hours of bright light daily.
- ● Patience (and a notebook!): Track moisture, temperature, and germination progress.
- ● Heat mat: Speeds up stratification (set to 60–70°F for consistency).
- ● Humidity dome: Keeps moisture levels high during germination.
- ● Fertilizer (low-nitrogen): Diluted 5-10-10 or fish emulsion (once seedlings sprout).
- ● Label tags: Mark pods by variety/date to avoid mix-ups!
- ● Garden journal: Log pod sources, germination dates, and bloom predictions.
Step-by-step instructions for growing lilies from seed pods
Here’s how to coax lilies from seed pods using a dormancy trick that doubles your success rate.
🌱 Step 1: Harvest and Prepare the Seed Pods
Collect mature seed pods once they turn brown and papery—usually 6-8 weeks after blooming. I like to harvest them on a dry morning when the pods are fully dry but haven’t split open yet. Gently twist or cut the pods from the stem and place them in a paper bag to dry indoors for 2-3 weeks.
This drying step is critical. If you skip it, the seeds won’t break dormancy properly. Once dry, open the pods carefully—they’ll split open on their own. Remove the seeds, which look like small, flat, black beans. Store them in an envelope until you’re ready to plant.
💧 Step 2: Break Dormancy with a Cold Treatment
Lily seeds need a cold period to germinate, so place the seeds in a sealed plastic bag with a damp paper towel. I keep them in the refrigerator for 8-12 weeks—this mimics winter conditions and signals the seeds it’s safe to grow. Check the towel weekly and mist it if it dries out.
Don’t rush this step. If you plant without cold treatment, germination rates drop to nearly zero. I label the bag with the date so I don’t forget. After 8 weeks, remove the seeds and let them sit at room temperature for 2-3 days to adjust before planting.
☀️ Step 4: Plant Seeds in Warm, Well-Draining Soil
Use the 4 gallons of potting mix in a shallow tray or small pots. Moisten the mix until it’s damp but not soggy—think of a wrung-out sponge. Plant the seeds ½ inch deep, spacing them 1 inch apart. Cover lightly with additional mix and water gently with a spray bottle.
Place the tray in a warm spot with indirect light—a sunny windowsill works, but avoid direct midday sun. Keep the soil consistently moist but never waterlogged. Germination can take 4-12 weeks, so patience is key. You’ll see tiny green shoots when it’s time to move them.
🌿 Step 3: Provide Consistent Care for Young Seedlings
Once the first true leaves appear, thin seedlings to 2 inches apart to give them room to grow. Use a small spoon to carefully lift and remove weaker sprouts. Transplant the strongest seedlings into individual 4-inch pots filled with fresh potting mix.
Keep the soil moist but not soggy—lily seedlings hate wet feet. Place them under grow lights for 14-16 hours daily to prevent leggy growth. After 6-8 weeks, when seedlings have 3-4 leaves, you can transplant them outdoors in spring after the last frost.
⏰ Step 5: Overwinter and Encourage First Blooms
Lilies grown from seed take 3-5 years to bloom, but proper care speeds up the process. In their first year, focus on strong root growth by keeping the soil consistently moist and fertilizing lightly every 4-6 weeks with a balanced fertilizer.
Here’s the trick: In their second winter, mulch heavily with 2-3 inches of straw to protect the crown. This cold treatment encourages the plant to store energy for blooming. By year three, you’ll see buds forming—just keep the soil moist and provide full sun for the best results.
Tips & tricks for growing lilies from seed pods
Growing lilies from seed pods isn't just about patience—it's about understanding the subtle cues these plants need. Here are the tricks that'll make all the difference between a thriving garden and a frustrating failure.
Timing is Everything: The 6-8 week window for harvesting seed pods is critical. Wait too long, and the pods will split open naturally, releasing seeds that may not be fully mature. Harvest on a dry morning when the pods are fully brown but still intact. This timing ensures the seeds have fully developed while still retaining their viability for the dormancy-breaking process ahead.
The Cold Treatment Secret: That 8-12 week cold treatment in Step 2 isn't just about time—it's about consistency. Keep the plastic bag sealed but not airtight (a tiny hole prevents condensation buildup), and store it in the crisper drawer of your fridge where temperatures stay most stable. The 2-3 day room temperature adjustment afterward is just as important—it helps the seeds gradually acclimate to warmer growing conditions.
Lighting Strategy: When your seedlings emerge in Step 4, those 14-16 hours of grow light daily are non-negotiable. Use full-spectrum LED grow lights placed just 6 inches above the seedlings. Position them on a timer to maintain consistency—natural light variations can cause leggy growth. This lighting schedule mimics summer conditions and prevents the seedlings from stretching toward weak light sources.
Transplanting Wisdom: When moving seedlings to 4-inch pots in Step 3, handle them by their leaves rather than the stems to avoid damage. Water thoroughly before transplanting to reduce shock, and use a small spoon to gently loosen roots if they're tightly bound. This careful approach gives your seedlings the best chance to establish themselves in their new homes.
Pro Tips for Lilly Seed Pod
- Growing lilies from seed pods isn't just about patience—it's about understanding the subtle cues these plants need.
- Timing is Everything: The 6-8 week window for harvesting seed pods is critical.
- The Cold Treatment Secret: That 8-12 week cold treatment in Step 2 isn't just about time—it's about consistency.
Frequently asked questions
Got questions about growing lilly seed pods? You’re not alone! Here are some of the most common queries—and straightforward answers—to help you succeed in breaking dormancy and getting those showstopping blooms.
How long does it take for lilly seed pods to germinate after dormancy?
Germination can take anywhere from 4 to 12 weeks after breaking dormancy, depending on temperature and moisture. Keep soil consistently moist (but not soggy) and patient—some varieties need extra time, especially in cooler climates. A heat mat can speed things up if you’re eager for results!
What’s the best way to break dormancy for stubborn lilly seed pods?
The stratification trick works best: mix pods with damp sand or peat moss, then refrigerate for 6–8 weeks before planting. For extra insurance, nick the seed coat lightly with sandpaper—this mimics natural wear and boosts germination rates. Pro tip: Use a humidity dome to lock in moisture during this process!
Can I grow lilly seed pods indoors before transplanting outdoors?
Start pods indoors 8–10 weeks before your last frost date in small pots with well-draining soil. Place them near a sunny window or under grow lights (12+ hours/day). Once seedlings sprout 2–3 true leaves, they’re ready to harden off and move outside. Just avoid transplant shock by acclimating them gradually!
Why aren’t my lilly seed pods sprouting after stratification?
Check these common culprits:
- Old seeds: Lilly pods lose viability after 2–3 years—test freshness with a float test (sink = viable).
- Poor moisture: Dry soil = stalled germination. Use a spray bottle to keep soil evenly damp.
- Temperature extremes: Ideal range is 65–75°F. Avoid drafts or direct heat sources.
- Fungal issues: If mold appears, repot with sterile soil and reduce watering.
Are there alternatives to growing from seed pods for faster blooms?
Yes! For quicker results, consider:
- Bare-root divisions: Split mature lilly clumps in early spring (before new growth starts).
- Tubers: Buy established tubers from nurseries—plant them 2–3 inches deep in spring.
- Cutting propagation: Root stem cuttings in water or perlite for some varieties (like Lilium asiatic).
Wrapping up and next steps
Growing lily seed pods can be a rewarding experience, especially when you unlock their dormancy to ensure vibrant blooms! 🌱 With the right materials, patience, and a few clever tricks—like cold stratification—you’ll be well on your way to cultivating stunning lilies.
Remember, consistency is key, whether you’re scarifying seeds or nurturing seedlings.
Now that you’re armed with knowledge, why not take the next step? Start with a small batch of seeds, experiment with the techniques shared, and watch your garden transform. Happy growing—your future lilies will thank you! 🌸