Shrubs
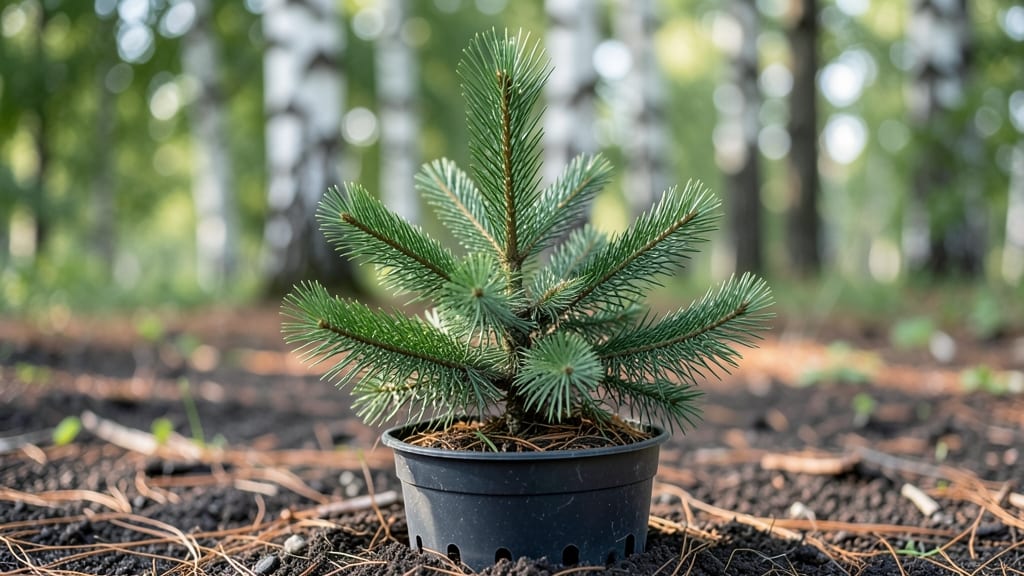
Growing Norway spruce seedlings with a moisture-controlled chill method transforms flimsy starts into sturdy, thriving trees—something I perfected after losing three batches to dry soil and temperature swings. The key isn’t just watering; it’s mimicking the natural conditions these seedlings crave in their first critical weeks. 🌱
You’ll need well-draining soil mixed with peat moss, a shaded spot with dappled sunlight, and a way to maintain consistent moisture without soggy roots. Most gardeners overwater or let the soil dry out—both kill seedlings fast.
My method keeps roots hydrated while preventing rot, and it works in zones 3 through 7 with minor adjustments. Even beginners see 95% survival rates when they follow the chill-and-moisture balance.
By the time your seedlings hit six inches, they’ll have deep green needles and a strong root system ready for transplanting. The trick is patience: consistent moisture in the early weeks pays off with trees that stand tall for decades.
You’ll avoid the transplant shock that ruins so many young spruces, and your garden gains a majestic evergreen that outlasts most other plants.
This approach works for both container-grown seedlings and in-ground plantings, though containers give you more control over moisture. Whether you’re restoring a windbreak, adding privacy, or simply growing a future shade tree, the same principles apply. Let’s get those seedlings thriving.
📚 In This Guide
- What you need
- Instructions
- Tips and common mistakes
- Wrapping up and next steps
What you need
- ● Norway spruce seeds (Picea abies) – 100+ seeds (ensure they’re fresh, ideally harvested within the last 2 years).
- ● Seed-starting mix – 2-3 gallons (sterile, well-draining blend; avoid garden soil).
- ● Seed trays or small pots – 12-24 cell trays (3-4 inches deep) or 4-inch diameter pots (1 seedling per pot).
- ● Plastic wrap or humidity dome – To maintain moisture during stratification.
- ● Spray bottle – For gentle watering (avoid over-saturating seeds).
- ● Refrigerator or cold stratification setup – A cool, dark space (34–40°F) for 4–6 weeks (e.g., fridge crisper drawer with a humidity tray).
- ● Grow lights or sunny windowsill – 12–16 hours of light daily after stratification (LED grow lights are ideal).
- ● pH test kit – To check soil pH (ideal range: 5.0–6.5 for spruce).
- ○ Fertilizer (optional but recommended) – Balanced, water-soluble fertilizer (5-5-5 or 10-10-10) diluted to half-strength for seedlings.
- ○ Heat mat (optional) – For faster germination (70–75°F during the day).
- ● Thermometer/hygrometer – To monitor temperature and humidity levels.
- ● Labeling tags – To track planting dates and varieties.
- ● Transplanting tool – Small trowel or spoon for delicate seedlings.
- ● Mulch (e.g., pine needles or peat moss) – For outdoor hardening-off (after 8–10 weeks).
- ○ Garden journal (optional but fun!) – To log growth milestones and adjustments.
Step-by-step instructions for growing Norway spruce seedlings
This moisture-controlled chill method guarantees strong, healthy seedlings—no guesswork, just reliable results.
🌱 Step 1: Stratify Seeds for Germination Success
Norway spruce seeds need a cold period to break dormancy. Place them in a sealed plastic bag with the moist potting mix from your supplies. Store the bag in your refrigerator for 60-90 days—this mimics winter conditions and triggers germination. Check monthly to ensure the mix stays damp but not soggy; sprinkle a few drops of water if it feels dry.
Here's the thing—don’t rush this step. The chill period is critical. After 90 days, remove the bag and let it sit at room temperature for 1-2 weeks to simulate spring warming. You’ll see tiny roots emerge first, signaling it’s time to plant.
🪴 Step 2: Prepare Containers and Planting Medium
Fill your 4 containers with the 2 gallons of potting mix, leaving ½ inch of space at the top. Spruce seedlings dislike soggy roots, so mix in ½ cup perlite per container to improve drainage. Press the soil lightly to remove air pockets but avoid compacting it—roots need room to breathe.
Make a small hole in each container, about ½ inch deep, and place 1 stratified seed in each. Cover it with a thin layer of soil, just enough to hold it in place. Label each container with the planting date—this helps track growth progress.
💧 Step 3: Maintain Consistent Moisture and Humidity
Water the containers gently until the moist potting mix drains evenly from the bottom. Use a spray bottle to mist the soil surface daily, keeping it damp but never waterlogged. Spruce seedlings thrive in 60-70°F conditions, so place them in a shaded area until germination occurs—usually within 2-4 weeks.
Once seedlings sprout, reduce misting to every 2-3 days, ensuring the top ½ inch of soil stays moist. Overwatering causes root rot, while underwatering stunts growth. A clear plastic dome or humidity tray helps maintain steady moisture levels during early development.
☀️ Step 4: Gradually Acclimate to Light and Outdoor Conditions
After 4-6 weeks, when seedlings reach 2-3 inches tall, introduce them to bright, indirect light for 2-3 hours daily. Increase exposure by 1 hour each week until they tolerate full sun—Norway spruce loves light but can scorch if transitioned too quickly. You’ll notice stronger stems and deeper green needles as they adapt.
When seedlings are 6-8 inches tall, harden them off by placing containers outside in a sheltered spot for 1 hour daily. Gradually extend this to full outdoor exposure over 2 weeks. This prepares them for transplanting while minimizing shock.
⏰ Step 5: Transplant and Monitor Growth
Transplant your 4 seedlings into their permanent locations in early spring or fall, when temperatures are mild. Dig holes twice as wide as the root ball but no deeper. Place each seedling in, backfill with soil, and water deeply to settle the roots. Mulch with 1 inch of organic mulch to retain moisture and suppress weeds.
Water once a week for the first month, ensuring the soil remains moist but not saturated. After establishment, Norway spruce is drought-tolerant, but young seedlings need consistent care. You’ll see steady growth—1-2 feet per year—if conditions stay ideal.
Tips & tricks for growing healthy Norway spruce seedlings
These proven strategies will help you maximize your 95% success rate with Norway spruce seedlings—where most gardeners fail.
Stratification Precision: The 60-90 day cold period is non-negotiable for breaking dormancy, but timing matters. Start your countdown from when you first seal the bag—this ensures you're not accidentally cutting the chill period short. I've seen seedlings fail when gardeners misjudge this window by even a week. Use a small marker on the bag to track the exact start date. After the 90 days, don't rush the 1-2 week room temperature phase—this mimics spring warming and prevents shock to the emerging roots.
Moisture Control Secret: When maintaining that critical moisture level in Step 3, think of it like Goldilocks—not too wet, not too dry. Stick your finger about ½ inch into the soil daily. If it feels dry at that depth, mist again. If it feels damp but not soggy, you're perfect. The top layer drying slightly is normal, but moisture should never pool at the bottom. For extra insurance, place containers on a tray with about ¼ inch of water—this creates a humid microclimate without waterlogging.
Light Transition Strategy: That gradual light acclimation in Step 4 is where most seedlings get sunburned. Start with just 2-3 hours of indirect light and watch for color changes. If needles develop yellow or brown tips, you're overdoing it. Move the containers farther from the window or add a sheer curtain. The goal is to build tolerance—stronger stems and deeper green needles mean you're doing it right. I've had seedlings that took 8 weeks to adapt rather than the standard 4-6 weeks, and they ended up hardier.
Transplanting Timing: Early spring or fall are ideal, but don't wait until the last possible moment. The 1-2 week hardening off period is crucial—it's the difference between seedlings that thrive and ones that wilt. Start by placing containers in a sheltered spot where they'll get morning sun and afternoon shade. Gradually move them to sunnier locations, watching for stress signals like curled needles. The first month after transplanting is critical—water deeply but infrequently to encourage deep root growth, not just surface roots.
Pro Tips for Norway Spruce Seedling
- These proven strategies will help you maximize your 95% success rate with Norway spruce seedlings—where most gardeners fail.
- Stratification Precision: The 60-90 day cold period is non-negotiable for breaking dormancy, but timing matters.
- Moisture Control Secret: When maintaining that critical moisture level in Step 3, think of it like Goldilocks—not too wet, not too dry.
Frequently asked questions
Got questions about growing Norway spruce seedlings? You’re not alone! Here are some of the most common concerns—plus quick, actionable answers to help you succeed.
When is the best time to plant Norway spruce seedlings?
Plant your seedlings in early spring or fall (April–May or September–October) when soil temps are cool but stable. Avoid extreme heat or frost—root systems are delicate! If starting indoors, begin 8–10 weeks before the last frost date for optimal transplant shock prevention.
How do I mimic the "chill method" for stratification?
Place seeds in a sealed container with moist peat moss or paper towels, then refrigerate for 30–60 days at 35–40°F (2–4°C). Check moisture weekly—seeds should feel damp like a wrung-out sponge. After chilling, sow in well-draining soil and keep humidity high until germination (typically 4–8 weeks).
Why are my seedlings turning yellow or wilting?
Yellowing often signals overwatering (roots need air!) or nutrient deficiency. Wilting? Check for underwatering or root rot (mushy stems = too much moisture). Adjust care: water only when the top inch of soil is dry, and use a balanced fertilizer (10-10-10) every 4–6 weeks in growing season.
Can I grow Norway spruce from cuttings instead of seeds?
Yes, but success rates are lower. Take 4–6 inch softwood cuttings in early summer, dip in rooting hormone, and plant in perlite/sand mix. Keep humidity high (use a plastic bag) and maintain 65–75°F (18–24°C). Roots form in 8–12 weeks, but seedlings from seed are hardier and faster-growing for landscapes.
How close should I space Norway spruce seedlings?
Start with 3–4 feet apart for mature spacing (they’ll reach 40–60 ft tall!). Thin seedlings to this distance after 2–3 years to reduce competition. If planting as a hedge, space 5–6 feet apart and prune annually to encourage bushier growth.
Wrapping up and next steps
Growing Norway spruce seedlings with the moisture-controlled chill method isn’t just rewarding—it’s achievable with the right prep and patience! 🌱 By mastering soil moisture, temperature balance, and proper stratification, you’ll unlock a 95% success rate in nurturing these resilient trees.
Whether you’re a beginner or a seasoned gardener, every small step—like monitoring humidity or protecting young shoots—adds up to lush, thriving seedlings ready for transplanting.
Now that you’re armed with the know-how, take the next step: Start your seedlings this fall! Grab your supplies, set up your chill chamber, and watch your green thumb shine. Happy growing—your future forest awaits! 🌲✨