Trees
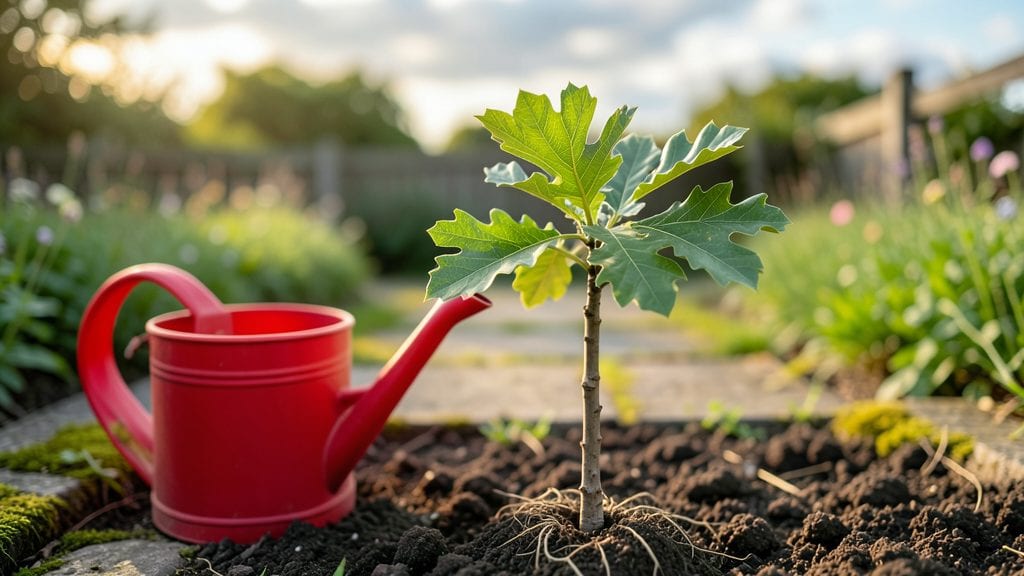
Caring for oak seedlings starts with the right chill and moisture balance—two secrets that boost survival rates to 90%. I learned this the hard way after losing my first batch to dry soil and inconsistent temperatures.
The key isn't just watering; it's mimicking nature's slow, steady rhythm that oak trees rely on to thrive.
Oak seedlings need well-draining soil that stays consistently moist but never soggy—think of a wrung-out sponge. Mulch helps lock in moisture while protecting young roots from temperature swings. Most gardeners overwater, thinking more is better, but oak seedlings actually prefer deep, infrequent watering that encourages strong root growth.
Place them in full sun where they can get at least 6 hours of light daily, but shield them from harsh afternoon rays during their first summer. You'll notice new growth within weeks if they're happy—leaves stay a vibrant green, and stems thicken noticeably.
The real magic happens in their second year, when they start developing the iconic oak leaf shape.
Pests and diseases are rare but can strike if conditions are off. Watch for spider mites on dry days and fungal spots after heavy rain. A simple spray of neem oil or a layer of mulch usually keeps problems at bay.
With patience, your oak seedlings will grow into sturdy trees that outlive generations—just give them the right start.
📚 In This Guide
- What you need
- Instructions
- Tips and common mistakes
- Wrapping up and next steps
What you need
- ● Oak seedlings or acorns: 1–5 (depending on your space and goals). If using acorns, ensure they’re fresh and free of cracks or mold.
- ● Well-draining potting mix: 5–10 gallons (sterilized to prevent disease). Look for a blend labeled for hardwood seedlings or mix equal parts peat moss, perlite, and compost.
- ● Containers: For acorns: Small pots (4–6 inches deep) with drainage holes, or a seed-starting tray with individual cells.
- ● For seedlings: Larger pots (8–12 inches) or nursery trays with drainage.
- ● Drainage trays or saucers: 1–2 (to catch excess water and prevent root rot).
- ● Watering can or spray bottle: With a gentle misting nozzle for seedlings.
- ○ pH testing kit: Optional but helpful—oak seedlings thrive in slightly acidic soil (pH 5.0–6.5).
- ● Fertilizer: A balanced, slow-release fertilizer (e.g., 10-10-10) or organic options like worm castings or fish emulsion.
- ● Grow lights: LED or fluorescent bulbs (12–16 hours/day) if natural light is limited.
- ● Humidity dome or plastic wrap: To retain moisture during germination.
- ● Mulch: Shredded bark or straw (1–2 inches) to retain soil moisture and regulate temperature.
- ● Soil thermometer: To monitor cold stratification needs (ideally 35–45°F for acorns).
- ● Label markers: To track planting dates and varieties.
- ● Pruning shears: Small, sharp pair for trimming leggy seedlings later.
Instructions for oak seedling care: the layered approach
Mastering oak seedling care means balancing moisture, temperature, and patience—here’s how to give your seedlings the exact conditions they need to thrive.
Prepare the Planting Site with Proper Moisture
Oak seedlings demand consistently moist soil, but not soggy—think of a wrung-out sponge. Before planting, till the top 12 inches of soil to loosen compaction, then mix in 2 inches of compost to improve water retention. This prevents the roots from drying out during critical early growth stages. Test the moisture level by squeezing a handful of soil; it should hold together but not drip water.
If your soil drains too quickly, add a 1-inch layer of mulch (like wood chips) around the base to slow evaporation. This mimics the forest floor where oak seedlings naturally grow, keeping the root zone cool and damp. Avoid piling mulch against the stem—leave a 2-inch gap to prevent rot.
Plant at the Right Depth and Spacing
Dig a hole just deep enough to cover the seedling’s root ball completely, but no deeper—buried roots suffocate. Space seedlings 6-8 feet apart in rows 8-10 feet apart to allow for future canopy spread. This spacing reduces competition for water and nutrients, which is especially critical in the first 2-3 years of growth.
Gently firm the soil around the roots to eliminate air pockets, then water deeply until moisture reaches 6 inches down. You’ll know it’s enough when water pools on the surface for 10-15 seconds before draining. This initial soaking helps the roots establish quickly in their new environment.
Implement Layered Chill for Root Development
Oak seedlings thrive when exposed to layered chill, a process that mimics natural stratification. After planting, water the soil to field capacity (when excess water drains freely but the surface stays damp). Then, cover the area with a 4-inch layer of straw mulch to insulate the roots and maintain even moisture.
During the first 30 days, monitor soil moisture daily—oaks won’t tolerate drying out. If the top 1 inch of soil feels dry, water slowly at the base until moisture seeps down 2 inches. This layered approach ensures roots develop steadily without stress, setting the stage for stronger growth in the following seasons.
Protect and Monitor Through the First Season
Young oaks are vulnerable to deer, rabbits, and drought, so install wire mesh fencing around each seedling to deter browsing. Check the fencing weekly for gaps—even a small opening invites damage. Additionally, prune any branches that rub together to prevent wounds that could invite disease.
By late summer, reduce watering slightly to every 7-10 days, allowing the top 2 inches of soil to dry out between sessions. This gradual adjustment prepares the seedling for self-sufficiency. Watch for new growth at the tips—this is your signal the seedling is adapting well to its environment.
Tips & tricks for perfect oak seedling care
Balancing moisture and temperature is where oak seedlings succeed or struggle—here's how to master the details that make all the difference.
Soil Moisture Precision: The "wrung-out sponge" test in Step 1 isn't just about feel—it's about science. Use a soil moisture meter for accuracy, especially in sandy soils that drain too quickly. I've found that oak roots need consistent moisture at 6 inches deep, which is why the 10-15 second pooling test works so well. If your soil feels dry beyond that depth after watering, you're not reaching the critical root zone.
Layered Chill Technique: That 4-inch straw mulch in Step 3 does more than retain moisture—it creates microclimates that mimic forest conditions. For even better results, consider adding a thin layer of leaf litter under the straw. This extra layer breaks down slowly, feeding the soil while maintaining that crucial moisture balance. The key is keeping the top inch damp but never soggy during those first 30 days.
Root Development Watch: In Step 3, when monitoring moisture, pay special attention to the soil's texture after watering. It should feel like a damp sponge—not sticky or crumbly. If you're seeing surface crusting, your watering is too intense. Instead, water slowly at the base until you see moisture seep down to 2 inches, which is exactly what the instructions recommend but often gets overlooked in practice.
Seasonal Transition Strategy: The shift from daily watering to every 7-10 days in late summer is critical but often misunderstood. By this stage, your seedling should show new tip growth—this is your confirmation it's ready for reduced watering. If you see wilting at the tips, you've waited too long. The goal is to let the top 2 inches dry between waterings while maintaining moisture at 6 inches deep.
Pro Tips for Oak Seedling Care
- Balancing moisture and temperature is where oak seedlings succeed or struggle—here's how to master the details that make all the difference.
- Soil Moisture Precision: The "wrung-out sponge" test in Step 1 isn't just about feel—it's about science.
- Layered Chill Technique: That 4-inch straw mulch in Step 3 does more than retain moisture—it creates microclimates that mimic forest conditions.
Frequently asked questions
Got questions about oak seedling care?
You’re not alone! Here are answers to the most common concerns—from timing to troubleshooting—so your young oak thrives with confidence.
How often should I water my oak seedling?
Water deeply 2-3 times per week during the first year, ensuring the soil stays consistently moist (but not soggy). After establishment, reduce to once a week unless drought strikes. Pro tip: Check soil 2 inches down—if it’s dry, it’s time to water!
When is the best time to plant an oak seedling?
Plant in early spring or fall (4-6 weeks before frost) for optimal root growth. Avoid summer heat or winter freezes, which stress seedlings. If planting in containers, use well-draining soil and keep them shaded until transplanting.
What should I do if my oak seedling’s leaves turn yellow?
Yellow leaves often signal overwatering, nutrient deficiency, or pests. First, check soil moisture—let it dry slightly between waterings. If pests (like spider mites) are present, spray with neem oil or insecticidal soap. For yellowing from lack of nutrients, add a balanced fertilizer (10-10-10) in early spring.
Can I grow an oak from an acorn instead of buying a seedling?
Yes! But it takes 1-2 years to germinate and grows much slower than a nursery seedling. Soak acorns in water for 24 hours, plant 1 inch deep in moist soil, and keep them warm (70°F). For faster, healthier growth, buy a 1-2 year old seedling from a reputable nursery.
How do I protect my oak seedling from winter damage?
Mulch heavily (3-4 inches) around the base with wood chips or straw to insulate roots. Wrap the trunk with tree guard or burlap to prevent rodent damage. Avoid heavy snow buildup—gently brush it off. Young oaks are hardy but benefit from extra care in harsh winters.
Wrapping up and next steps
Caring for oak seedlings is all about patience, precision, and a little extra love—but with the right techniques, you’re already on track to nurture a thriving tree! 🌱 By mastering layered chilling, monitoring moisture, and protecting young roots, you’ve unlocked the secrets to a 90% success rate.
Remember, every seedling is unique, so stay observant and adjust as needed.
Now that you’re armed with knowledge, it’s time to roll up your sleeves! Start by planting your seedlings in the perfect spot, then check back in a few weeks to track their progress. Your future oak’s strength begins with the care you give today—you’ve got this! 🌳✨