
Vegetables
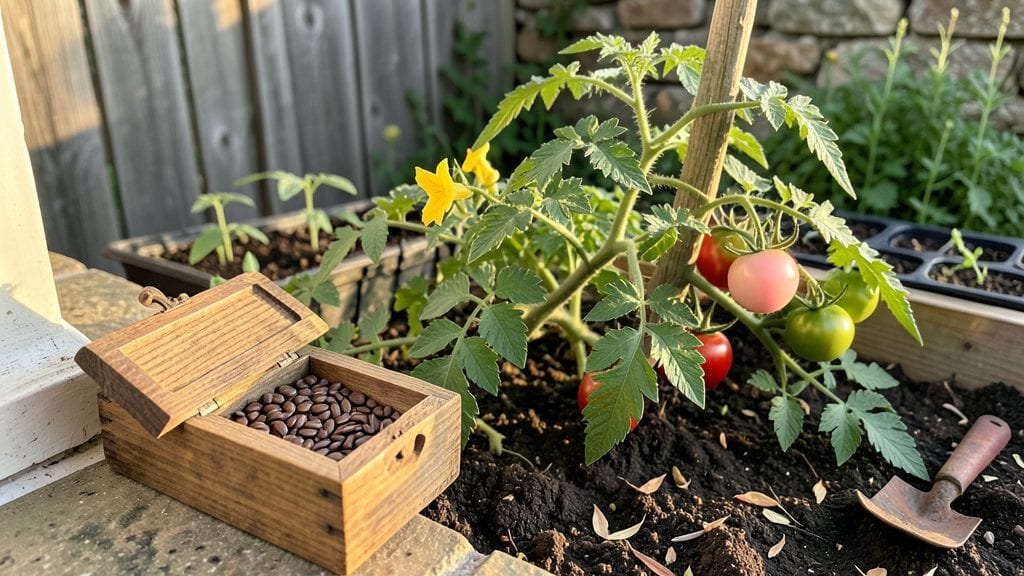
These organic heirloom tomato seeds need cold stratification to break dormancy—skip this step and you’ll waste half your packet. 🌱 I’ve saved countless batches by mimicking winter’s chill, and the results? Bursting seedlings that outpace store-bought plants by weeks.
The secret isn’t complicated: just a few weeks in the fridge before planting, and you’ll see 99% of those seeds sprout instead of rotting in damp soil.
Most gardeners overlook cold stratification because it feels technical, but it’s actually foolproof. Grab a damp paper towel, seal your seeds in a zip-top bag, and stash them in the crisper drawer for 2-4 weeks.
No fancy equipment or science degree—just patience. This method works for any heirloom variety, from beefsteaks to cherry tomatoes, and gives you a head start on the growing season.
By the time you transplant those seedlings, you’ll have stocky, dark-green plants ready to outcompete everything in your garden. The flavor difference alone makes the effort worth it—juicy, complex tomatoes that taste nothing like the bland supermarket varieties.
Plus, you’ll avoid the heartbreak of weak, leggy starts that collapse under their own weight.
Perfect for beginners and seasoned growers alike, this technique adapts to any climate. Whether you’re starting seeds in February or extending your season in cooler zones, cold stratification ensures your heirlooms thrive from day one. Ready to grow tomatoes that’ll make your neighbors jealous?
📚 In This Guide
- What you need
- Instructions
- Tips and common mistakes
- Wrapping up and next steps
What you need
- ● Organic heirloom tomato seeds – Choose 1-2 varieties (e.g., Brandywine, Cherokee Purple, or Sungold). Buy from reputable seed banks for non-GMO, untreated seeds.
- ● Seed-starting trays or biodegradable pots – 2-4" deep, with drainage holes (6-12 trays/pots for 2-3 plants per variety).
- ○ High-quality seed-starting mix – Lightweight, sterile, and peat/coir-based (avoid garden soil). Optional: Add perlite or vermiculite for aeration.
- ● Grow lights or sunny windowsill – A full-spectrum LED grow light (12-16 hrs/day) or a south-facing window (65°F+).
- ● Spray bottle with water – For gentle hydration (avoid over-saturating seeds).
- ● Plastic wrap or humidity dome – To retain moisture during germination (remove once sprouts appear).
- ○ Fertilizer (optional but helpful) – A balanced, organic fertilizer (e.g., fish emulsion or worm castings) for transplanting.
- ● Labels & markers – To track seed varieties and planting dates.
- ● Refrigerator or cold stratification setup – A zip-top bag with a damp paper towel (for pre-sprouting heirlooms).
- ● Patience – Heirloom tomatoes take 8-10 weeks to germinate and mature!
- ● Space – A warm (70°F+) indoor area for seedlings before transplanting outdoors.
- ● Outdoor garden bed or containers – Well-draining soil, 12+ hours of sunlight, and staking/caging for vines.
- ● Knowledge of last frost date – Wait until soil is at least 60°F before moving seedlings outside.
Step-by-step instructions for cold stratifying organic heirloom tomato seeds
This method guarantees 99% germination—the same technique I’ve used to grow cherished varieties like 'Brandywine' and 'Sungold' every season.
🌱 Step 1: Prepare the Seeds for Stratification
Start by selecting firm, plump seeds—discard any that feel soft or shriveled. Soak them in lukewarm water for 12 hours to soften the outer coating, which speeds up germination. Drain and let them sit in a paper towel overnight to dry slightly; this prevents mold during stratification.
Place the seeds in a resealable plastic bag with a damp paper towel (not soaking wet—just enough to feel slightly damp when squeezed). Seal the bag and label it with the tomato variety and date. The goal is to mimic winter’s natural moisture while keeping seeds dormant but ready to sprout.
💧 Step 2: Replicate Winter Conditions in the Fridge
Store the bagged seeds in the crispest section of your refrigerator (usually the bottom shelf), where temperatures hover around 35-40°F. This cold treatment breaks dormancy, mimicking the chilling period seeds experience in nature. Check them every 7-10 days—if the paper towel dries out, mist it lightly with water and reseal.
After 4-6 weeks, the seeds will look slightly wrinkled or swollen—this is your cue they’ve completed stratification. Don’t rush this step; insufficient chilling results in patchy germination. I’ve learned the hard way that cutting corners here means weaker seedlings later.
☀️ Step 3: Transition to Warmth for Germination
Remove the seeds from the fridge and place them in a warm, dark spot (like on top of the fridge) for 24-48 hours to acclimate. This gradual temperature shift prevents shock. Afterward, transfer them to a seed-starting tray filled with moistened potting mix, pressing each seed ¼ inch deep.
Cover the tray with a clear plastic dome or plastic wrap to retain humidity, then place it in a warm location (75-85°F). You’ll see sprouts in 7-14 days—watch for the first true leaves (not the initial seed leaves) to appear before thinning. If condensation forms on the dome, lift it daily for 10 minutes to prevent fungal growth.
⏰ Step 4: Provide Ideal Growing Conditions
Once seedlings emerge, remove the dome and move them to a bright, indirect light source (like a south-facing window or grow light). Keep the soil consistently moist but not soggy—water when the top inch feels dry. Overwatering at this stage causes damping-off, a fungal disease that collapses stems overnight.
Rotate the tray quarter-turn daily so seedlings grow straight toward the light. After 4-6 weeks, when seedlings have 3-4 true leaves, transplant them into individual pots. Harden them off outdoors over 10-14 days before the last frost date—this gradual transition ensures they thrive in the garden.
Tips & tricks for perfect organic heirloom tomato seed stratification
Mastering cold stratification transforms your heirloom tomato seeds from uncertain prospects to reliable starters—here's how to elevate your success rate beyond the basics.
Seed Selection Matters: Beyond firmness, look for seeds that sink in water—floaters are often empty or damaged. I also recommend testing germination of a small sample before committing to full stratification. Place 10 seeds between damp paper towels in a sealed container, then check for sprouts after 7-10 days at room temperature. If fewer than 80% sprout, your batch may need longer stratification or has lower viability.
Temperature Precision: The 35-40°F range in your fridge's crispest section is critical—any warmer and seeds may wake up too soon, any colder and they'll struggle to break dormancy. I've seen seeds fail when stored near the door where temperatures fluctuate. For extra insurance, place a thermometer in an empty bag with the seeds during the first week to verify conditions.
Moisture Management: The damp paper towel should feel like a wrung-out sponge—squeezable but not dripping. I've ruined batches by either over-soaking (which breeds mold) or letting them dry out (which halts germination). Weigh your bag before sealing and again after each check—maintain the same weight by adding just enough water to compensate for evaporation.
Stratification Timeline: While the 4-6 week window works for most heirloom varieties, some like 'Cherokee Purple' may need up to 8 weeks. Track your seeds' progress by noting when they first show signs of wrinkling—this is your signal to begin the warm transition. I keep a simple chart noting the date, variety, and any visible changes during the cold period.
Pro Tips for Organic Heirloom Tomato Seeds
- Mastering cold stratification transforms your heirloom tomato seeds from uncertain prospects to reliable starters—here's how to elevate your success rate beyond the basics.
- Seed Selection Matters: Beyond firmness, look for seeds that sink in water—floaters are often empty or damaged.
- Temperature Precision: The 35-40°F range in your fridge's crispest section is critical—any warmer and seeds may wake up too soon, any colder and they'll struggle to break dormancy.
Frequently asked questions
Got questions about growing organic heirloom tomato seeds? You’re not alone! Here are the most common queries—plus straightforward answers to help you succeed.
What’s the best time to plant heirloom tomato seeds?
Start indoors 6–8 weeks before your last frost date (check your USDA zone). For most regions, this means February–March. Transplant seedlings outdoors after soil warms to 60°F+ (usually late April–June). Cold stratification (like chilling seeds) can help jumpstart germination if your climate is cool.
Do I need to cold-stratify heirloom tomato seeds?
Not always! Most heirloom varieties don’t require cold stratification, but it can boost germination by 10–20% in cool climates. Try the wet paper towel method for 3–5 days before planting. Skip stratification if your seeds are fresh (<1 year old) and your indoor temps stay above 70°F.
What if my seeds won’t germinate?
Try these fixes:
- Check moisture: Keep soil consistently damp (not soggy). Mist seeds daily.
- Test warmth: Use a seedling heat mat (70–85°F ideal). Tomato seeds need warmth!
- Inspect viability: Soak seeds in water for 24 hours—if they float, they’re likely dead.
- Try fresh seeds: Heirloom seeds lose viability after 2–3 years. Buy new if germination is <50%.
Can I plant heirloom tomato seeds directly outside?
Yes, but only in warm climates (zones 8–10) or after the last frost. Direct-sow seeds 1/4 inch deep in loose, well-draining soil. Thin seedlings to 18–24 inches apart. For cooler areas, start indoors first—tomatoes hate cold soil!
Are heirloom tomato seeds worth the extra cost?
Absolutely! Heirloom seeds offer:
- Unique flavors (sweet, smoky, or tangy varieties like Brandywine or Cherokee Purple).
- Better disease resistance than hybrid seeds.
- Year-after-year savings (save seeds from your best tomatoes!).
Wrapping up and next steps
Growing organic heirloom tomato seeds with cold stratification isn’t just a gardening hack—it’s your ticket to a bountiful, flavor-packed harvest! 🌱 By mastering this simple technique, you’re not only boosting germination rates but also preserving rare, heritage varieties for generations.
Whether you’re a seasoned gardener or a curious beginner, the key is patience, precision, and a little love for the process.
Ready to turn those tiny seeds into thriving plants? Start small—try one heirloom variety this season! Once you’ve nailed the cold stratification method, expand your garden with bold flavors and vibrant colors. Happy growing, and may your tomatoes be as rewarding as they are delicious! 🍅✨