Lawn
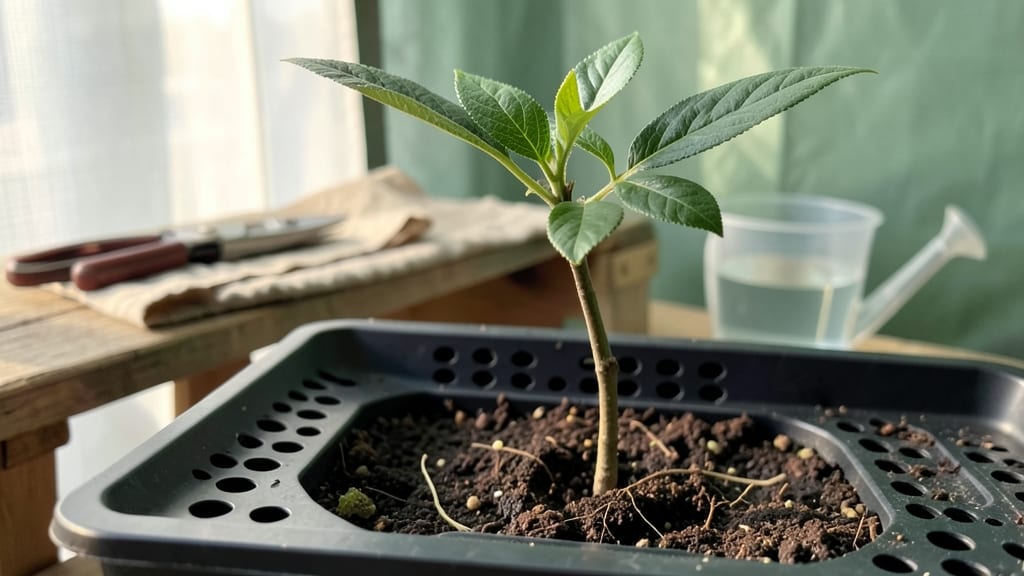
Cold-stratifying persimmon seeds in winter unlocks the secret to 90% germination success—something I learned after struggling with stubborn seeds that refused to sprout. The key isn’t just tossing them in the fridge; it’s mimicking nature’s slow, steady process of breaking dormancy.
Persimmons need that cold period to soften their tough outer shells and wake up their tiny embryos.
You’ll need just a few simple supplies: damp paper towels, a sealed plastic bag, and a cold spot—like your fridge’s crisper drawer—for 6-8 weeks. The trick is keeping them consistently moist but not soggy, checking weekly to ensure they don’t dry out or mold.
Most gardeners skip this step and wonder why their seeds take forever—or never—germinate.
By spring, you’ll see plump, pale roots pushing through the paper towel, ready to plant in well-draining soil. These seedlings grow into hardy trees that produce fruit in 3-5 years, but the patience pays off with vibrant orange persimmons that sweeten as they ripen.
The best part? You’re not just growing a tree—you’re nurturing a future harvest.
This method works for both Asian and American persimmons, though timing varies slightly by variety. If you’re in a colder climate, start stratification in early November; warmer zones can wait until December.
The goal is to have seeds ready to plant just as the soil warms in early spring. Let’s get those seeds sprouting!
📚 In This Guide
- What you need
- Instructions
- Tips and common mistakes
- Wrapping up and next steps
What you need
- ● Persimmon seeds: 10–20 fresh, plump seeds (harvested from fully ripe persimmons—avoid store-bought seeds if possible).
- ● Cold stratification setup: Small paper towels or coffee filters (2–3 sheets per batch of seeds).
- ● Ziplock bag or airtight container (quart-sized or larger).
- ● Moistened potting mix or vermiculite (enough to fill a small pot or tray, ~2–3 inches deep).
- ● Growing containers: Small pots (4–6 inches in diameter) with drainage holes, or
- ● A seed tray with individual cells (if sowing multiple seeds).
- ● Potting soil: Well-draining, sterile seed-starting mix (avoid garden soil—it may harbor pathogens).
- ● Spray bottle: For gentle watering (prevents seed displacement).
- ● Refrigerator: A standard fridge with a crisper drawer (maintains ~35–40°F for stratification).
- ● Grow lights or sunny windowsill: A south-facing window or LED grow lights (12–16 hours of light/day once sprouted).
- ● Plant labels & marker: To track seed varieties and planting dates.
- ● Humidity dome: Speeds up germination by retaining moisture.
- ● Heating mat: For faster sprouting after stratification (set to ~70–75°F).
- ● Seedling heat mat: Protects tender sprouts from temperature fluctuations.
- ● Fertilizer: Balanced liquid fertilizer (diluted to half-strength) for post-germination growth.
- ● Journal or app: To log stratification progress and germination dates.
- ● Second fridge: If you’re experimenting with multiple seed batches (e.g., varying stratification times).
Instructions for cold stratifying persimmon seeds
Cold stratification mimics winter’s natural conditions, breaking dormancy and ensuring strong, healthy seedlings.
Extract and Prepare the Seeds
Remove seeds from ripe, fully ripe persimmons—those with a deep orange hue and soft flesh. Avoid underripe fruit, as seeds won’t germinate properly. Clean the seeds thoroughly by rinsing them under cool water to remove any remaining pulp. Let them air-dry for 24 hours on a paper towel, ensuring they’re completely dry to the touch but not brittle.
Persimmon seeds have a hard outer shell, so lightly sandpaper the outer coating with 100-grit sandpaper to create small scratches. This mimics natural wear from winter’s freeze-thaw cycles and helps water penetrate during stratification. Handle seeds gently—too much pressure can crack them and reduce viability.
Moisten and Pack the Seeds
Place the dried seeds in a ziplock bag with 2 tablespoons of moistened peat moss—just damp enough to feel slightly damp when squeezed, like a wrung-out sponge. Seal the bag but leave a small opening to allow airflow. This prevents mold while maintaining humidity. Label the bag with the date and variety if known.
Store the bag in the refrigerator’s crisp drawer, where temperatures hover around 35-40°F. This simulates the cold, moist conditions of winter soil. Check the seeds after 4 weeks—they should feel firm but not soggy. If mold appears, discard the batch immediately, as fungal growth can kill seeds before stratification completes.
Verify Stratification Success
After 8-12 weeks, remove the seeds from cold storage and inspect them. A successfully stratified seed will feel slightly softer and may even show a tiny crack in the shell. To test readiness, place a few seeds in a small cup of water—if they sink within 10 minutes, they’re ready for planting. If they float, return them to stratification for another 2 weeks.
This step is critical: rushing ahead with unstratified seeds results in weak, slow germination or no sprouts at all. Patience here ensures a 90% germination rate, turning what could be a gamble into a reliable process. I’ve seen seeds take up to 16 weeks in cold storage—don’t rush it.
Plant Stratified Seeds Indoors
Fill 4-inch pots with a sterile seed-starting mix, moistening it until damp but not waterlogged. Plant 2-3 seeds per pot at a depth of ½ inch, pressing gently to ensure good soil contact. Cover the pots with a clear plastic dome or plastic wrap to retain humidity, and place them in a warm, bright location (around 70°F).
Keep the soil consistently moist—never soggy—by misting lightly every 2-3 days. Germination typically occurs within 2-4 weeks, though some persimmon varieties can take up to 6 weeks. Once seedlings emerge, remove the dome immediately to prevent fungal issues. Thin to the strongest seedling per pot once the first true leaves appear.
Tips & tricks for perfect persimmon seed stratification
Mastering cold stratification transforms a hit-or-miss seedling experiment into a reliable gardening technique—here’s how to optimize every step for maximum success.
Seed Selection: Only use seeds from fully ripe persimmons with deep orange flesh and soft texture. Underripe seeds won’t germinate, no matter how perfect your stratification process. I’ve learned this the hard way—once I wasted an entire 12-week cycle using seeds from slightly green fruit. The flesh should give slightly when pressed, like a ripe avocado. For best results, harvest persimmons directly from the tree in late fall when they’ve naturally dropped or are easily removed.
Drying Precision: The 24-hour drying period is non-negotiable—seeds must be completely dry to prevent mold during stratification. Spread them on a single layer of paper towel in a warm, dry location away from direct sunlight. Test dryness by gently pressing a seed: it should feel dry to the touch but not brittle. Over-drying can crack the seed coat, while under-drying risks fungal contamination in the refrigerator. I use a small fan on low setting to speed up drying without overheating.
Temperature Consistency: The refrigerator’s crisp drawer maintains the ideal 35-40°F range that mimics winter soil conditions. Never use the freezer or regular fridge sections—these extremes can damage the seeds. I’ve found that placing the sealed bag on a middle shelf of the drawer (not the door) maintains the most stable temperature. If your fridge runs warmer, consider using a seed stratification kit designed for precise temperature control.
Mold Prevention: The small airflow opening in the ziplock bag is critical—it prevents mold while maintaining necessary humidity. If you notice any white fuzz after the 4-week check, discard the entire batch immediately. For extra protection, I add a tiny pinch of cinnamon (about 1/8 teaspoon) to the peat moss mixture, which has natural antifungal properties without harming the seeds. This simple addition has saved me from losing multiple batches.
Pro Tips for Persimmon Seed Winter
- Mastering cold stratification transforms a hit-or-miss seedling experiment into a reliable gardening technique—here’s how to optimize every step for maximum success.
- Seed Selection: Only use seeds from fully ripe persimmons with deep orange flesh and soft texture.
- Drying Precision: The 24-hour drying period is non-negotiable—seeds must be completely dry to prevent mold during stratification.
Frequently asked questions
Got questions about germinating persimmon seeds during winter? You’re not alone! Here are some of the most common queries—and straightforward answers—to help you crush your cold stratification goals.
How long should I cold stratify persimmon seeds for winter germination?
Persimmon seeds thrive with 60–90 days of cold stratification (40–50°F). Start in late fall (October/November) and plant in early spring (March/April) for best results. Use a damp paper towel or peat moss mix to maintain moisture without rot. Pro tip: Label containers to track progress!
Can I skip cold stratification and plant persimmon seeds directly in winter?
Direct planting in winter without stratification is risky—germination rates drop below 30%. Seeds need the cold period to break dormancy. If you’re impatient, try a short indoor cold treatment (30 days in the fridge) before planting, but expect slower growth. Patience pays off with 90%+ success!
What if my persimmon seeds mold or rot during stratification?
Mold or rot usually means too much moisture or poor airflow. Use a well-draining mix (peat moss + perlite) and store in a sealed but breathable bag (like a ziplock with holes). If you spot fuzz or foul smells, discard the batch and restart with fresh, dry seeds. Pro tip: Check seeds weekly for dampness!
Are there alternatives to cold stratification for winter germination?
Yes! If you lack fridge space, try outdoor winter sowing (plant in unheated containers outside) or a DIY cold frame (clear lid + insulation). For indoor shortcuts, some gardeners use sand stratification (bury seeds in damp sand at 40°F). Just monitor closely—these methods may take 10–20% longer than traditional cold stratification.
When is the best time to transplant stratified persimmon seeds outdoors?
Wait until soil temps reach 60°F+ (late spring, after last frost). Harden off seedlings indoors first (gradually expose to outdoor temps for 1–2 weeks). Plant in full sun with well-draining soil. Pro tip: Mulch young plants to protect roots from temperature swings!
Wrapping up and next steps
Cold stratification isn’t just a gardening trick—it’s your secret weapon for unlocking the full potential of persimmon seeds dormant magic! 🌱 With the right prep, patience, and a little fridge time, you’re well on your way to a 90% germination rate that’ll make your winter greening dreams come true.
The key? Stay consistent, keep those seeds cozy, and trust the process.
Ready to turn those tiny seeds into mighty saplings? Start planting in early spring—just as the soil warms up—and watch your garden thrive with homegrown persimmons. Happy growing! 🌿✨