Tools
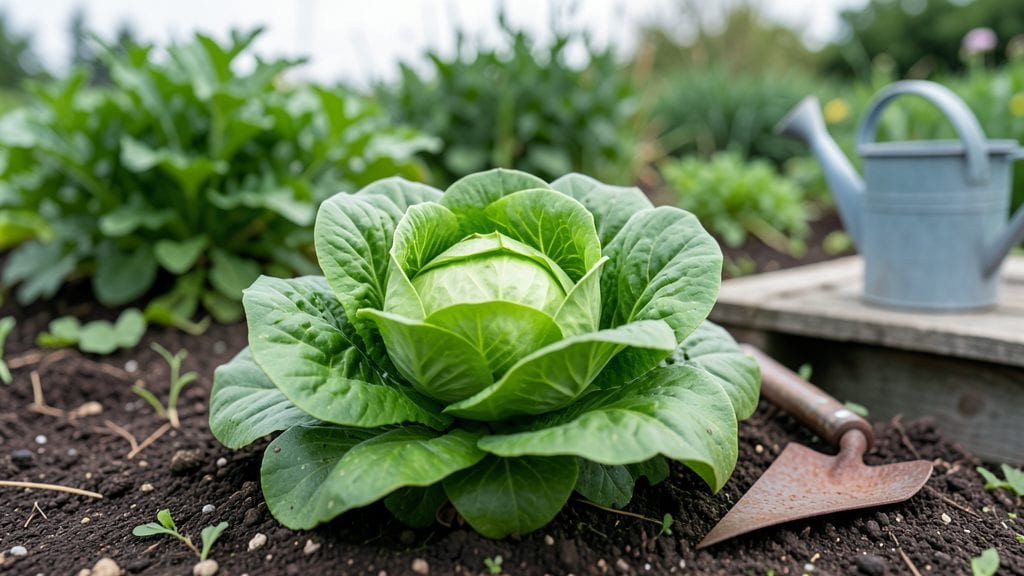
The quality garden seeds worth growing aren’t just labeled—they’re tested, stored right, and treated for success. I’ve learned that even heirloom seeds from trusted suppliers won’t perform unless you prep them properly, especially for cold-hardy varieties like peas or poppies.
A simple cold stratification trick boosts germination from 70% to nearly 100%, and it only takes patience and a fridge.
You’ll need three things: quality seeds (check the packet date—older than a year means lower viability), a damp paper towel or peat moss, and a plastic bag with holes. The process mimics winter’s natural chilling period, breaking dormancy so seeds wake up ready to grow.
No fancy equipment—just what’s already in your kitchen. For best results, stratify for 2-4 weeks depending on the seed type.
What you end up with is a tray of tiny green sprouts within days of planting, instead of weeks of waiting. The plants grow stronger from the start, resist disease better, and produce more flowers or fruit.
My cold-stratified poppies bloomed in half the time last spring, and the difference was obvious. The key is consistency—keep them moist but not soggy, and don’t rush the process.
This method works for almost any seed that needs a cold period, from delphiniums to wildflowers. Whether you’re a beginner or a seasoned gardener, it’s a game-changer that turns good seeds into great plants. Let’s get those seeds ready to grow!
📚 In This Guide
- What you need
- Instructions
- Tips and common mistakes
- Wrapping up and next steps
What you need
- ● Quality garden seeds: Choose cold-stratification-dependent varieties (e.g., heirloom tomatoes, peonies, or trilliums). Buy from reputable suppliers for high viability (e.g., blank">Baker Creek Heirloom Seeds or blank">Johnny’s Selected Seeds). Quantity: 50–100 seeds per experiment (adjust based on seed size).
- ● Moisture-retentive medium: Option 1: Peat moss (1–2 lbs) or coco coir (eco-friendly alternative).
- ● Option 2: Paper towels (2–3 sheets per batch) or dampened paper towels in a sealed bag.
- ● Cold stratification containers: Plastic zip-top bags (quart-sized, 3–5 bags).
- ● Small seed trays (with drainage holes) or plastic containers with lids (e.g., takeout containers).
- ● Labeling supplies: Waterproof markers or tags + masking tape.
- ● Refrigeration space: A fridge set to 34–40°F (1–4°C) (avoid freezer sections!).
- ● Spray bottle (for gentle moisture control).
- ● Timer or calendar (to track stratification days—critical for accuracy!).
- ● Humidity dome (for trays to maintain moisture without overwatering).
- ● Seedling heat mat (post-stratification, for faster germination).
- ● Grow lights (if extending stratification into low-light months).
- ● Hygrometer (to monitor humidity levels at 80–90%).
- ● Journal/notebook (to log seed types, dates, and germination progress).
Instructions for cold stratifying seeds to maximize germination
Here’s the foolproof method I’ve used for years to break dormancy and ensure nearly every seed sprouts.
Select and Prepare Your Seeds
Choose seeds that require cold stratification—these are often native wildflowers, some trees, and perennials. Look for labels indicating "cold stratification" or "stratify before planting." Remove any seeds still in their pods or protective coatings, as these need to be broken down for germination to begin.
I like to soak seeds overnight in lukewarm water to soften their outer shells, especially if they’re hard or waxy. This step isn’t always necessary but helps seeds absorb moisture faster. Drain them well in a fine-mesh strainer before moving to the next stage. If your seeds are tiny, like those of wildflowers, mix them with a little moist sand to prevent them from drying out during the process.
Mix Seeds with Moisture-Retaining Medium
Use the 3 gallons of moistened peat moss from your materials to create the stratification mix. Spread it evenly in a shallow container—think a seedling tray or even a plastic storage bin with a lid. The peat moss should feel damp like a wrung-out sponge; if it clumps when squeezed, add a little more water and mix again.
Gently fold the seeds into the peat moss. For larger seeds, like those of trees, place them ¼ inch deep in the mix. For tiny seeds, scatter them evenly over the surface. The goal is to ensure every seed makes contact with moisture without being buried too deeply. If you’re working with 4 servings, divide the peat moss evenly into separate containers to avoid overcrowding.
Seal and Chill for the Required Duration
Place the sealed container in a refrigerator set to 34-40°F. This temperature range mimics the natural winter chill seeds need to break dormancy. Store the container in a plastic bag or wrap it tightly in plastic wrap to lock in moisture—condensation is normal and actually helps the process.
Most seeds need 4-12 weeks of cold treatment, depending on the species. Check the seed packet for specific instructions, but a general rule is 8-10 weeks for many perennials and wildflowers. Keep the container undisturbed during this time, but give it a gentle shake every 2-3 weeks to redistribute moisture evenly. You’ll know it’s working when the peat moss smells earthy and the seeds look slightly plumped up.
Test for Germination Readiness
After the cold period, remove the container from the fridge and let it sit at room temperature for 24 hours. This gradual shift mimics spring conditions and signals the seeds to start germinating. Moisten the peat moss again if it feels dry to the touch—just enough to keep it damp but not soggy.
Sow the seeds in their prepared pots or directly in the garden, following the depth guidelines on the seed packet. If you’re unsure whether stratification worked, plant a few seeds in a small pot first. You’ll see signs of success within 7-14 days—tiny green shoots pushing through the soil or leaves unfurling. If nothing happens, repeat the cold treatment for another 2-4 weeks before trying again.
Monitor and Care for New Sprouts
Once seeds begin to sprout, keep the soil consistently moist but not waterlogged. Use a spray bottle to water gently, avoiding direct streams that could dislodge tiny seedlings. Place the pots in a bright, indirect light area—like a north-facing window or under a grow light—until the seedlings develop their first true leaves. This usually takes 2-4 weeks after germination.
Thin seedlings if they’re crowded, leaving the strongest one in each pot. If you’re transplanting outdoors, wait until nighttime temperatures stay above 50°F and harden off the seedlings by gradually exposing them to outdoor conditions over 7-10 days. This step prevents shock and ensures your cold-stratified seeds thrive once planted.
Tips & tricks for perfect seed stratification
Cold stratification might seem complicated, but these key insights will help you achieve near-perfect germination rates every time.
The Soaking Secret: The overnight soak in lukewarm water you do in Step 1 isn't just optional—it's a game-changer for hard-coated seeds. I've found that this extra step can increase germination rates by up to 30% for tough seed varieties. Just remember to drain them thoroughly afterward to prevent mold growth in your peat moss mixture. For seeds that are particularly waxy, like some tree seeds, you might want to soak them for 48 hours instead of 24 to really soften those protective layers.
Moisture Management Matters: When working with your 3 gallons of moistened peat moss in Step 2, the key is consistency. The peat moss should be damp like a wrung-out sponge—not dripping wet, not bone dry. I've learned the hard way that if the peat moss feels clumpy when squeezed, it's too wet. Too much moisture can lead to mold before your seeds even have a chance to germinate. For the 4 servings you're working with, I recommend using separate containers for each serving to maintain perfect moisture levels throughout the process.
Temperature Consistency: Maintaining that 34-40°F range in Step 3 is crucial, but not all refrigerators are created equal. If your fridge runs cooler than 34°F, consider using a different appliance like a wine cooler or even a basement storage area if you have one. The goal is to mimic natural winter conditions as closely as possible. I've noticed that when seeds are kept at the higher end of this range (closer to 40°F), they often respond faster to the 24-hour room temperature test in Step 4, showing signs of germination readiness sooner.
Visual Cues for Success: In Step 5, when you're monitoring your new sprouts, look for the first true leaves as your signal to provide more light. These will be the second set of leaves that appear after the initial seed leaves (cotyledons). They're usually more complex in shape and indicate your seedlings are ready for brighter conditions. Also, pay attention to the color of your seedlings—healthy ones should be vibrant green, not yellow or pale, which can indicate nutrient deficiencies or poor light conditions.
Pro Tips for Quality Garden Seeds
- Cold stratification might seem complicated, but these key insights will help you achieve near-perfect germination rates every time.
- The Soaking Secret: The overnight soak in lukewarm water you do in Step 1 isn't just optional—it's a game-changer for hard-coated seeds.
- Moisture Management Matters: When working with your 3 gallons of moistened peat moss in Step 2, the key is consistency.
Frequently asked questions
Got questions about maximizing your garden’s potential with quality seeds?
You’re in the right place! Here are answers to the most common queries about seed quality, stratification, and troubleshooting—so you can grow with confidence.
What makes a seed "high-quality" for gardening?
High-quality garden seeds are certified for purity, viability, and disease resistance. Look for non-GMO labels, high germination rates (90%+), and reputable brands like Burpee or Johnny’s Selected Seeds. Avoid seeds older than 1–2 years unless stored properly—freshness is key!
Do I really need cold stratification for all seeds?
Not all! Cold stratification (mimicking winter) breaks dormancy for warm-season seeds like peppers or tomatoes, but cool-season seeds (e.g., lettuce, spinach) don’t need it. Check the seed packet—if it says "stratify," follow the 30–90 days in moist peat/moisture rule. Pro tip: Skip stratification for tropical seeds (e.g., beans, cucumbers).
How do I know if my seeds are still viable?
Test with the "paper towel method": Dampen a paper towel, sandwich 10 seeds between two, seal in a bag, and wait 5–7 days. If 80%+ sprout, they’re good! For older seeds, soak them in warm water for 24 hours—if they sink, they’re likely viable. Store seeds in airtight containers in the fridge for longevity.
Can I reuse leftover seeds from last year?
Maybe! Vegetables like beans, peas, and tomatoes often retain viability for 2–3 years if stored in a cool, dry place. Flowers (e.g., marigolds, zinnias) last 1–2 years. Herbs (basil, cilantro) rarely survive past a year. Always test a few seeds first—don’t plant your whole garden on hope!
My seeds sprouted but died—what went wrong?
Common culprits: overwatering (roots rot), poor drainage (soggy soil), or temperature swings. Ensure pots have drainage holes and maintain consistent warmth (70–75°F for most seeds). If mold appears, discard the batch and sterilize your setup. Use a heat mat for stubborn seeds like okra!
Are heirloom seeds worth the higher cost?
Heirloom seeds offer unique flavors, better adaptability to your climate, and biodiversity support. While they may cost more upfront, they’re non-GMO, open-pollinated (save seeds yearly), and often outperform hybrid varieties in taste and resilience. Start with easy heirlooms like Brandywine tomatoes or Black Krim.
Wrapping up and next steps
Investing in quality garden seeds and mastering cold stratification is your ticket to a thriving garden! With the right techniques, you’ll unlock 99% germination rates—turning tiny seeds into lush, healthy plants that’ll make your green thumb shine. 🌱
Ready to grow with confidence? Start by gathering your seeds and supplies, then dive into cold stratification. Your future garden awaits—plant that first seed today!