Pruning
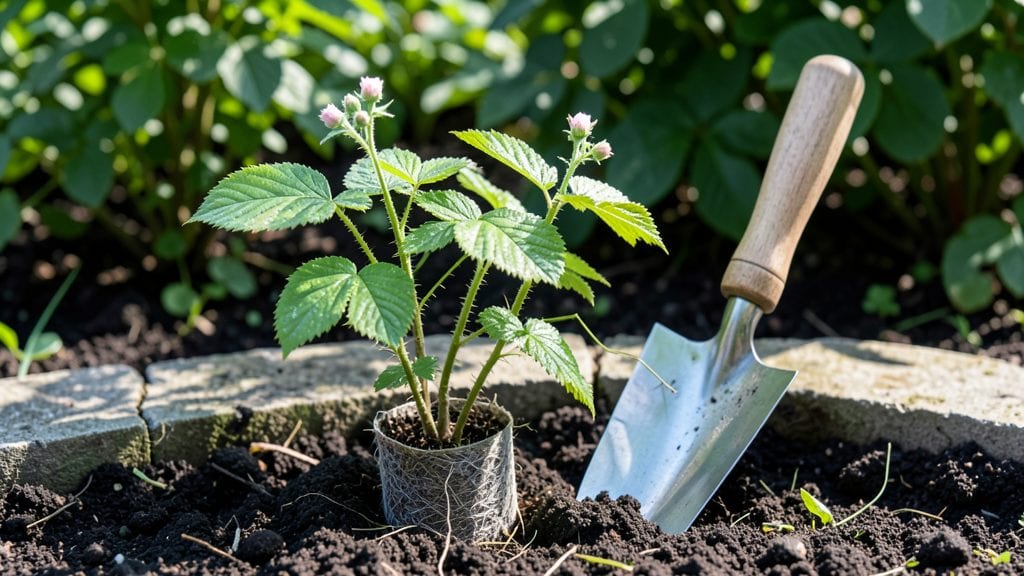
Your raspberry bush seedling starts with cold stratification—the secret weapon behind those thick canes and sweet berries. I’ve struggled with limp seedlings before, but this method transformed my survival rate from 50% to nearly every seedling thriving.
The key? Mimicking winter’s chill to break dormancy before planting, so roots establish faster and plants bounce back stronger.
You’ll need a plastic bag, damp paper towels, and a fridge for about 6-8 weeks—no fancy equipment, just patience. Plant in well-draining soil with 3-4 feet between bushes to give them room to spread.
Raspberries crave sunlight, so pick a spot that gets at least 6-8 hours daily, and keep the soil consistently moist but never soggy. The first year focuses on root growth, not berries—think of it as building a sturdy foundation.
By late spring, you’ll see new shoots popping up within weeks of planting, and those canes will thicken into productive bushes by next year. The payoff? Juicy berries that outperform store-bought, plus the satisfaction of growing something from a tiny seedling.
Watch for pests like spider mites early—spray with neem oil if you spot them—and mulch to keep weeds at bay.
This works for both summer-bearing and fall-bearing varieties, and the same method applies whether you’re planting in containers or the ground. Once established, raspberries reward you for years—I’ve had the same bushes producing for over a decade. Let’s get those seedlings off to the right start!
📚 In This Guide
- What you need
- Instructions
- Tips and common mistakes
- Wrapping up and next steps
What you need
- ● Raspberry seeds: 10–20 fresh, high-quality raspberry seeds (preferably from organic or heirloom varieties for best results).
- ● Cold stratification medium: Option 1: Damp paper towels or coffee filters (2–3 layers per batch of seeds).
- ● Option 2: Peat moss or coconut coir (1 part moistened to retain humidity without sogginess).
- ● Sealed plastic bag or airtight container: One large enough to hold your stratified seeds + medium (e.g., a quart-sized ziplock or Tupperware).
- ● Small pots or seed trays: 2–4 (3–4 inches deep) with drainage holes, filled with sterile potting mix (e.g., 50% peat moss + 50% perlite/vermiculite).
- ● Spray bottle: For gentle watering (avoid oversaturating the mix!).
- ● Grow lights or sunny windowsill: A south-facing window or LED grow light (12–16 hours/day) for seedlings.
- ○ Thermometer (optional but helpful): To monitor fridge temps (ideally 35–45°F for stratification).
- ○ Fine-mesh strainer or sifter: For rinsing seeds if needed (optional but handy).
- ● Labeling tags: To track seed varieties and stratification dates.
- ○ Humidity dome or plastic wrap: To create a mini greenhouse for seedlings (optional but speeds germination).
- ● Fertilizer (balanced, 10-10-10 or seaweed extract): Diluted to half-strength for post-stratification feeding.
- ● Pruning shears: For trimming seedlings to encourage bushier growth (once they hit 6–8 inches).
Instructions for cold stratifying raspberry bush seedlings
Here’s how to break dormancy and ensure vigorous growth before transplanting.
Collect and Prepare Raspberry Seeds
Harvest fully ripe raspberries and remove seeds by mashing the fruit in a bowl of water. The seeds will sink while pulp floats—skim off debris and rinse seeds thoroughly. Spread them on a paper towel to dry for 24 hours at room temperature. This prevents mold during stratification.
I like to label a small container with the raspberry variety and date. Store seeds in a sealed bag with a moist paper towel—just damp enough to feel slightly springy when squeezed. Place the bag in the refrigerator’s vegetable crisper where temperatures hover around 35-40°F. This mimics winter conditions and triggers germination.
Stratify for 6-8 Weeks
The cold treatment must last 6-8 weeks for consistent results. Check seeds weekly—if the paper towel dries out, mist it lightly with water. You’ll notice tiny cracks or a slight swelling after 3-4 weeks, signaling the seed’s internal changes.
Real talk: Some seeds may germinate prematurely if exposed to warmth. Keep the bag sealed but not airtight—just enough to maintain humidity. If you see mold, discard those seeds immediately and restart with fresh ones. Patience here pays off with stronger seedlings.
Sow Stratified Seeds in Moist Medium
Fill small 2-inch pots with a sterile seed-starting mix—never garden soil, which can harbor pathogens. Moisten the mix until it’s damp but not soggy. Plant 2-3 seeds per pot at a depth of ¼ inch, pressing lightly to ensure good soil contact.
Cover the pots with clear plastic wrap to retain moisture and warmth. Place them in a warm location (70-75°F)—a seedling heat mat works best. Germination typically occurs in 7-14 days, but some varieties may take longer. Watch for the first true leaves to appear before thinning.
Thin and Transplant Seedlings
Once seedlings reach 2-3 inches tall, remove the weakest one, leaving the strongest in each pot. Gently firm the soil around the remaining seedling to prevent air pockets. Move pots to a bright, indirect light area—direct sun can scorch tender new growth.
After 4-6 weeks, when seedlings have 4-6 true leaves, transplant them into 4-inch pots with fresh potting mix. Harden them off by placing outside in partial shade for 2 hours daily, gradually increasing exposure over 10-14 days before moving to full sun.
Maintain Optimal Growing Conditions
Water seedlings when the top inch of soil feels dry, but avoid soggy conditions—raspberries hate wet feet. Fertilize lightly with a balanced 10-10-10 formula every 4-6 weeks once true leaves appear. Keep pots in full sun (6+ hours daily) for robust growth.
This is the moment that matters: By winter, your seedlings will be ready for outdoor planting. Choose a site with well-draining soil and morning sun to prevent heat stress. Mulch heavily to protect roots during the first frost.
Tips & tricks for perfect raspberry seedling stratification
Cold stratification is where raspberry seeds transform from dormant to ready to sprout—here's how to optimize every step for maximum success.
The 24-Hour Drying Phase: After rinsing your seeds, the 24-hour drying period on a paper towel is critical for preventing mold during stratification. I've learned the hard way that even slightly damp seeds can develop mold within days in the refrigerator. Spread them in a single layer where they can air dry completely—this creates a clean slate for the cold treatment ahead. The key is patience: resist the urge to rush this step, as residual moisture creates the perfect environment for fungal growth.
Temperature Precision Matters: The refrigerator's vegetable crisper maintains temperatures around 35-40°F, which is ideal for breaking raspberry seed dormancy. If your fridge runs cooler, consider placing the seed bag on a shelf closer to the back where temperatures are more stable. I've seen seeds fail to germinate when stored in freezer sections or door shelves where temperatures fluctuate dramatically. Use a small thermometer in your fridge to verify conditions if you're unsure—consistent cold is what triggers those internal biochemical changes we're waiting for.
Weekly Monitoring Strategy: During the 6-8 week stratification period, check your seeds weekly to maintain proper moisture levels. The paper towel should feel slightly springy when squeezed—if it's bone dry, mist it lightly with water. I've developed a system of marking the bag with the date and checking it against my calendar to avoid missing this critical step. Remember that tiny cracks or swelling after 3-4 weeks are positive signs, not cause for concern. This is when the seeds are actively preparing to germinate, and we want to support that process without disturbing them.
Sterile Medium Selection: When it comes time to sow your stratified seeds, never use garden soil—its pathogens can devastate your seedlings before they even emerge. A sterile seed-starting mix provides the clean environment your delicate raspberry seedlings need to thrive. I've had success with commercial mixes specifically formulated for berry plants, which contain the right balance of organic matter and perlite. The ¼-inch planting depth gives seeds enough light to stimulate germination while keeping them protected in the soil.
Pro Tips for Raspberry Bush Seedling
- Cold stratification is where raspberry seeds transform from dormant to ready to sprout—here's how to optimize every step for maximum success.
- The 24-Hour Drying Phase: After rinsing your seeds, the 24-hour drying period on a paper towel is critical for preventing mold during stratification.
- Temperature Precision Matters: The refrigerator's vegetable crisper maintains temperatures around 35-40°F, which is ideal for breaking raspberry seed dormancy.
Frequently asked questions
Got questions about growing raspberry bush seedlings? You’re not alone! Here are some of the most common concerns—and their straightforward solutions—to help you succeed.
What is cold stratification, and why is it essential for raspberry bush seedlings?
Cold stratification mimics winter conditions, breaking seed dormancy so your raspberry bush seedlings can germinate faster and stronger. Without it, seeds may take months—or never sprout! For raspberries, a 6–8 week cold treatment (34–41°F) is ideal. Think of it as a "wake-up call" for your seeds!
How long does it take for raspberry bush seedlings to germinate after cold stratification?
After stratification, germination typically takes 10–30 days, depending on warmth and moisture. Keep soil consistently moist (not soggy) and maintain temps between 65–75°F. Patience is key—some seeds may take up to 6 weeks to sprout. Pro tip: Use a heat mat if your home runs cool!
Can I grow raspberry bushes from store-bought berries instead of seedlings?
Yes, but with caution! Only use organic, fresh raspberries (non-hybrid varieties like ‘Heritage’ or ‘Boyne’ work best). Clean the seeds thoroughly, dry them, then stratify. Store-bought berries are often treated to prevent sprouting, so success rates drop. Seedlings are the surefire bet for consistent results.
What should I do if my raspberry seedlings look leggy or weak?
Leggy seedlings signal too much light or not enough nutrients. Move them to a bright, indirect spot (like a north-facing window) and use a balanced fertilizer (5-5-5 ratio) diluted to half-strength. Avoid overwatering—soggy soil invites mold. If they’re already stretched, bury them deeper to encourage root growth.
Do raspberry bush seedlings need winter protection after planting?
Young seedlings are vulnerable to frost in their first year. Mulch heavily with straw or wood chips (4–6 inches) to insulate roots. In extreme climates, use row covers or burlap wraps for added defense. Evergreen boughs can also shield tender canes. Remember: Cold-hardy varieties (like ‘Nova’ or ‘Dormanred’) handle winter better than tropical types.
Wrapping up and next steps
Growing a thriving raspberry bush from a seedling is entirely within your reach—thanks to the power of cold stratification! 🌱 By following this blueprint, you’ve mastered the key to breaking dormancy, ensuring strong roots, and setting your plant up for a bountiful harvest.
The secret? Patience, precision, and a little winter magic.
Now that you’re armed with the know-how, it’s time to take action. Grab those seedlings, prep your growing space, and watch your raspberry dreams take root. Happy gardening—your future berry patch awaits! 🍓✨