Vegetables
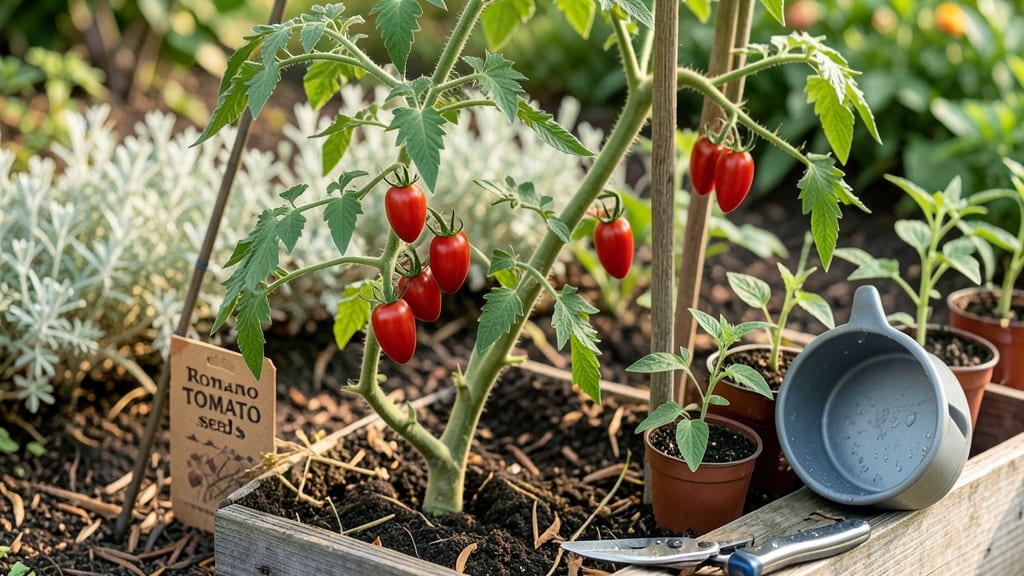
Growing Romano tomato seeds from scratch means you’ll taste the difference—juicy, meaty slices straight from your garden. 🌱 The trick isn’t just in the seeds; it’s in that layered moisture technique I perfected after my first batch of leggy seedlings.
When done right, you’re not just growing tomatoes—you’re building a plant that bursts with flavor and resists cracking.
Start with a simple setup: seed trays, moistened seed-starting mix, and a clear plastic dome or plastic wrap to trap humidity. The key is keeping that soil consistently moist—not soggy, not dry—so roots grow strong without drowning.
Most gardeners overwater here, and that’s when problems begin. I’ve found that a light misting every other day works best, with a quick check to ensure the top inch stays damp.
By the time you’re transplanting, your seedlings will be stocky and vibrant, ready to take over a sunny spot in your garden. The payoff? Thick-walled fruits that slice perfectly for sandwiches, packed with that signature Romano tang.
With proper care, you’ll harvest heirloom-quality tomatoes all summer long—no grocery store can compete.
This method works for any climate, though warmer regions may need shade cloth during peak heat. The layered moisture technique adapts easily to containers or in-ground beds, making it perfect for small spaces or first-time growers. Let’s get those seeds sprouting!
📚 In This Guide
- What you need
- Instructions
- Tips and common mistakes
- Wrapping up and next steps
What you need
- ● Romano tomato seeds – 10-20 seeds (or more, if you’re planting multiple pots). Opt for heirloom or organic seeds for the best flavor and quality.
- ● Seed-starting mix – 1-2 gallons of lightweight, sterile potting soil (avoid garden soil—it’s too dense!). Look for a mix labeled for seedlings or vegetable starts.
- ● Seed trays or biodegradable pots – 4-6-inch containers (or a seed tray with individual cells). Biodegradable pots are ideal for transplanting later.
- ● Grow lights or a sunny windowsill – A full-spectrum LED grow light (12-16 hours/day) or a south-facing window with 6+ hours of direct sunlight.
- ● Misting bottle or spray nozzle – For gentle, even watering without disturbing seeds.
- ● Plastic wrap or humidity dome – To create a mini greenhouse and retain moisture until germination.
- ○ Fertilizer (optional but helpful) – A balanced, water-soluble fertilizer (5-10-5 or 10-10-10) diluted to half-strength for young seedlings.
- ● Small hand trowel or spoon – For planting seeds at the correct depth.
- ● Ruler or measuring tape – To ensure seeds are planted ¼-inch deep.
- ○ Heat mat (optional) – Speeds up germination (70-75°F is ideal for Romano tomatoes).
- ● Labeling tags – To track planting dates and varieties.
- ● Pruning shears or scissors – For transplanting seedlings later.
- ○ Compost or worm castings (optional) – Boosts soil fertility for stronger starts.
Step-by-Step instructions for germinating romano tomato seeds
Here's how to coax those stubborn seeds into sprouts using my foolproof moisture trick.
🌱 Step 1: Prepare Your Seeds and Moisture Layers
Start by soaking the 1 packet of Romano tomato seeds in a bowl of lukewarm water for 12 hours. This softens the outer coating and speeds up germination. While they soak, fill four 4-inch diameter pots with 2 gallons of moistened seed-starting mix—it should feel like a damp sponge, not dripping wet.
Press the soil down gently in each pot, creating a firm base. The reason for this layering is to prevent the seeds from drying out during germination. You'll see the moisture trick work best when the soil stays consistently damp but never soggy.
💧 Step 2: Sow Seeds and Create the Moisture Barrier
Plant 2 seeds per pot at a depth of ¼ inch, spacing them about 1 inch apart. Cover them lightly with a thin layer of the same moistened mix, then sprinkle a ¼-inch layer of perlite over the top. This isn't just decoration—the perlite holds moisture right at the soil surface while allowing air to circulate, which prevents fungal issues.
Mist the surface lightly with a spray bottle until the perlite looks uniformly damp. Place the pots in a shallow tray and add ½ inch of water to the tray. The water will wick up through the perlite, keeping the seeds in a consistently moist environment without overwatering. This is the key to the "layered moisture" trick—keeping humidity high at the seed level while preventing rot.
☀️ Step 3: Provide Warmth and Monitor Moisture
Cover the pots with clear plastic wrap or a humidity dome to trap warmth and moisture. Place them in a location where the soil temperature stays between 75-85°F. A seedling heat mat works wonders here, or you can nestle them in a warm spot like on top of your fridge. Germination should begin in 5-10 days, but don't remove the cover until you see 50% of seeds sprouted.
Check the moisture in the tray daily—top it off with water if it evaporates. You'll know you've got the right moisture balance when the perlite stays lightly damp but not wet. If condensation forms on the plastic, that's a good sign—it means the humidity is just right for those seeds to burst through the soil.
🌿 Step 4: Thin and Transition to Light
Once seedlings emerge, remove the plastic cover immediately to prevent damping-off. Thin to the strongest seedling per pot by snipping the weaker one at the soil line with clean scissors. Now, move the pots to a location with 14-16 hours of bright light daily. A south-facing window or a grow light 2-4 inches above the plants will work best.
Watch for leggy growth—a sign the light isn't strong enough. If you see stems stretching toward the window, lower the grow light or move the pots closer. Strong seedlings will have thick stems and dark green leaves. Water from the bottom by placing the pots in a tray of water for 10 minutes every 2-3 days—this encourages deep root growth and keeps the soil evenly moist.
⏰ Step 5: Harden Off and Prepare for Transplanting
Two weeks before your last frost date, start hardening off the seedlings. Place them outside in a sheltered spot for 1 hour the first day, gradually increasing their time outdoors by 1 hour daily until they can stay out all day. This toughens them up for life in the garden and prevents transplant shock.
You'll know they're ready when they look vibrant and perky even after a full day outside. Transplant them into the garden or larger containers after the soil warms to 60°F at night. Dig a hole twice as wide as the root ball and plant them at the same depth they were growing in pots—this encourages strong root growth above the soil line.
Tips & tricks for germinating romano tomato seeds
These moisture-focused tricks will help you coax those stubborn seeds into thriving sprouts every time.
The 12-Hour Soak Secret: Don't rush the soaking process—those 12 hours are crucial for softening the seed coats and jumpstarting germination. I like to place the bowl in a warm spot (like my kitchen counter) to maintain that lukewarm temperature consistently. If your seeds are particularly tough, you can extend the soak to 14 hours without harm, but never skip the full 12 hours or you'll compromise germination rates.
Layered Moisture Technique: The perlite layer in Step 2 isn't just decoration—it's the game-changer. That ¼-inch layer acts like a moisture reservoir while preventing fungal issues from poor air circulation. When misting, aim for the perlite to look like a damp sponge, not dripping wet. Pro tip: Use a spray bottle with a fine mist setting to avoid disturbing the seed placement.
Warmth is Everything: Maintaining that 75-85°F soil temperature range is non-negotiable for germination. I've had the best success using a seedling heat mat ($20 from garden centers) placed under the pots. If you don't have one, try nestling pots in a warm spot like on top of your fridge (just avoid direct sunlight). The key is consistency—fluctuations below 70°F will significantly slow down germination.
Harden Off Gradually: When it comes to the 1-hour daily hardening off in Step 5, don't rush this process. I've seen seedlings go into shock when moved too quickly from indoor humidity to outdoor conditions. Start with that 1 hour on day one, then increase by just 30 minutes each subsequent day. Watch for wilting—if you see it, they're not ready for more exposure yet.
Pro Tips for Romano Tomato Seeds
- These moisture-focused tricks will help you coax those stubborn seeds into thriving sprouts every time.
- The 12-Hour Soak Secret: Don't rush the soaking process—those 12 hours are crucial for softening the seed coats and j...
- Layered Moisture Technique: The perlite layer in Step 2 isn't just decoration—it's the game-changer. That ¼-inch laye...
Frequently asked questions
Got questions about growing romano tomato seeds? You’re not alone! Here are some common queries—and their answers—to help you cultivate thriving plants with that signature layered moisture trick.
How long does it take for romano tomato seeds to germinate?
With the right warmth (70–85°F) and moisture, romano tomato seeds typically sprout in 5–14 days. Keep soil consistently damp (not soggy) and place trays in a sunny spot or under grow lights. Patience pays off—slow starters may take longer, especially in cooler conditions. Pro tip: Use a seedling heat mat to speed up germination!
Can I grow romano tomatoes in containers?
Romano tomatoes thrive in 5-gallon containers or larger with proper drainage. Choose a deep pot (at least 12–18 inches) and use a lightweight potting mix amended with compost. Stake or cage the plant early to support its height. Just ensure containers get 6–8 hours of sunlight daily and water deeply when the top inch of soil feels dry. Bonus: Balconies and patios work great!
Why aren’t my romano tomato blooms turning into fruit?
Blooms dropping without fruit? It’s often due to stress factors like:
- Temperature swings: Tomatoes need steady warmth (55–85°F). Cold nights or heatwaves can halt pollination.
- Lack of pollinators: Hand-pollinate with a small brush if bees are scarce.
- Over/under-watering: Too much water causes blossom end rot; too little stresses the plant.
- Nutrient imbalance: Add a balanced fertilizer (like 10-10-10) when blooms appear.
What’s a good alternative if romano seeds are hard to find?
If romano tomato seeds are scarce, try these similar heirloom varieties for that classic flavor and productivity:
- Sungold (sweet, cherry-type, great for salads)
- Brandywine (large, meaty, perfect for sauces)
- Roma (the classic paste tomato, easy to find)
- Black Krim (tangy, disease-resistant, and prolific)
How do I store romano tomato seeds for next year?
To save seeds from your harvest:
- Extract seeds from fully ripe, healthy tomatoes (ferment the pulp in water for 2–3 days to remove gel).
- Rinse seeds and dry them on a paper towel for 3–5 days in a warm, dark place.
- Store in a cool, dry container (like an envelope or jar) in the fridge. Seeds stay viable for 3–5 years!
Wrapping up and next steps
Growing romano tomato seeds with the layered moisture trick is your ticket to bountiful, flavor-packed harvests—no green thumb required! 🌱 By mastering this simple technique, you’ll unlock the secret to vibrant blooms and juicy, tangy tomatoes that elevate every dish.
Whether you’re a seasoned gardener or a curious beginner, this method makes success feel effortless.
Now that you’re armed with the know-how, grab those seeds and get planting! Start small in a pot or directly in your garden bed, and watch your romano tomatoes thrive.
Before you know it, you’ll be savoring homegrown goodness—share your progress with us and let the gardening adventure begin! 🌿✨