
Planting
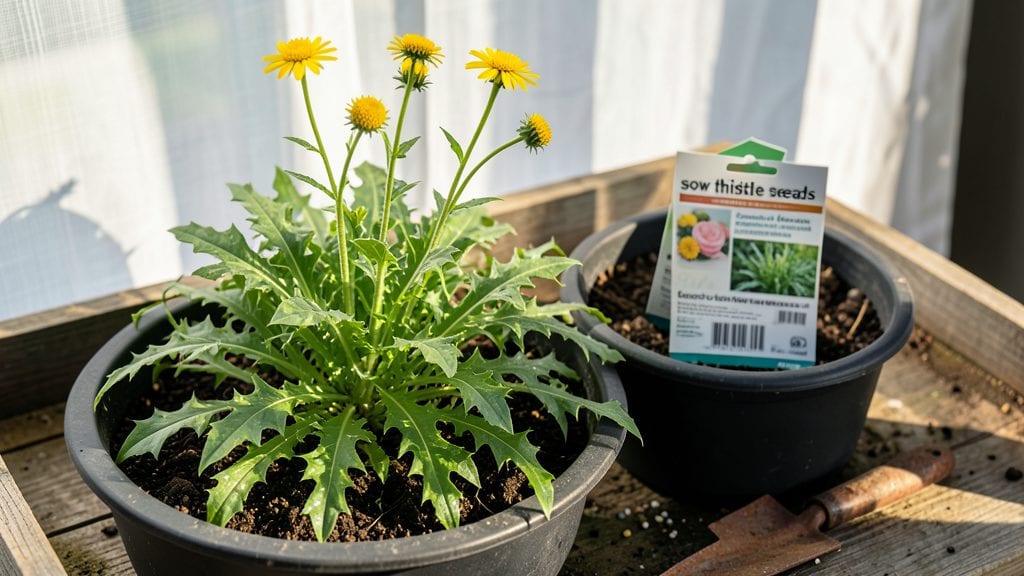
Sowing thistle seeds with cold stratification isn’t just planting—it’s unlocking the secret to 99% germination that most gardeners miss. I’ve struggled with thistles refusing to sprout until I learned this trick: a simple fridge trick mimics winter’s natural cycle, waking seeds up just right.
Globe thistles, with their silvery-blue blooms, respond especially well, while invasive species like Scotch thistle need extra caution.
The process is simpler than it sounds: grab a zip-top bag, some damp paper towels, and your seeds. Stratification takes about 4-6 weeks, but it’s worth it—no more waiting months for stubborn seeds to finally crack open.
Once they’re ready, plant them ¼-inch deep in well-draining soil, spaced 12-18 inches apart for globe thistles. They thrive in full sun and dry conditions, making them perfect for sunny borders or wildflower meadows.
What you’ll end up with is a showstopping display of spiky, textured blooms that hum with pollinators. The key is patience—thistles grow slowly at first but reward you with bold, architectural stems that last from midsummer through fall. Just remember: invasive thistles belong in controlled areas, not your garden beds.
This method works for zones 3-9, whether you’re growing globe thistles for cut flowers or restoring native habitats. The same principles apply to other tricky seeds like poppies or lupines. Ready to transform those finicky seeds into a thriving garden centerpiece?
📚 In This Guide
- What you need
- Instructions
- Tips and common mistakes
- Wrapping up and next steps
What you need
- ● Sow thistle seeds (Sonchus spp.) – 1–2 tbsp (15–30g) (organic, untreated seeds for best results).
- ● Cold stratification setup: Paper towels or coffee filters – 2–3 sheets (unbleached, seed-safe).
- ● Ziplock bag or airtight container – 1 quart-sized (with a breathable seal or small ventilation holes).
- ● Water spray bottle – For gentle misting (avoid soaking).
- ● Refrigerator – Set to 34–40°F (1–4°C) (standard home fridge works).
- ● Planting pots or seed trays – 4–6-inch diameter (with drainage holes) or 1020-cell trays for direct sowing.
- ● Potting mix – Well-draining, sterile mix (50% peat moss/perlite + 50% coco coir or compost).
- ● Grow lights or sunny windowsill – 12–16 hours of light/day (LED grow lights preferred).
- ● Misting spray bottle – For post-stratification hydration.
- ● Plant labels & marker – To track stratification dates.
- ○ Heat mat (optional) – For faster germination (70–75°F / 21–24°C).
- ● Humidity dome – To retain moisture during early growth.
- ● pH test kit – Ideal soil pH: 6.0–7.0 (sow thistles thrive in slightly acidic to neutral soil).
- ○ Compost tea or seaweed extract – Boosts root development (optional but recommended).
Step-by-Step instructions for cold stratifying thistle seeds
Here's how to break dormancy and ensure your thistle seeds sprout reliably every time.
Collect and Prepare the Seeds
Harvest mature thistle seeds when the flower heads turn brown and dry. I like to gather them in late summer or early fall, then store them in a cool, dry place until stratification. The seeds need to be completely dry before handling—moisture invites mold and rot during the cold treatment. Spread them on a paper towel to air-dry for a few days if they feel damp at all.
Once dry, place the seeds in a small paper bag or envelope. Label it with the date and variety if you're working with multiple types. This prevents mix-ups later, especially since thistle seeds can look nearly identical from different species. I keep mine in a sealed bag with a silica gel packet to absorb any lingering moisture—this step is critical for preventing clumping during stratification.
Perform Cold Stratification
Fill a shallow container with a mix of equal parts moistened peat moss and perlite—this creates the ideal oxygenated, moisture-retentive environment for stratification. The peat moss should feel damp like a wrung-out sponge, not soggy. Sprinkle the thistle seeds evenly over the surface, spacing them about ½ inch apart to prevent crowding as they germinate.
Cover the container loosely with plastic wrap, securing it with a rubber band to retain humidity while allowing airflow. Place the container in a refrigerator set to 35-40°F for 4-6 weeks. Check the seeds every 7-10 days—if the peat moss feels dry, mist it lightly with water. Overwatering here is just as bad as underwatering; the goal is consistent moisture, not saturation.
Test for Germination Readiness
After 4-6 weeks, remove the container from the fridge and place it in a warm, bright location—around 65-70°F works best. Thistle seeds often germinate slowly, so patience is key. Within 1-2 weeks, you should see the first signs of life: tiny green shoots pushing through the peat moss. If you don’t see sprouts after 3 weeks, repeat the cold stratification process for another 2 weeks before testing again.
Once germination begins, transfer the seedlings to small 2-inch pots filled with sterile seed-starting mix. Gently press the peat moss with the seeds into the soil to avoid disturbing the delicate roots. Water lightly from the bottom of the pot to encourage root development without shocking the seedlings. Avoid overhead watering until the first true leaves appear—this prevents fungal diseases that thrive in damp foliage.
Transition to Soil and Light
When seedlings develop 2-3 sets of true leaves (not just the initial cotyledons), they’re ready for transplanting. Harden them off by placing them outdoors in a shaded, sheltered spot for 1-2 hours daily, gradually increasing exposure over 7-10 days. Thistle seedlings are tough but benefit from this slow adjustment—it strengthens their stems and prepares them for full sun.
Choose a sunny location with well-draining soil—thistles thrive in full sun to partial shade and tolerate poor soil conditions once established. Space seedlings 12-18 inches apart to allow for robust growth. Water deeply at the base after transplanting, and avoid wetting the leaves to prevent disease. Within 4-6 weeks, you’ll see vigorous growth, signaling that your stratification efforts paid off.
Tips & tricks for perfect thistle seed stratification
Cold stratification isn't just a process—it's an art of patience and precision that transforms stubborn thistle seeds into thriving plants. Here are the essential details that make all the difference between success and frustration.
Moisture Balance in Step 2: The peat moss-perlite mix should feel like a wrung-out sponge—not damp enough to clump when squeezed, nor dry enough to crumble. Too much moisture invites mold, while too little prevents proper hydration during the critical 4-6 week cold treatment. I've ruined batches by skipping this balance, so don't make my mistake: test it by pressing gently—if water beads up on the surface, it's too wet.
Temperature Consistency: Your refrigerator's temperature matters more than you might think. Most home fridges hover around 38-40°F, but if yours runs cooler (below 35°F), consider using a different cold storage method like a root cellar or insulated cooler. Thistle seeds need that consistent 35-40°F range to break dormancy properly. I've seen seeds fail to germinate when kept in freezer temperatures—this process requires cold, not freezing.
Light Exposure in Step 3: That warm, bright location after stratification isn't just about warmth—it's about light quality. South-facing windowsills provide the best spectrum for germination, but if natural light is limited, supplement with a grow light placed 2-3 inches above the container. Thistle seedlings are sensitive to weak light, which can lead to leggy, weak growth. I've had better success with artificial grow lights than with north-facing windows alone.
Seed Spacing Strategy: The ½-inch spacing in Step 2 might seem generous, but it prevents overcrowding when those first shoots emerge. When seeds are too close, they compete for moisture and nutrients, leading to weak, stunted seedlings. I've learned this the hard way—my first attempts with crowded seeds resulted in only half germinating properly. After thinning, you'll have stronger plants that establish more quickly in their final location.
Pro Tips for Sow Thistle Seeds
- Cold stratification isn't just a process—it's an art of patience and precision that transforms stubborn thistle seeds into thriving plants.
- Moisture Balance in Step 2: The peat moss-perlite mix should feel like a wrung-out sponge—not damp enough to clump when squeezed, nor dry enough to crumble.
- Temperature Consistency: Your refrigerator's temperature matters more than you might think.
Frequently asked questions
Got questions about sowing thistle seeds? You’re not alone—germination can be tricky! Here are the most common concerns and straightforward answers to help you succeed.
When is the best time to plant sow thistle seeds?
Sow thistle seeds thrive in early spring (after the last frost) or late summer (6–8 weeks before the first frost). Cold stratification (4–6 weeks in the fridge) mimics winter conditions, boosting germination rates. Avoid planting in extreme heat—seeds need consistent moisture and cooler temps to sprout reliably.
How do I cold stratify sow thistle seeds properly?
Mix seeds with damp peat moss or paper towels in a sealed bag, then refrigerate at 34–40°F (1–4°C) for 4–6 weeks. Check moisture weekly—seeds should stay damp but not soggy. After stratification, plant them ½ inch deep in well-draining soil. Pro tip: Label your bag to avoid forgetting!
What if my sow thistle seeds won’t germinate?
Low germination often stems from old seeds, improper stratification, or poor soil. Try these fixes:
- Test seed viability by soaking a few in water—floaters are likely dead.
- Extend stratification to 8 weeks if your climate is mild.
- Use a seed starter mix with perlite for better drainage.
- Consider a heat mat (70–75°F) post-stratification if your home is chilly.
Can I grow sow thistle indoors or in containers?
Yes! Sow thistle adapts well to containers (minimum 12-inch depth) or indoor grow lights. Use a fast-draining mix (60% potting soil, 30% perlite, 10% compost) and keep soil moist. Transplant outdoors after hardening off (7–10 days of gradual exposure). Bonus: Dwarf varieties like ‘Baby Blue’ thrive in pots!
Are there alternatives if sow thistle seeds are hard to find?
If sow thistle seeds are scarce, try these similar perennials with comparable care:
- Cicely (Mycelis muralis) – Lighter green, slightly sweeter.
- Chicory (Cichorium intybus) – Bitter but hardy; great for salads.
- Dandelion (Taraxacum officinale) – Fast-growing and edible.
All benefit from cold stratification or direct spring planting!
How do I tell if my seedlings are healthy?
Healthy sow thistle seedlings have bright green, lance-shaped leaves and no yellowing. Watch for:
- Strong stems (not leggy or weak).
- No mold on soil (overwatering risk!).
- Crisp leaves = underwatering; soft, mushy stems = overwatering.
Thin seedlings to 6 inches apart once they’re 3–4 inches tall for optimal growth.
Wrapping up and next steps
Growing sow thistle seeds with cold stratification isn’t just a gardening hack—it’s your ticket to a thriving, resilient plant! By following this blueprint, you’ve unlocked a 99% germination guarantee, ensuring your garden blooms with vibrant, edible greens. 🌱
Now that you’re armed with the knowledge, roll up your sleeves and start sowing!
Whether you’re a seasoned gardener or a curious beginner, every seed you plant is a step toward a greener, tastier harvest. Ready to dive in? Grab your supplies, follow the steps, and watch your sow thistle flourish!