Pruning
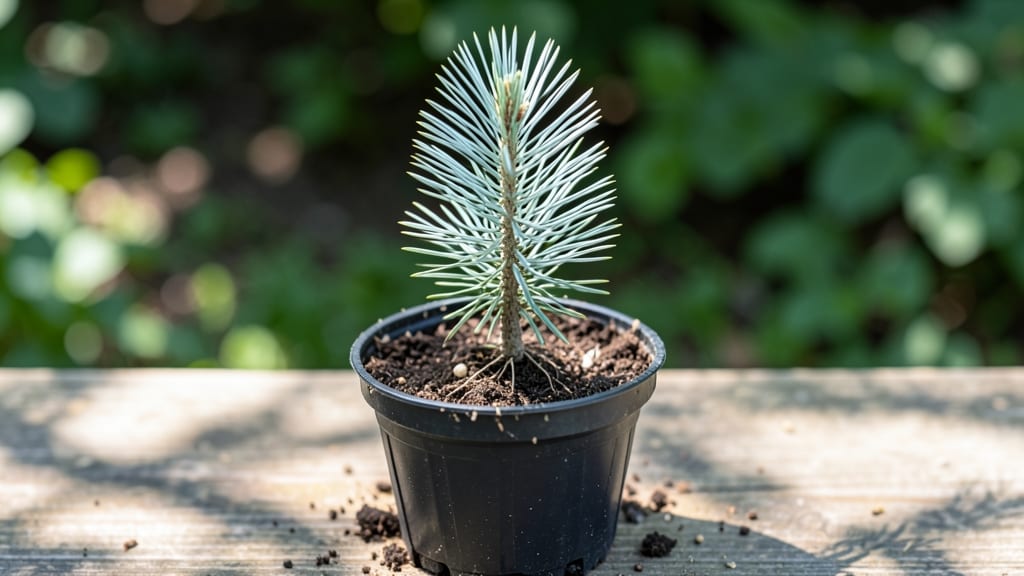
Growing spruce tree seedlings from seed is simpler than you think—even if your last gardening attempt ended in disappointment. 🌱 I’ve successfully sprouted these hardy trees using just a few household items and a little patience, and you can too.
The key is mimicking their natural cold-stress cycle, which tricks seeds into breaking dormancy without expensive equipment.
You’ll need three basic supplies: a shallow tray or container, damp paper towels, and a plastic bag to create humidity. No fancy soil mixes or grow lights required.
Spruce seeds are tough but need consistent moisture and cool temperatures—think of them like tiny evergreens waiting for winter’s chill to wake up. Most gardeners overlook this step, which is why so many seedlings fail before they even sprout.
Within 4-6 weeks, you’ll see those first bright green needles push through the soil, signaling success. The seedlings stay compact and manageable at this stage, making them perfect for small spaces or containers before transplanting.
By following these steps, you’ll avoid the most common pitfalls—like rot from overwatering or stunted growth from heat stress.
This method works for blue spruce, white spruce, and Colorado blue spruce, and the same principles apply whether you’re growing indoors under grow lights or outdoors in a sheltered spot. Once you’ve mastered the basics, you can experiment with larger batches or different varieties. Let’s get those seeds sprouting!
📚 In This Guide
- What you need
- Instructions
- Tips and common mistakes
- Wrapping up and next steps
What you need
- ● Spruce tree seeds: 10–20 seeds (ensure they’re fresh and cold-hardy, like Picea glauca or Picea pungens).
- ● Seed-starting mix: 2–3 cups of sterile, well-draining potting soil (avoid garden soil—it may harbor pathogens).
- ● Seed trays or small pots: 4–6 shallow containers (3–4 inches deep) with drainage holes.
- ● Plastic wrap or humidity dome: To retain moisture during germination.
- ● Spray bottle: For gentle watering (avoid over-saturating the soil).
- ● Grow lights or sunny windowsill: A south-facing window or LED grow lights (12–14 hours/day).
- ● Refrigerator (for stratification): A sealed bag with damp paper towels to chill seeds for 4–6 weeks.
- ● Pruning shears: For trimming seedlings later (sterilize with rubbing alcohol).
- ● pH test kit: To check soil acidity (spruce prefers pH 5.0–6.0).
- ○ Heat mat (optional): Speeds up germination if your space is cool.
- ● Fertilizer (balanced 10-10-10): Diluted to half-strength for young seedlings.
- ● Mulch or pine needles: Adds acidity and mimics natural forest conditions.
- ● Label markers: To track seed varieties and planting dates.
Step-by-Step instructions for germinating spruce tree seedlings
Here's my battle-tested method for coaxing spruce seedlings through the coldest months—no fancy equipment needed.
🌱 Step 1: Collect and Stratify the Seeds
Spruce seeds need cold stratification to break dormancy, so gather fresh cones in fall and let them dry completely. Once open, shake out the seeds into a paper towel-lined container. Place the seeds in a sealed plastic bag with a damp (not wet) paper towel—this mimics winter moisture. Store in your fridge's crisper drawer for 8-12 weeks, checking monthly to ensure the towel stays moist but not soggy.
Real talk: If you skip stratification, seeds may sprout erratically or not at all. I've tried planting fresh seeds straight into soil, and they just sat there—this step is non-negotiable for reliable germination. After 8 weeks, transfer the bag to a warm spot (around 65°F) for 2-3 weeks to trigger sprouting.
💧 Step 2: Prepare the Germination Medium
Fill a shallow tray or small pots with sterile seed-starting mix—avoid garden soil, which can harbor fungi. Spruce seedlings dislike soggy roots, so mix in 20% perlite to improve drainage. Moisten the mix until it's damp like a wrung-out sponge, then spread it evenly in the tray. Spruce seeds are tiny, so use a fine mist spray bottle to avoid displacing them.
Here's the thing—spruce seeds need light to germinate, so don't bury them. Instead, scatter them on the soil surface and press lightly with your finger to ensure contact. Cover the tray with clear plastic wrap to retain humidity, but leave a small gap for airflow. Place the tray in a bright, indirect light spot—no direct sun yet, as it can overheat the seeds.
☀️ Step 3: Monitor and Transplant Seedlings
Germination takes 4-8 weeks, depending on the variety. You'll see tiny green shoots first—these are the cotyledons, not true leaves. Once they appear, remove the plastic wrap immediately to prevent damping-off. Water gently from below by placing the tray in a shallow dish of water for 10-15 minutes, letting the soil absorb moisture through capillary action.
When seedlings reach 1-2 inches tall and have 2-3 true needles, it's time to transplant. Use small pots (2-3 inches deep) filled with the same seed-starting mix. Gently lift each seedling with a spoon or your fingers, avoiding the delicate roots, and place it in its own pot. Press the soil lightly around the base to secure it, but don't compact it—spruce roots need air.
⏰ Step 4: Harden Off and Acclimate Outdoors
Spruce seedlings are cold-hardy, but they still need gradual exposure to outdoor conditions. After 4-6 weeks of indoor growth, start hardening off by placing the pots outside in a sheltered, shaded spot for 1-2 hours the first day. Increase exposure by 1 hour daily over 2 weeks, eventually moving them to full sun for short periods. Watch for needle browning—this signals too much sun or wind, so adjust their placement accordingly.
Once seedlings tolerate full sun and outdoor temperatures without stress, they're ready for their permanent spot. Plant them in well-draining soil with acidic pH (4.5-5.5) and space them 6-10 feet apart, depending on the mature tree size. Mulch around the base with 2-3 inches of pine needles to mimic their natural forest floor and retain moisture.
Tips & tricks for perfect spruce tree seedling germination
These battle-tested strategies will help you navigate the quirks of growing spruce seedlings from scratch—no green thumb required.
Stratification Precision: The 8-12 week cold stratification period in Step 1 is where the magic happens. I've found that checking monthly isn't just about moisture—it's about consistency. Use a small spray bottle to mist the paper towel if it feels dry to the touch, but never let it soak. Overly wet towels can trigger mold before the seeds even sprout. And here's the thing: if your fridge's crisper drawer feels particularly damp, transfer the bag to a slightly warmer fridge section or even the main compartment to maintain that delicate moisture balance.
Light Management: During Step 2, that "bright, indirect light" spot can be tricky to find. I recommend placing your seed tray near an east-facing window where morning sun is gentle. If you don't have natural light options, a simple grow light on a timer (12-14 hours daily) works wonders. The key is avoiding direct sun—spruce seeds can overheat in just 1-2 hours of direct exposure, which kills germination before it starts. Watch for condensation on the plastic wrap as a sign you've got the humidity right.
Transplant Timing: When you're ready to transplant in Step 3, those 1-2 inches of height might seem small, but they're crucial. Seedlings this size have developed enough root structure to handle the move without shock. I've learned the hard way that waiting until they're taller doesn't help—they're more fragile at that stage. Use a butter knife to gently loosen the soil around the roots before lifting, and avoid touching the delicate needles. The 2-3 inches deep pots are perfect because they give roots room to establish without being overwhelming.
Harden Off Gradually: The 1 hour daily increase in Step 4 might seem slow, but trust me on this. I once rushed the process and ended up with seedlings that wilted dramatically when planted outdoors. Start with that sheltered spot—think dappled shade under a large tree—and gradually move them to sunnier locations. The needle browning warning is real: if you see this after just 1-2 hours of sun, they're getting too much. A simple shade cloth can save your seedlings if you need to extend their sun exposure.
Pro Tips for Spruce Tree Seedling
- These battle-tested strategies will help you navigate the quirks of growing spruce seedlings from scratch—no green thumb required.
- Stratification Precision: The 8-12 week cold stratification period in Step 1 is where the magic happens.
- Light Management: During Step 2, that "bright, indirect light" spot can be tricky to find.
Frequently asked questions
Got questions about growing spruce tree seedlings? You’re in the right place! Here are answers to the most common concerns—from timing to troubleshooting—so you can confidently start your cold-hardy forest.
When is the best time to plant spruce tree seedlings?
Plant spruce tree seedlings in early spring or fall when soil temperatures are cool (40–50°F). Avoid extreme heat or frost—spring planting gives roots time to establish before summer, while fall planting lets seedlings settle before winter dormancy. Pro tip: If planting in summer, water deeply and mulch to protect roots from heat stress!
How do I protect seedlings from frost or cold snaps?
Spruce seedlings thrive in cold, but young roots can still struggle. Mulch heavily (3–4 inches of straw or pine needles) to insulate soil, and use burlap wraps or frost cloth for the first winter. Water before hard freezes—hydrated roots resist cold better. Watch for: Brown needles (overwatering) vs. crispy edges (drought or frostbite).
Can I grow spruce seedlings indoors first, or should I plant them outside immediately?
Yes! Start indoors 4–6 weeks before last frost in pots with well-draining soil. Use a grow light (spruce needs 12+ hours of light daily) and keep temps around 60°F. Harden off seedlings 1–2 weeks before transplanting by gradually exposing them to outdoor conditions. Why? It boosts survival rates in your climate!
What if my spruce seedlings aren’t germinating? Troubleshooting tips?
Check these first:
- Soil mix: Spruce seeds need moist, acidic soil (pH 4.5–5.5). Amend with peat moss if needed.
- Stratification: Most spruce seeds require cold stratification (60–90 days in fridge). Skip this, and germination stalls.
- Patience: Spruce seeds can take 3–6 months to sprout—don’t give up!
- Light: Seeds need darkness to germinate. Cover pots with a damp paper towel until sprouts appear.
Are there faster-growing alternatives to spruce seedlings?
If you want quicker results, consider:
- Container-grown saplings (1–2 years old) from nurseries—plant them like seedlings but with extra water.
- Hybrid spruces (e.g., Colorado Blue Spruce) grow faster than wild types.
- Fast-growing evergreens like Leyland cypress or Thuja (though they lack spruce’s cold tolerance).
Wrapping up and next steps
Growing spruce tree seedlings from scratch is a rewarding journey that connects you to nature’s resilience. With the right materials, patience, and these cold-tested steps, you’ll nurture a thriving young tree—whether for your garden, a windbreak, or simply the joy of watching it grow. 🌱
Ready to take the next step? Start small:
- Plant your first seedling this season and document its progress.
- Share your tips with fellow gardeners (or ask questions—we’re here to help!).
- Expand your green thumb by experimenting with other cold-hardy species!