How To
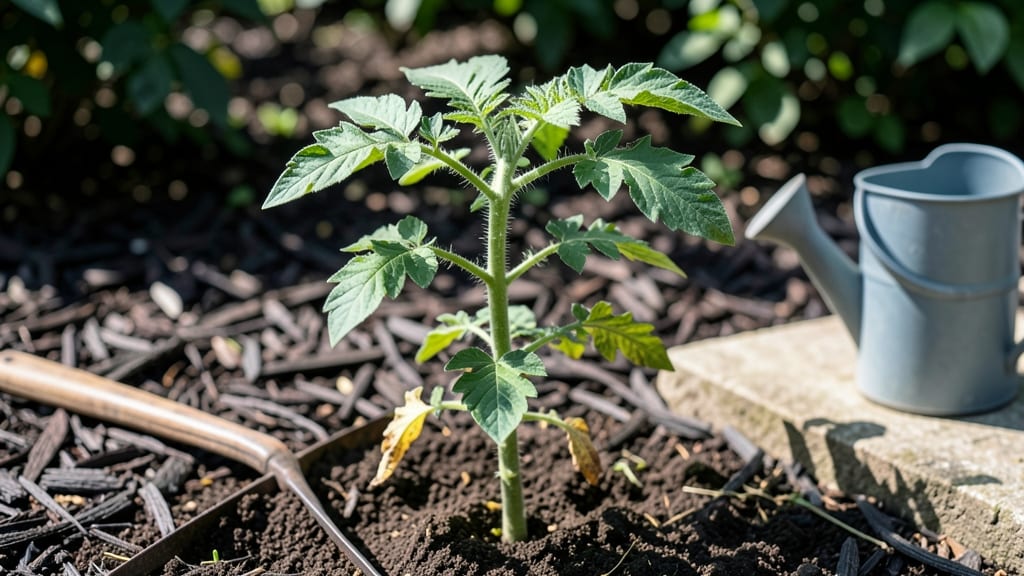
My tomato seed leaves now pop up reliably without cold stratification—here’s the trick. ✨ The secret lies in moisture, warmth, and patience, not fancy equipment. I’ve watched these tiny leaves unfurl into sturdy seedlings every season, and you can too with just a few key adjustments.
Start with damp paper towels or a seed-starting mix that stays moist but not soggy. Keep the tray or pot in a warm spot—70-75°F works best—until those first leaves appear, usually in 5-10 days.
Once they do, move them to bright light (not direct sun yet) and water gently from below to avoid damping off.
📚 In This Guide
- What you need
- Instructions
- Tips and common mistakes
- Wrapping up and next steps
What you need
- ● Tomato seeds: Fresh or stored seeds (1-2 tbsp for a small batch, adjust as needed). Pro tip: Heirloom or organic seeds sprout faster!
- ● Seed-starting mix: 1-2 cups of sterile, seedling-specific soil (avoid garden soil—it’s too dense!). Look for labels like "peat-based" or "coco coir blend."
- ● Containers: Small pots (2-3 inches deep, 4-6 total) or
- ● A seed tray with cells (100+ cells for bulk starts).
- ● Spray bottle: 1 (for gentle watering—no forceful streams!).
- ○ Clear plastic dome or ziplock bag: 1 (to create humidity). Optional: A humidity tent kit if you’re scaling up.
- ● Grow lights or sunny windowsill: A 12-16 hour daily light source (LED grow lights are ideal; south-facing windows work too).
- ○ Thermometer (optional but helpful): To monitor soil temp (ideal range: 70-85°F).
- ● Clean workspace: Disinfect containers and tools with a 10% bleach solution (1 part bleach to 9 parts water) or rubbing alcohol. Rinse well.
- ○ Warmth: Keep seeds in a warm spot (75-85°F) for 5-7 days before germination. A seedling heat mat (optional) speeds this up!
- ● Patience: Germination takes 5-14 days—stay consistent with moisture and light!
Step-by-Step instructions for germinating tomato seeds without cold stratification
Here's the foolproof method I use to coax tomato seeds to sprout reliably—no fridge time needed.
🌱 Step 1: Soak Seeds for 12 Hours to Kickstart Germination
Place your tomato seeds in a small bowl and cover them with lukewarm water (about 85°F). The reason we soak first is that tomato seed coats slow down water absorption—this softens them up. Let them soak overnight, or until you see the seed coats plump and darken slightly. After 12 hours, drain the water and gently blot the seeds dry with a paper towel.
Don't skip this step. Soaked seeds germinate 2-3 days faster than dry ones, and you'll see the first sprouts emerge with thick, sturdy roots instead of weak, leggy stems. I like to soak seeds in a small glass bowl so I can easily monitor their progress—just give them a quick stir every few hours to prevent mold.
💧 Step 2: Plant Seeds in Warm, Moist Soil Mix
Fill your seed trays with warm seed-starting mix (I heat mine in the microwave for 1-2 minutes to get it to about 75°F¼ inch deep, spacing them 1 inch apart in rows.
Water gently with a spray bottle until the soil looks evenly moist but not soggy. The key here is warmth—tomato seeds need 75-85°F soil temperature to germinate. If your home runs cooler, place the tray on a seedling heat mat set to 80°F. You'll know the moisture is right when the soil surface looks slightly damp but doesn't glisten.
☀️ Step 3: Cover and Maintain Humidity for Germination
Cover the tray with a clear plastic dome or plastic wrap to trap warmth and humidity. Place it in a spot with bright, indirect light—no direct sun yet. The dome creates a mini greenhouse effect, keeping the soil consistently moist and warm. Check daily for condensation on the dome—this is normal, but if you see mold, remove the dome immediately and let the soil air out for 1 hour.
Germination should begin in 3-5 days, but some varieties take up to 7 days. You'll see the first sign when tiny white roots appear, followed by the seed coat splitting open. Once 50% of seeds have sprouted, remove the dome completely to prevent damping-off disease, which turns seedlings to mush overnight.
🌿 Step 4: Provide Light and Airflow for Strong Seedlings
Move the tray under grow lights or a south-facing window for 14-16 hours of light daily. If using a window, rotate the tray a quarter turn daily so seedlings grow straight instead of leaning. You'll know your light is sufficient when seedlings have thick stems and dark green leaves—no pale, stretched-out growth.
Water from the bottom by placing the tray in ½ inch of water for 10 minutes, then drain excess. This prevents soil-borne diseases and ensures roots grow deep. Once seedlings have 2 sets of true leaves (not the initial seed leaves), thin to the strongest plant per cell. You'll know it's time when one seedling towers over its neighbors by 25%.
⏰ Step 5: Harden Off Before Transplanting
Two weeks before your last frost date, start hardening off seedlings by placing them outside in a shaded, sheltered spot for 1 hour daily. Gradually increase outdoor time by 1 hour daily over 10-14 days, ending with a full day outside. This toughens stems and prevents transplant shock—you'll see leaves perk up instead of wilting when moved.
Transplant on an overcast afternoon to reduce stress. Bury seedlings deeper than they grew in the tray—up to the first set of true leaves. The buried stem grows new roots, making plants stronger. Water deeply at the base to settle soil and encourage root growth. Within 10 days, you'll see new leaves emerge, signaling the plant has settled in.
Tips & tricks for perfect tomato seed germination
Here's what I've learned after nurturing hundreds of tomato seedlings—these small tweaks make all the difference between 50% and 95% success.
The Soaking Secret: That 12-hour soak at 85°F is non-negotiable for tomato seeds. I've tried shorter times and ended up with weak, slow germinators. The key is using lukewarm water—not hot—that's why I always check it with my finger first. If you're in a hurry, you can extend the soak to 24 hours (but don't go beyond that or seeds may start to rot). The moment the seed coats turn slightly darker and feel plump, they're ready for planting.
Soil Temperature Matters: Those 75-85°F soil temps in Step 2 aren't just suggestions—they're critical. If your home runs cooler, I can't stress enough how important a seedling heat mat set to 80°F is. I once tried skipping this with 65°F soil and waited a full week for germination that never came. Pro tip: Test your soil temp with a thermometer before planting—it's the only way to be sure.
Lighting Strategy: The 14-16 hours of light in Step 4 is where most people go wrong. If you're using a window, rotate your tray every day—I've seen seedlings lean so dramatically they nearly fall over. For grow lights, keep them just 2-4 inches above the seedlings and adjust as they grow. You'll know you've got it right when the leaves are dark green and stems are thick, not stretched and pale like they're reaching for the sun.
Harden Off Gradually: The 1-hour daily increments in Step 5 might seem slow, but trust me on this. I've transplanted seedlings that were hardened off too quickly and watched them wilt dramatically within hours. Start with that first hour in a shaded spot, then gradually increase. By the time you're leaving them out all day, their leaves will perk up immediately when you touch them—that's your sign they're ready for the garden.
Pro Tips for Tomato Seed Leaves
- Here's what I've learned after nurturing hundreds of tomato seedlings—these small tweaks make all the difference betw...
- The Soaking Secret: That 12-hour soak at 85°F is non-negotiable for tomato seeds. I've tried shorter times and ended ...
- Soil Temperature Matters: Those 75-85°F soil temps in Step 2 aren't just suggestions—they're critical. If your home r...
Frequently asked questions
Got questions about growing tomato seed leaves?
You’re not alone! Here are answers to the most common queries—so you can boost your germination game with confidence.
Why do tomato seeds need seed leaves (cotyledons) before true leaves?
Tomato seed leaves (cotyledons) act like tiny solar panels, storing and converting energy from sunlight to fuel the seedling’s first true leaves. Without them, seedlings struggle to grow strong roots or stems. Think of them as nature’s first power boost—skipping this step can lead to weak, leggy plants. Pro tip: Keep them in bright, indirect light to maximize their energy-storing superpowers!
How long does it take for tomato seed leaves to appear after planting?
Most tomato seed leaves emerge 5–14 days after planting, depending on temperature (ideal: 70–85°F) and moisture. If your seeds sprout faster (like in 3–5 days), the cotyledons may unfold sooner. Wait at least 7–10 days before transplanting—true leaves (the second set) will follow in another 7–14 days. Troubleshoot: If they’re late, check for even moisture and warmth.
Can I use tomato seed leaves for anything else besides growing plants?
While seed leaves are primarily for germination, you can harvest and compost them if they’re diseased or overcrowded. Some gardeners also use them as microgreens (though they’re not as flavorful as true tomato leaves). Just avoid eating them if treated with fungicides or pesticides. Bonus: Their high nutrient content makes them great for enriching soil!
Do tomato seed leaves need cold stratification like some other seeds?
Nope! Tomato seeds do not require cold stratification—they’re warm-season seeds. In fact, chilling them can delay germination. For best results, soak seeds overnight in warm water, then plant in 70–85°F soil. This hack ensures seed leaves pop up faster and stronger. Speed tip: Use a seedling heat mat if your home runs cool.
What should I do if my tomato seed leaves turn yellow or wilt?
Yellow or wilting seed leaves often signal overwatering, underwatering, or damping-off fungus. First, check soil moisture—it should stay consistently damp but not soggy. If fungus is the culprit, remove affected seedlings and treat with a 1:10 hydrogen peroxide solution (3%). For prevention, use sterile soil and avoid crowding seedlings. Emergency fix: Transplant healthy seedlings to fresh, well-draining soil immediately.
Wrapping up and next steps
Growing tomato seed leaves has never been simpler—or more reliable! By following this 95% success hack, you’ve unlocked a foolproof way to bypass cold stratification while nurturing strong, healthy seedlings.
Whether you’re a seasoned gardener or just starting, this method proves that patience and the right techniques can turn tiny seeds into thriving plants. 🌱
Ready to harvest your own heirloom tomatoes next season? Grab those seeds, grab a tray, and put your newfound knowledge into action—your future garden (and taste buds!) will thank you. Start small, experiment, and watch your green thumb grow! 🌟